Appearance
Yelp Reviews
This guide will show you how to connect your Yelp Business Page to WP Social Ninja's Business Reviews feature.
Yelp uses an API Key to connect. This is a simple key that you generate on Yelp's developer website. This guide will walk you through the entire process, step-by-step.
Use Case: This is essential for restaurants, cafes, local shops, and service-based businesses. By connecting Yelp, you can display your valuable, high-star reviews directly on your website, building instant trust and credibility with new customers.
Part 1: Start the Connection
First, let's start inside your WordPress dashboard to see what you need.
- From your WordPress dashboard, navigate to WP Social Ninja in the left-hand menu, and then click on Platforms.
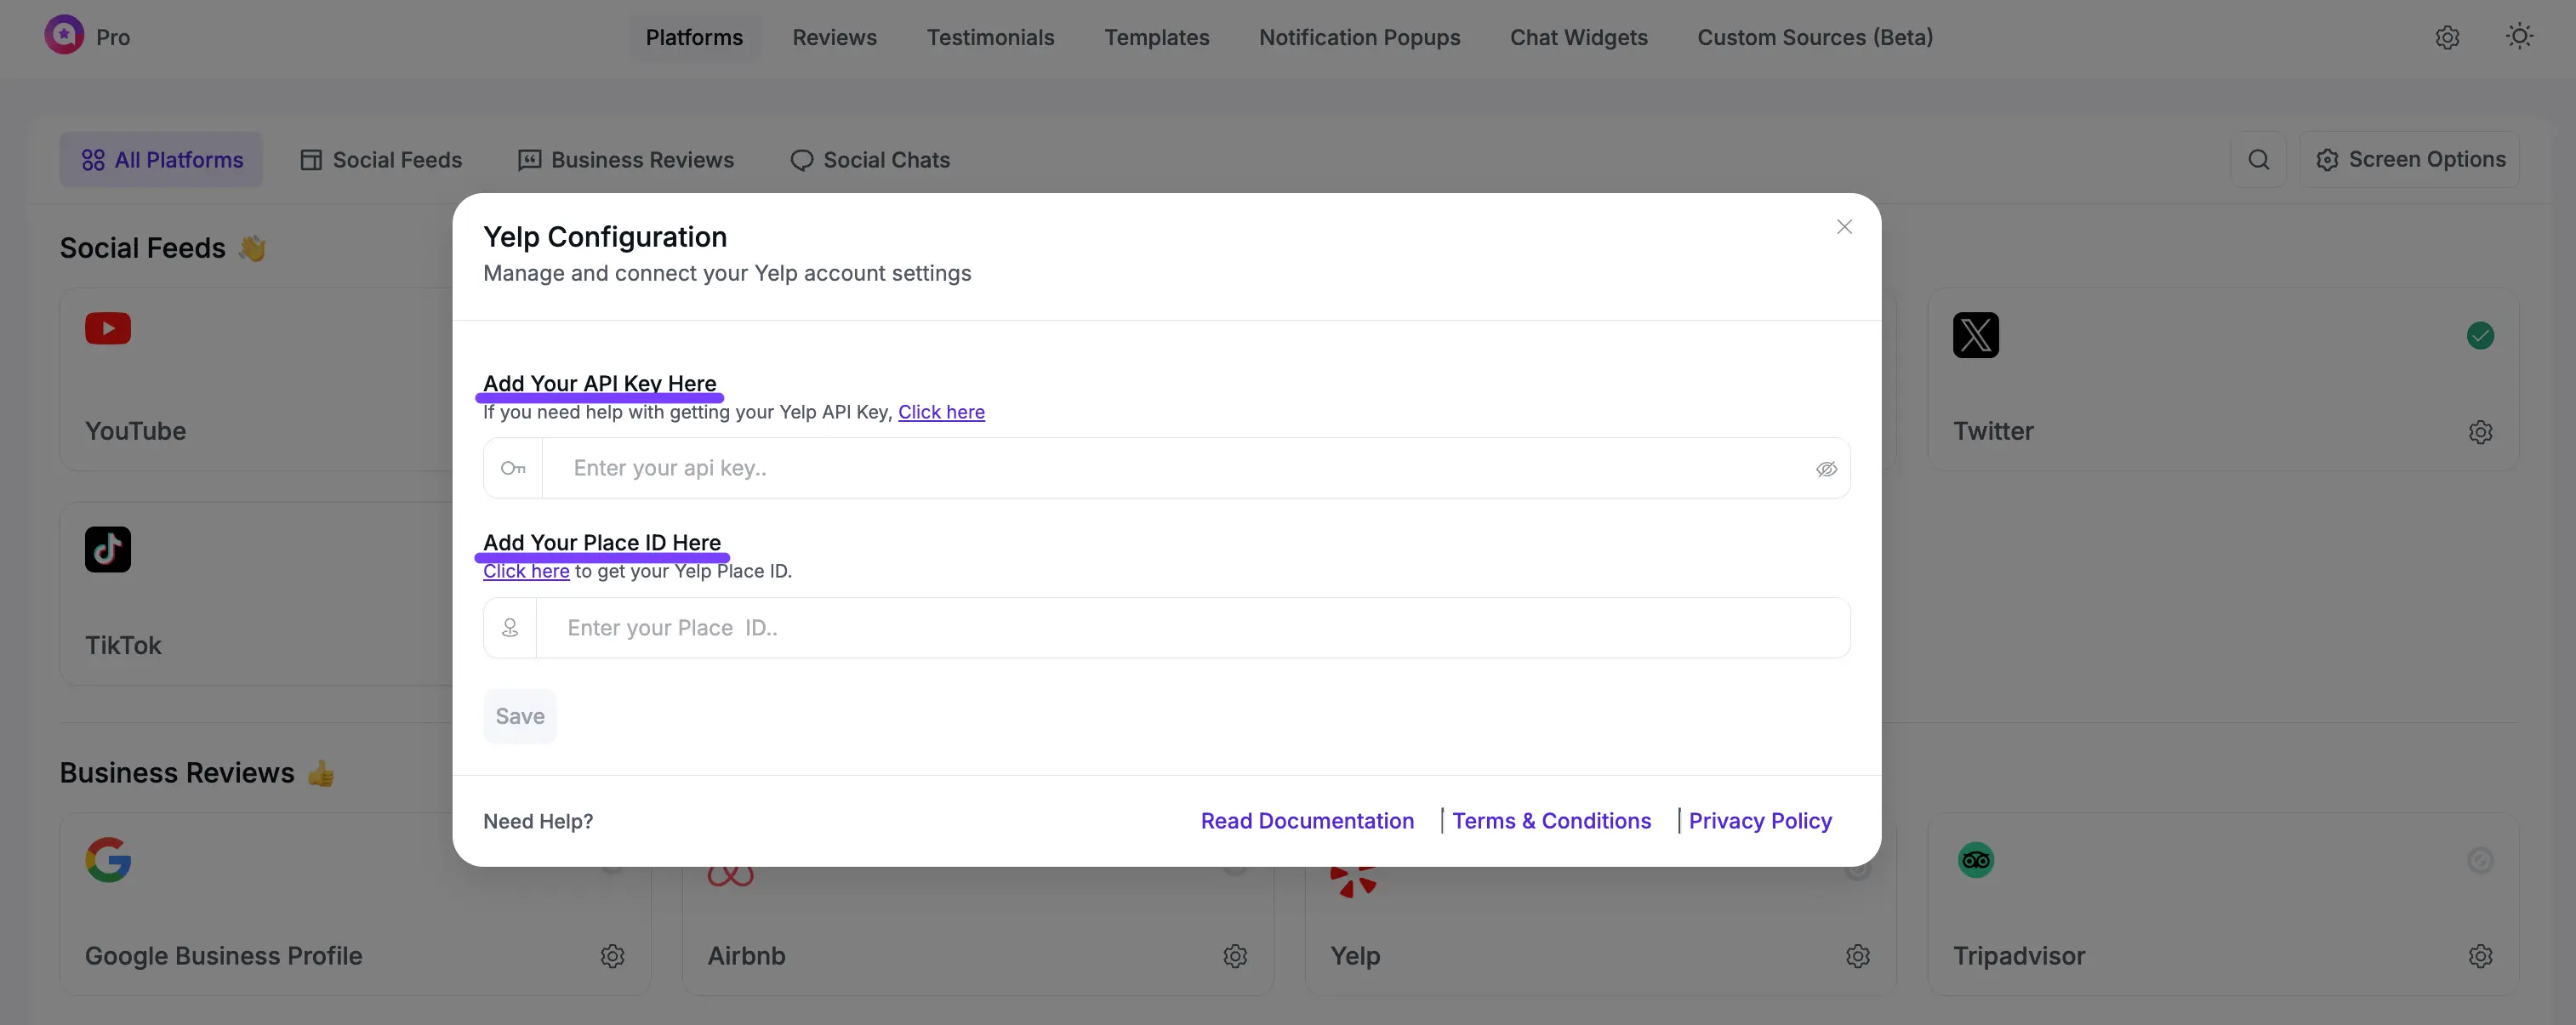
- On the "Platforms" page, find the Yelp row in the Business Review section then click the Settings icon button with it.

A pop-up window will appear with fields labeled API Key & Place ID. This is the things you need to get from Yelp.
Part 2: Yelp API Key
Now, let's go to Yelp's developer portal to generate your key.
Step 1: Go to Yelp Developers
In a new browser tab, go to the Yelp Developers website and log in to your Yelp account (the one associated with your business page).
Step 2: Create App
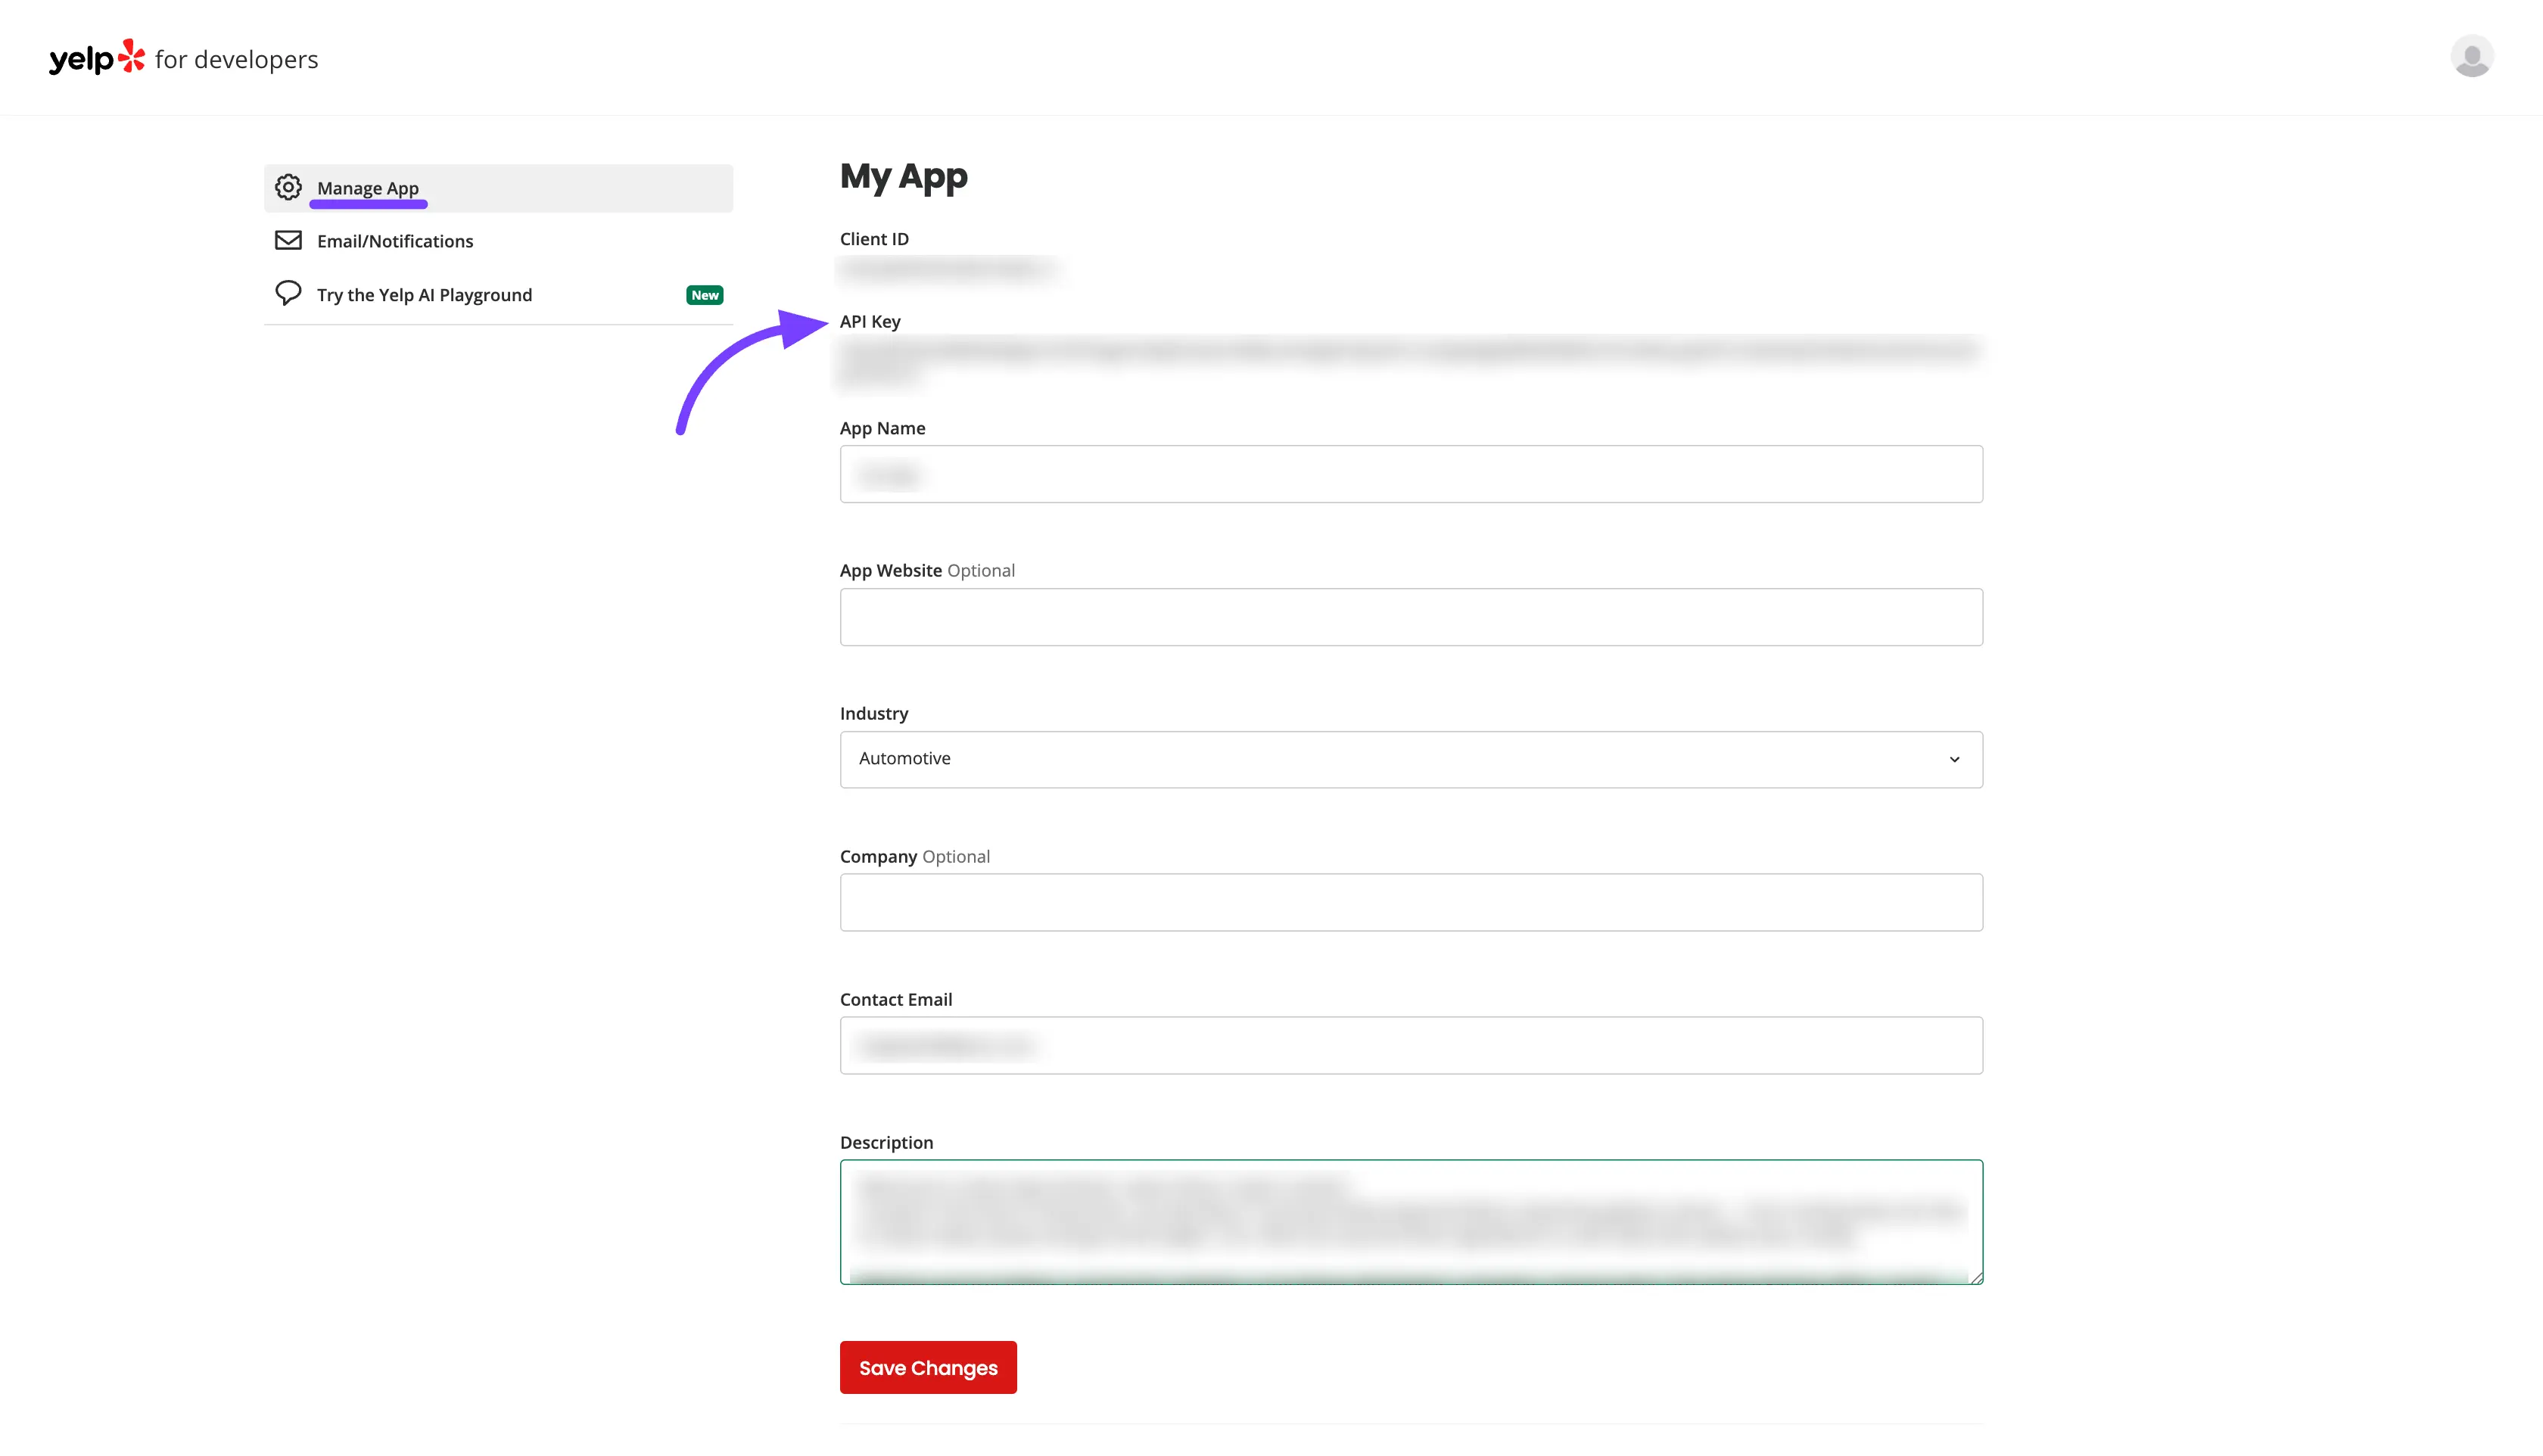
Once login go to the Manage App section and create an App by filling in the required information:
- App Name: Give it a name you'll recognize, like "My Website Reviews."
- Industry: Select the industry that best fits your business.
- Your Contact Email: Enter your email address.
- Description: Write a brief description, such as "Connecting Yelp reviews to my website."
Click the Create App button.
Yelp will immediately take you to a "Success!" page. On this page, you will see your new API Key. This is the key you need! Copy the API Key to your clipboard.
INFO
Yelp’s Fusion API no longer provides reviews for free. To fetch Yelp reviews in WP Social Ninja, you need a Yelp Pro plan:
Pro Enhanced → Up to 3 review excerpts per business.
Pro Premium → Up to 7 review excerpts per business.
These limits are controlled by Yelp, not WP Social Ninja. Check Yelp Plan and Pricing.
Part 3: Get Your Place ID (Add Your Business)
Now you must add your specific business. To do this, you need your business's Place ID.
Step 1: Find Your Yelp Place ID
Your Place ID is simply the unique part of your business's URL on Yelp.com.
- Go to Yelp.com in your browser.
- Search for your business name and city.
- Click on your business from the search results to open its main page.
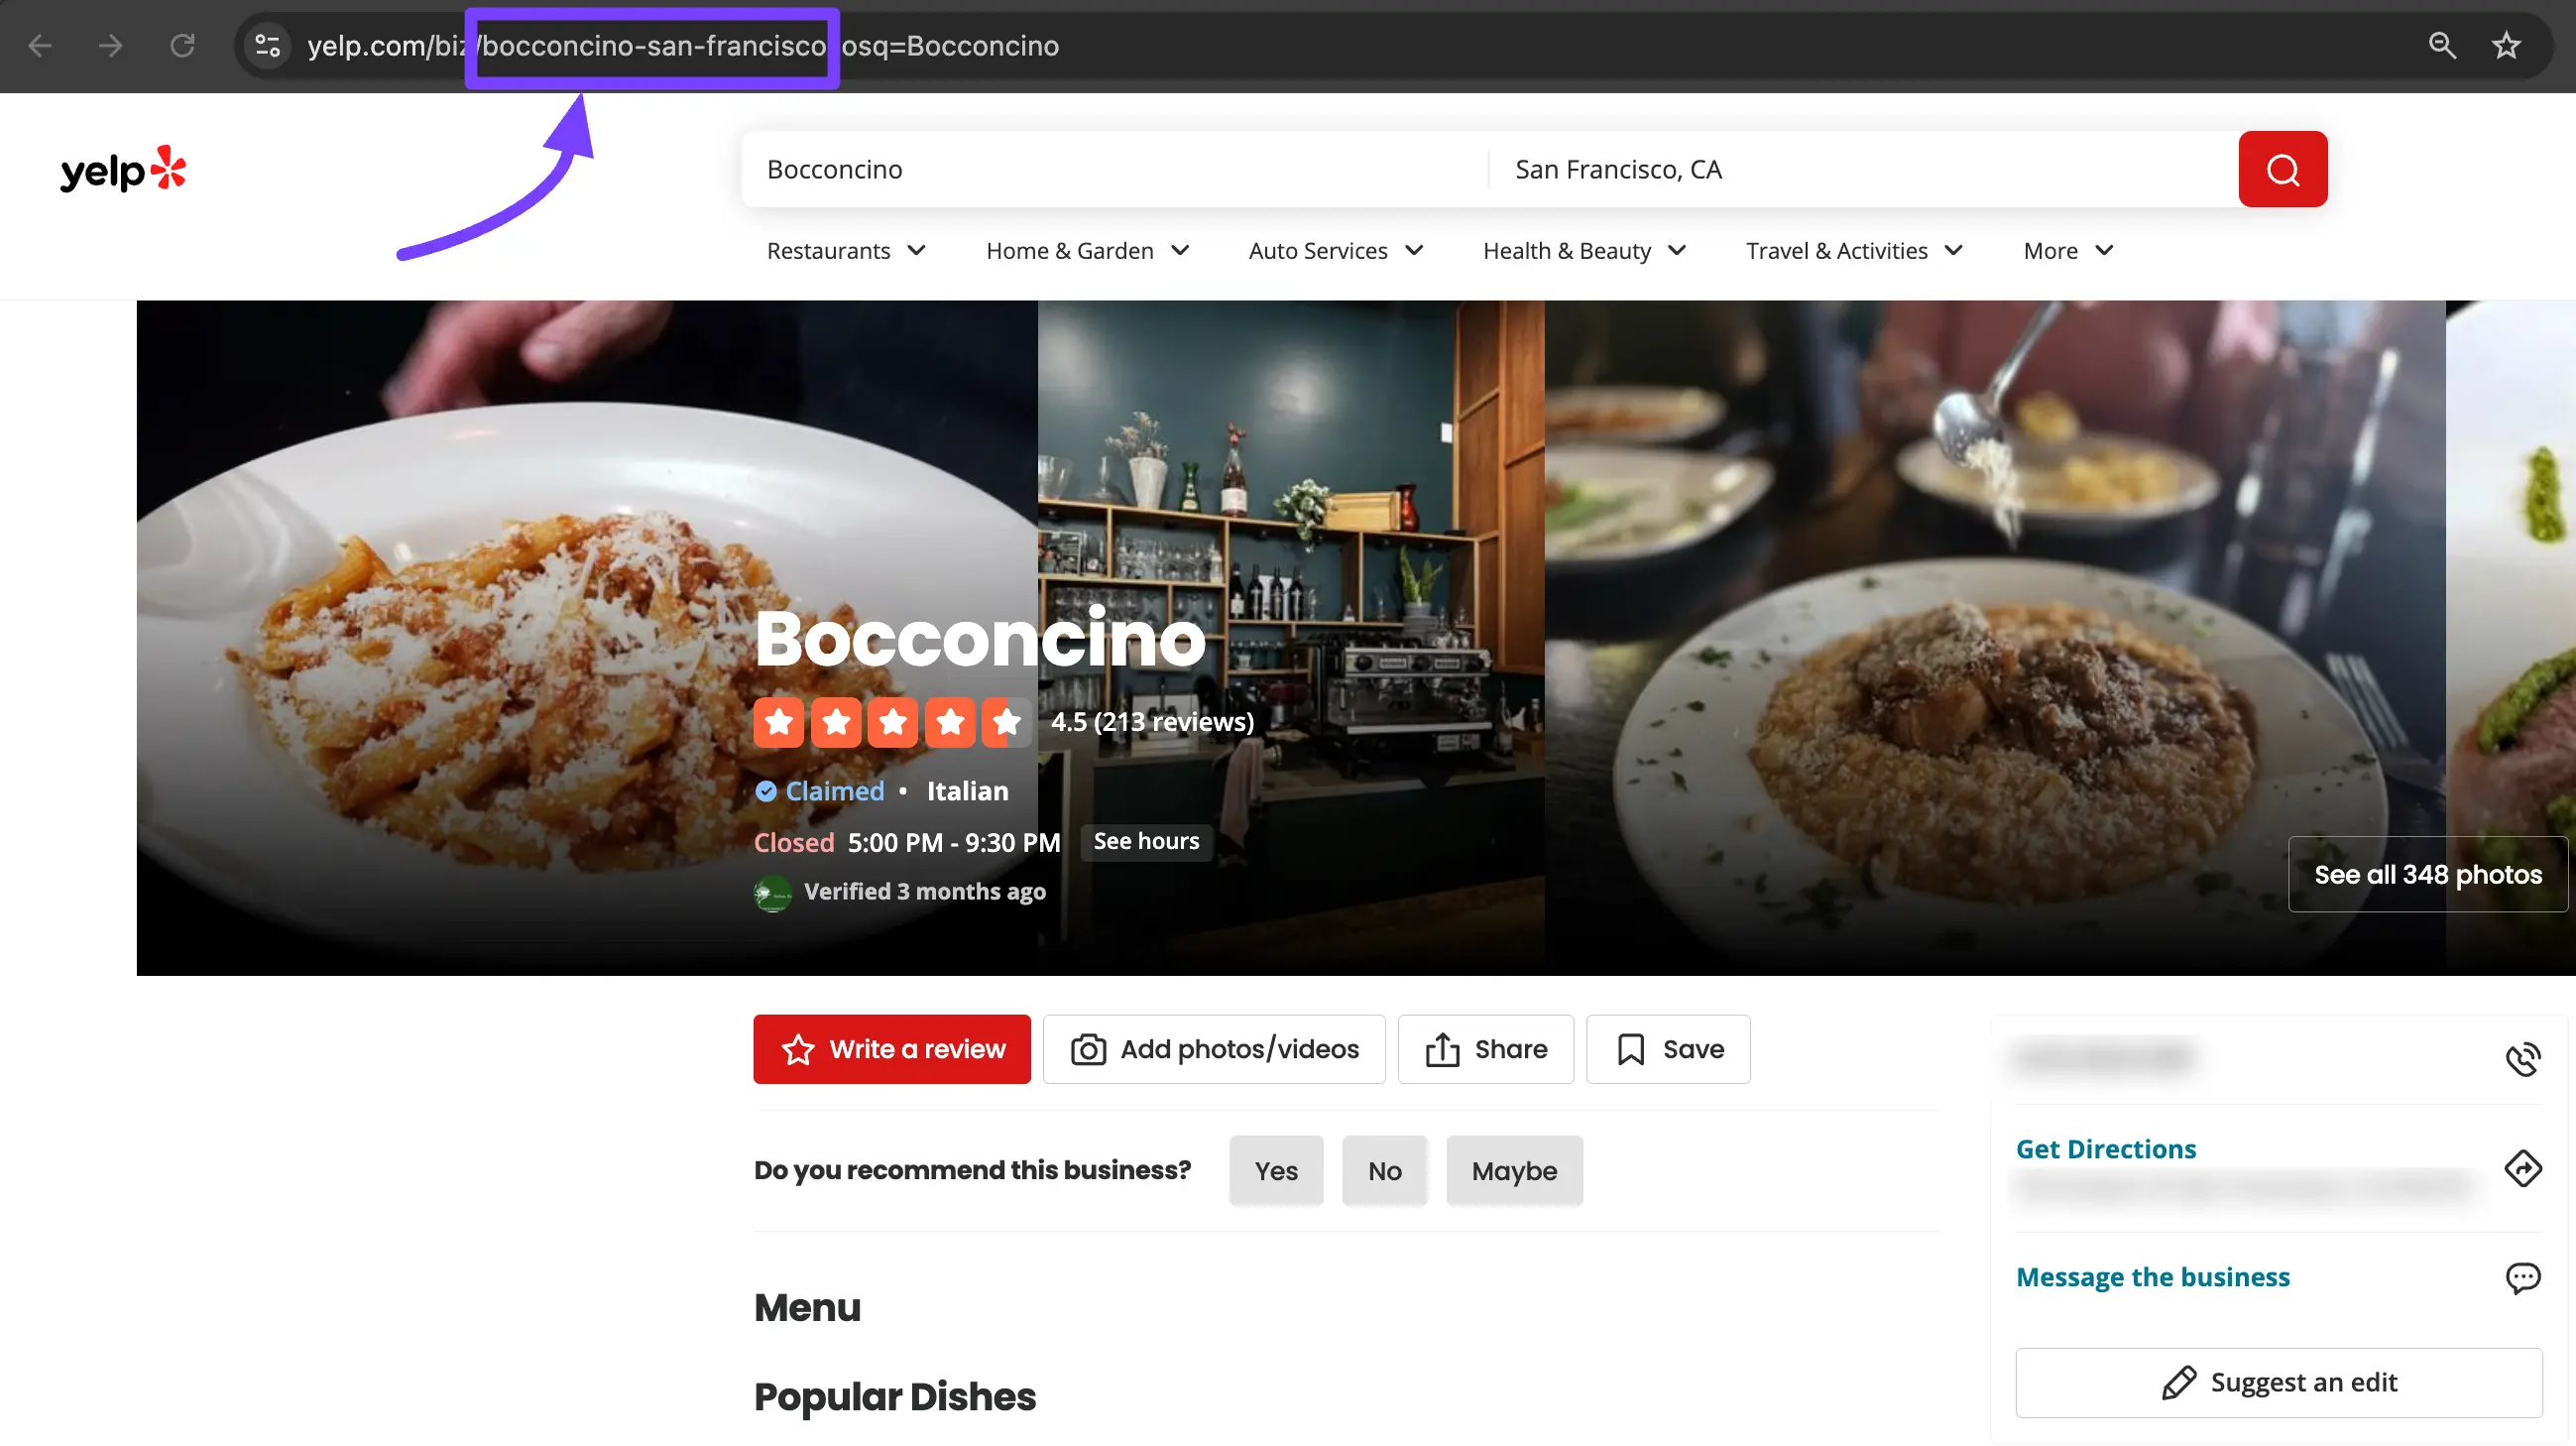
- Look at the URL in your browser's address bar. Your Place ID is the text that comes after
https://www.yelp.com/biz/.
Example URL:
https://www.yelp.com/biz/bocconcino-san-franciscoYour Place ID:bocconcino-san-francisco
Carefully copy this Place ID.
Part 4: Connect Your Yelp Account
Now for the final, easy step.
Paste Your API Key & Place ID
- Go back to your WordPress dashboard (where you still have the WP Social Ninja pop-up open from Part 1).
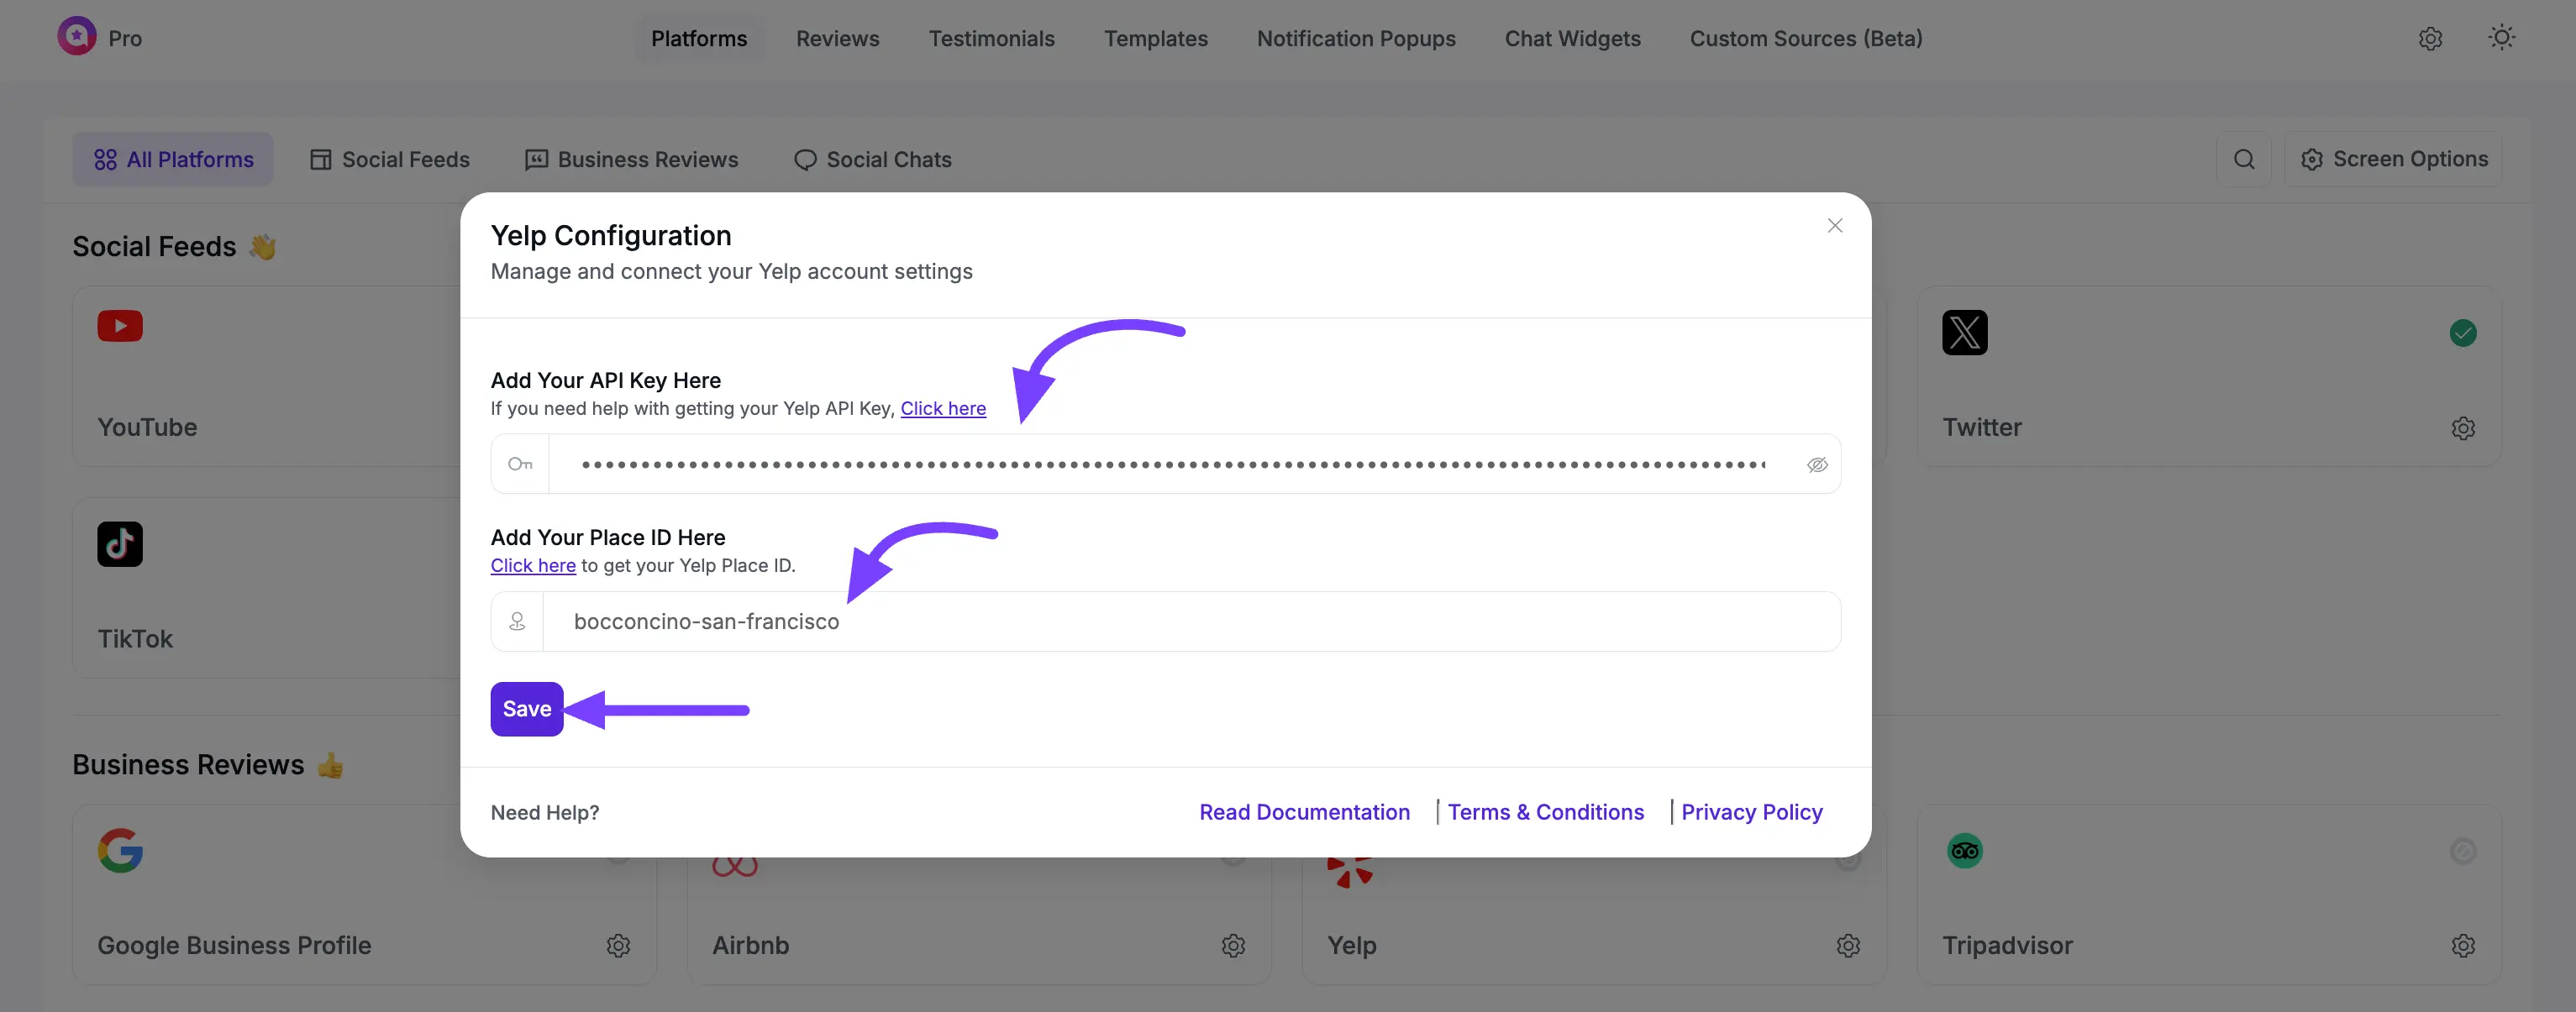
- Paste the API Key you just copied into the "API Key" field.
- Then Paste your Place ID (e.g.,
bocconcino-san-francisco) into the field. - Now click on the Save button.
Your business is now fully connected and will begin to sync reviews.
The Yelp row will now show a green "Connected" status.
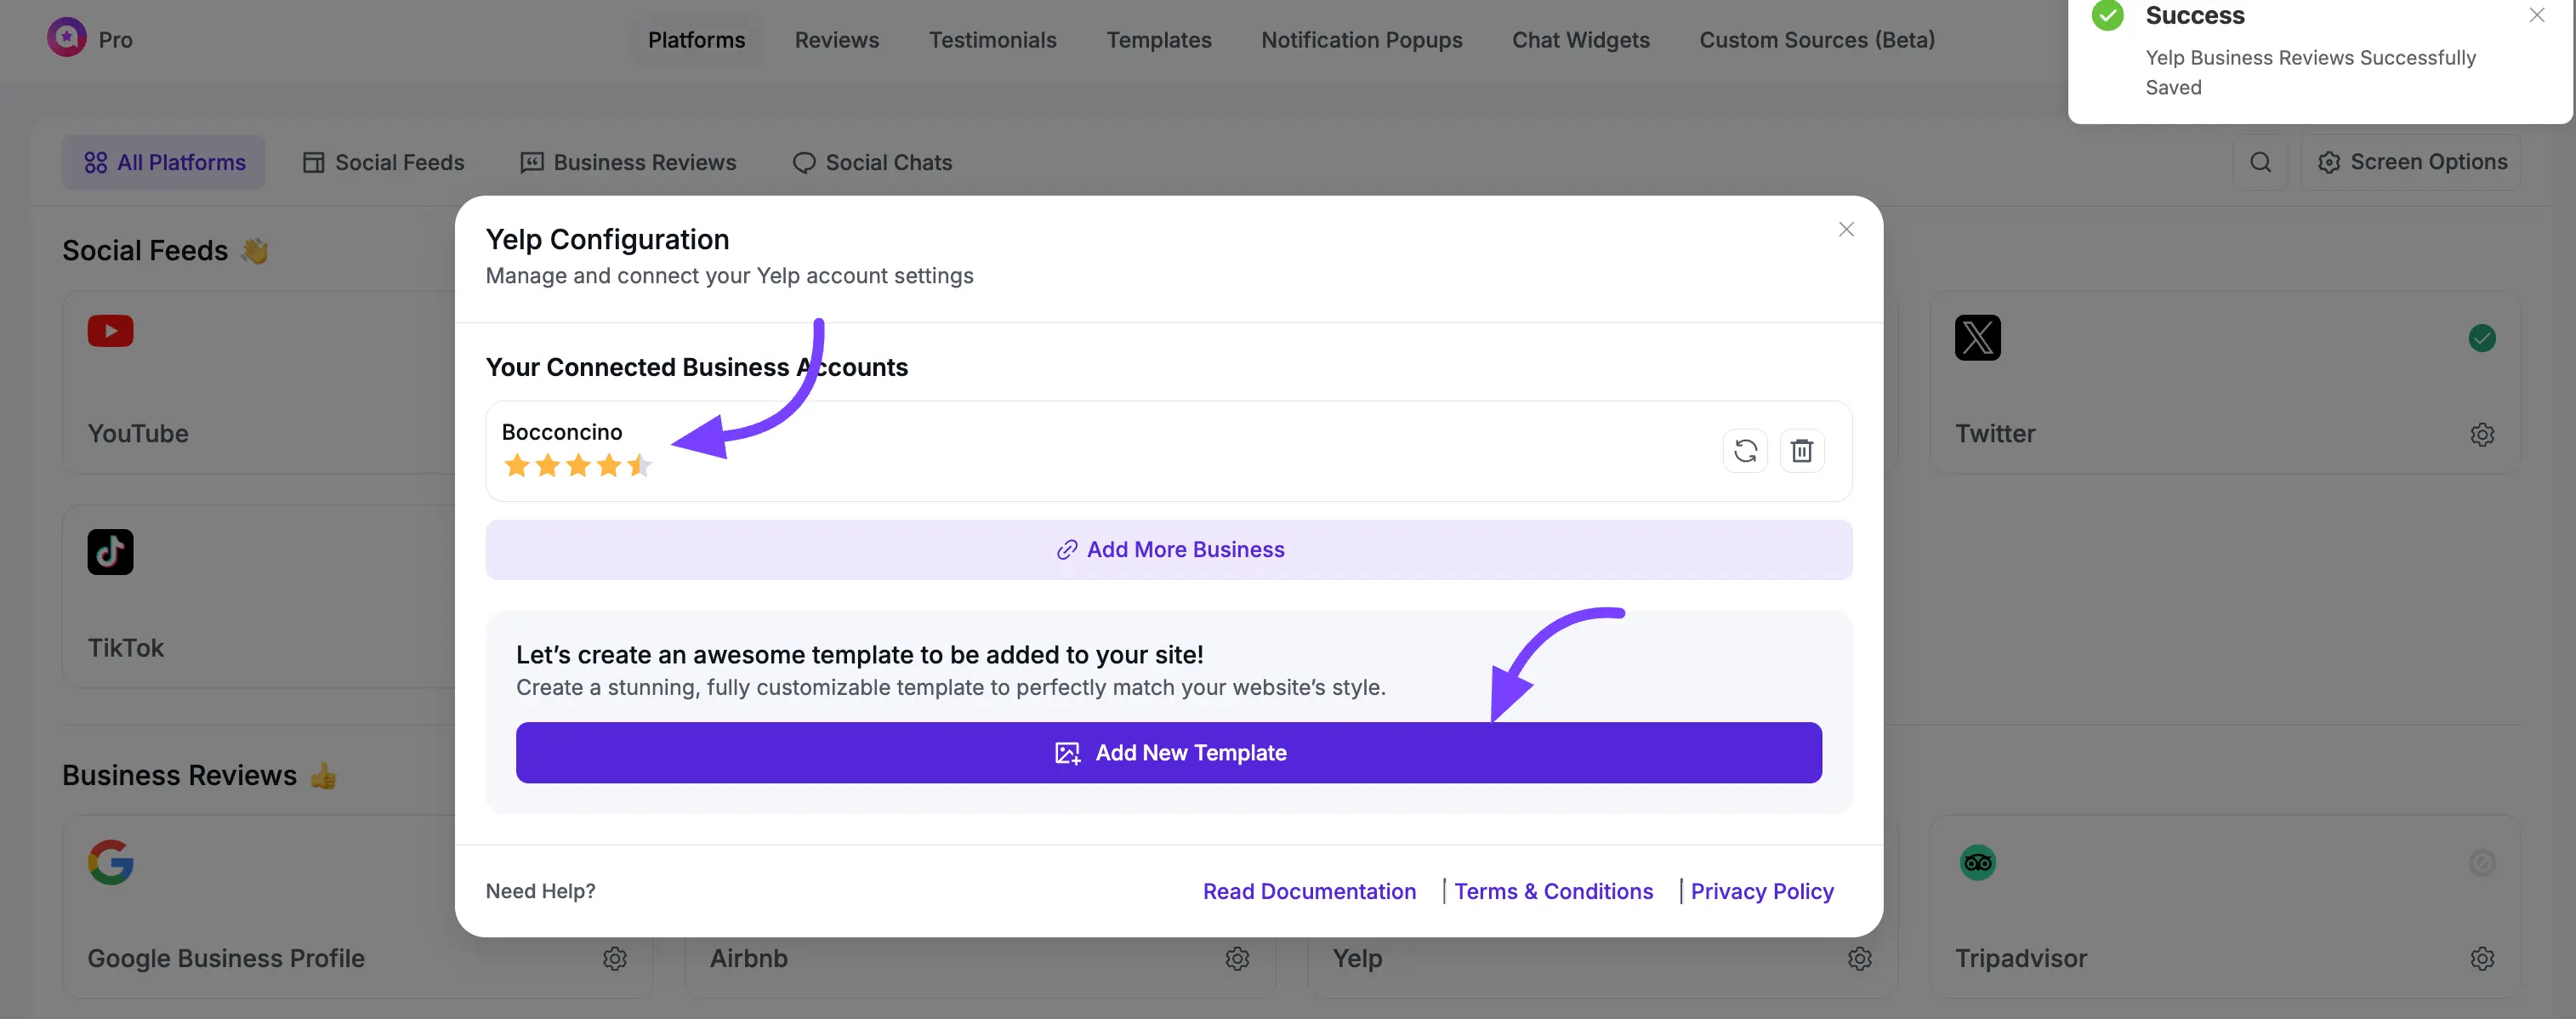
Next Steps
Congratulations! Your Yelp account is fully connected.
Now that your account is set up, you're ready for the fun part:
- Click the Add New Template button to go to the template editor and start designing your Business Reviews template for Yelp.