Appearance
Manager Settings (Granting User Permissions)
This guide will show you how to use WP Social Ninja's powerful Manager settings.
By default, only the website Administrator can see and access the WP Social Ninja plugin. This is for security. However, you might want a staff member, a store manager, or a blog editor to be able to create or manage your social feeds without giving them full admin access to your entire website.
The Manager feature allows you to give specific permissions to specific users on your site, giving you full control over who can do what.
Use Case: You have an "Editor" who manages your website's blog. You want them to be able to create new X (Twitter) feed templates, but you don't want them to be able to change your plugin's global settings or connect new accounts.
With this feature, you can add them as a Manager, enter their email, and check only the "Manage Templates" box. Now, that user can log in and create templates, but they won't even see the "Platforms" or "Settings" pages.
How to Add a New Manager
Follow these simple steps to add a new manager and set their permissions.
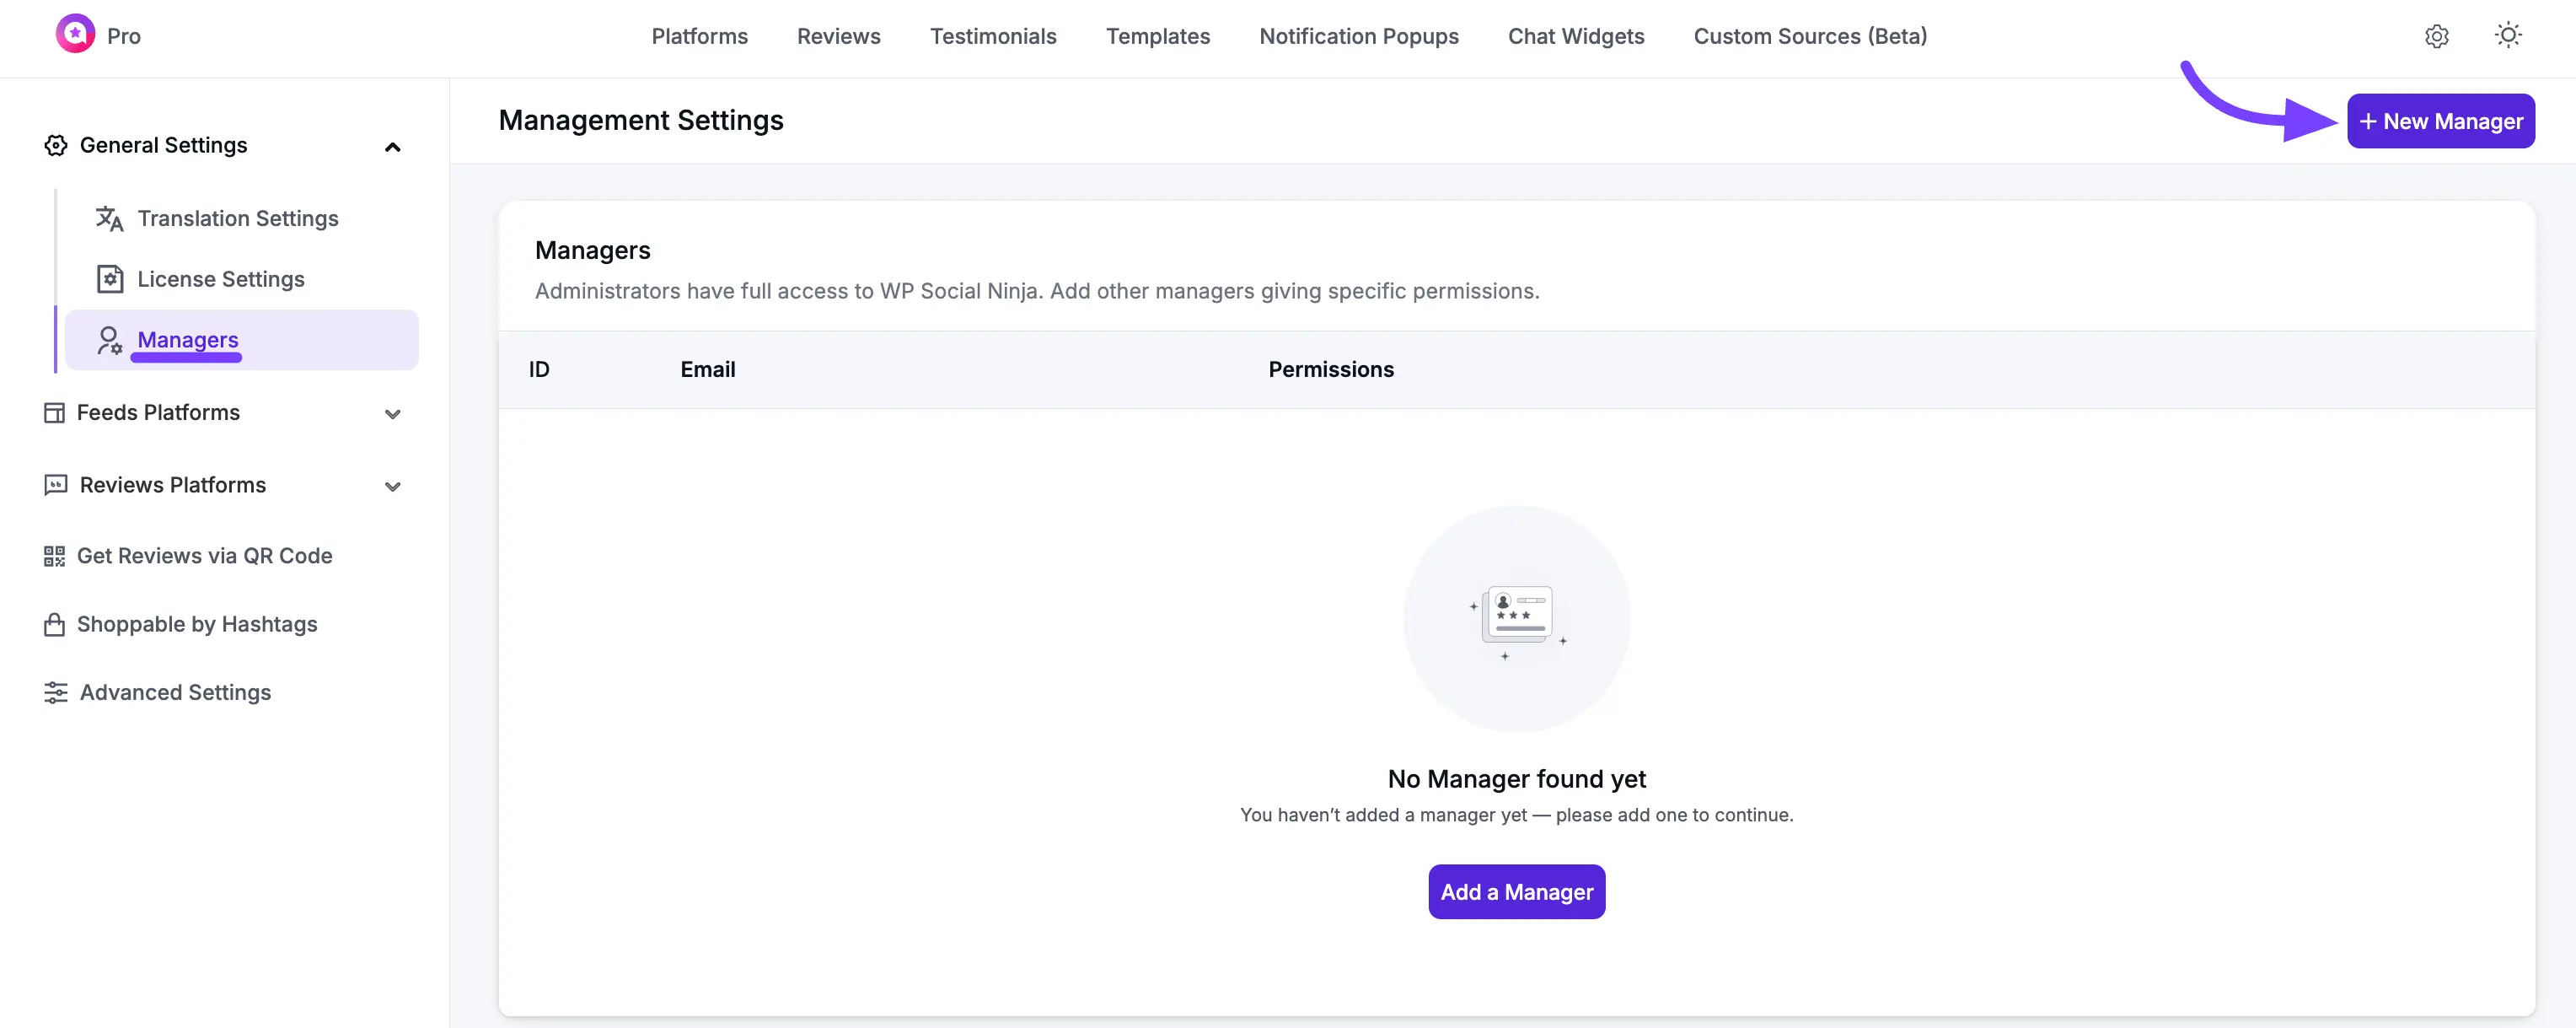
Step 1: Go to Manager Settings
First, go to your WordPress dashboard. In the left-hand menu, click on WP Social Ninja, and then select the Settings sub-menu.
On the Settings page, click on the Manager tab at the top. This will take you to the main "Managers List" page.
Step 2: Click "New Manager"
To add a new person, click the blue + New Manager button located in the top-right corner of the page.
Step 3: Enter the Manager's Email
A pop-up window titled "New Manager" will appear.
In the first field, enter the email address of the person you want to add.
Important Note: The email address you enter must be registered as a user on your WordPress website (e.g., as an "Editor," "Author," or "Subscriber"). You cannot add an email for someone who does not have an existing user account on your site.
Step 4: Assign Specific Permissions
Once you enter their email, a list of Permissions will appear in the pop-up. This is where you decide exactly what this manager is allowed to do.
Click the checkbox next to each permission you want to grant.
You can choose any combination. For example, you can give a user permission to "Manage Templates" but not "Manage Platforms" or "Manage Settings."
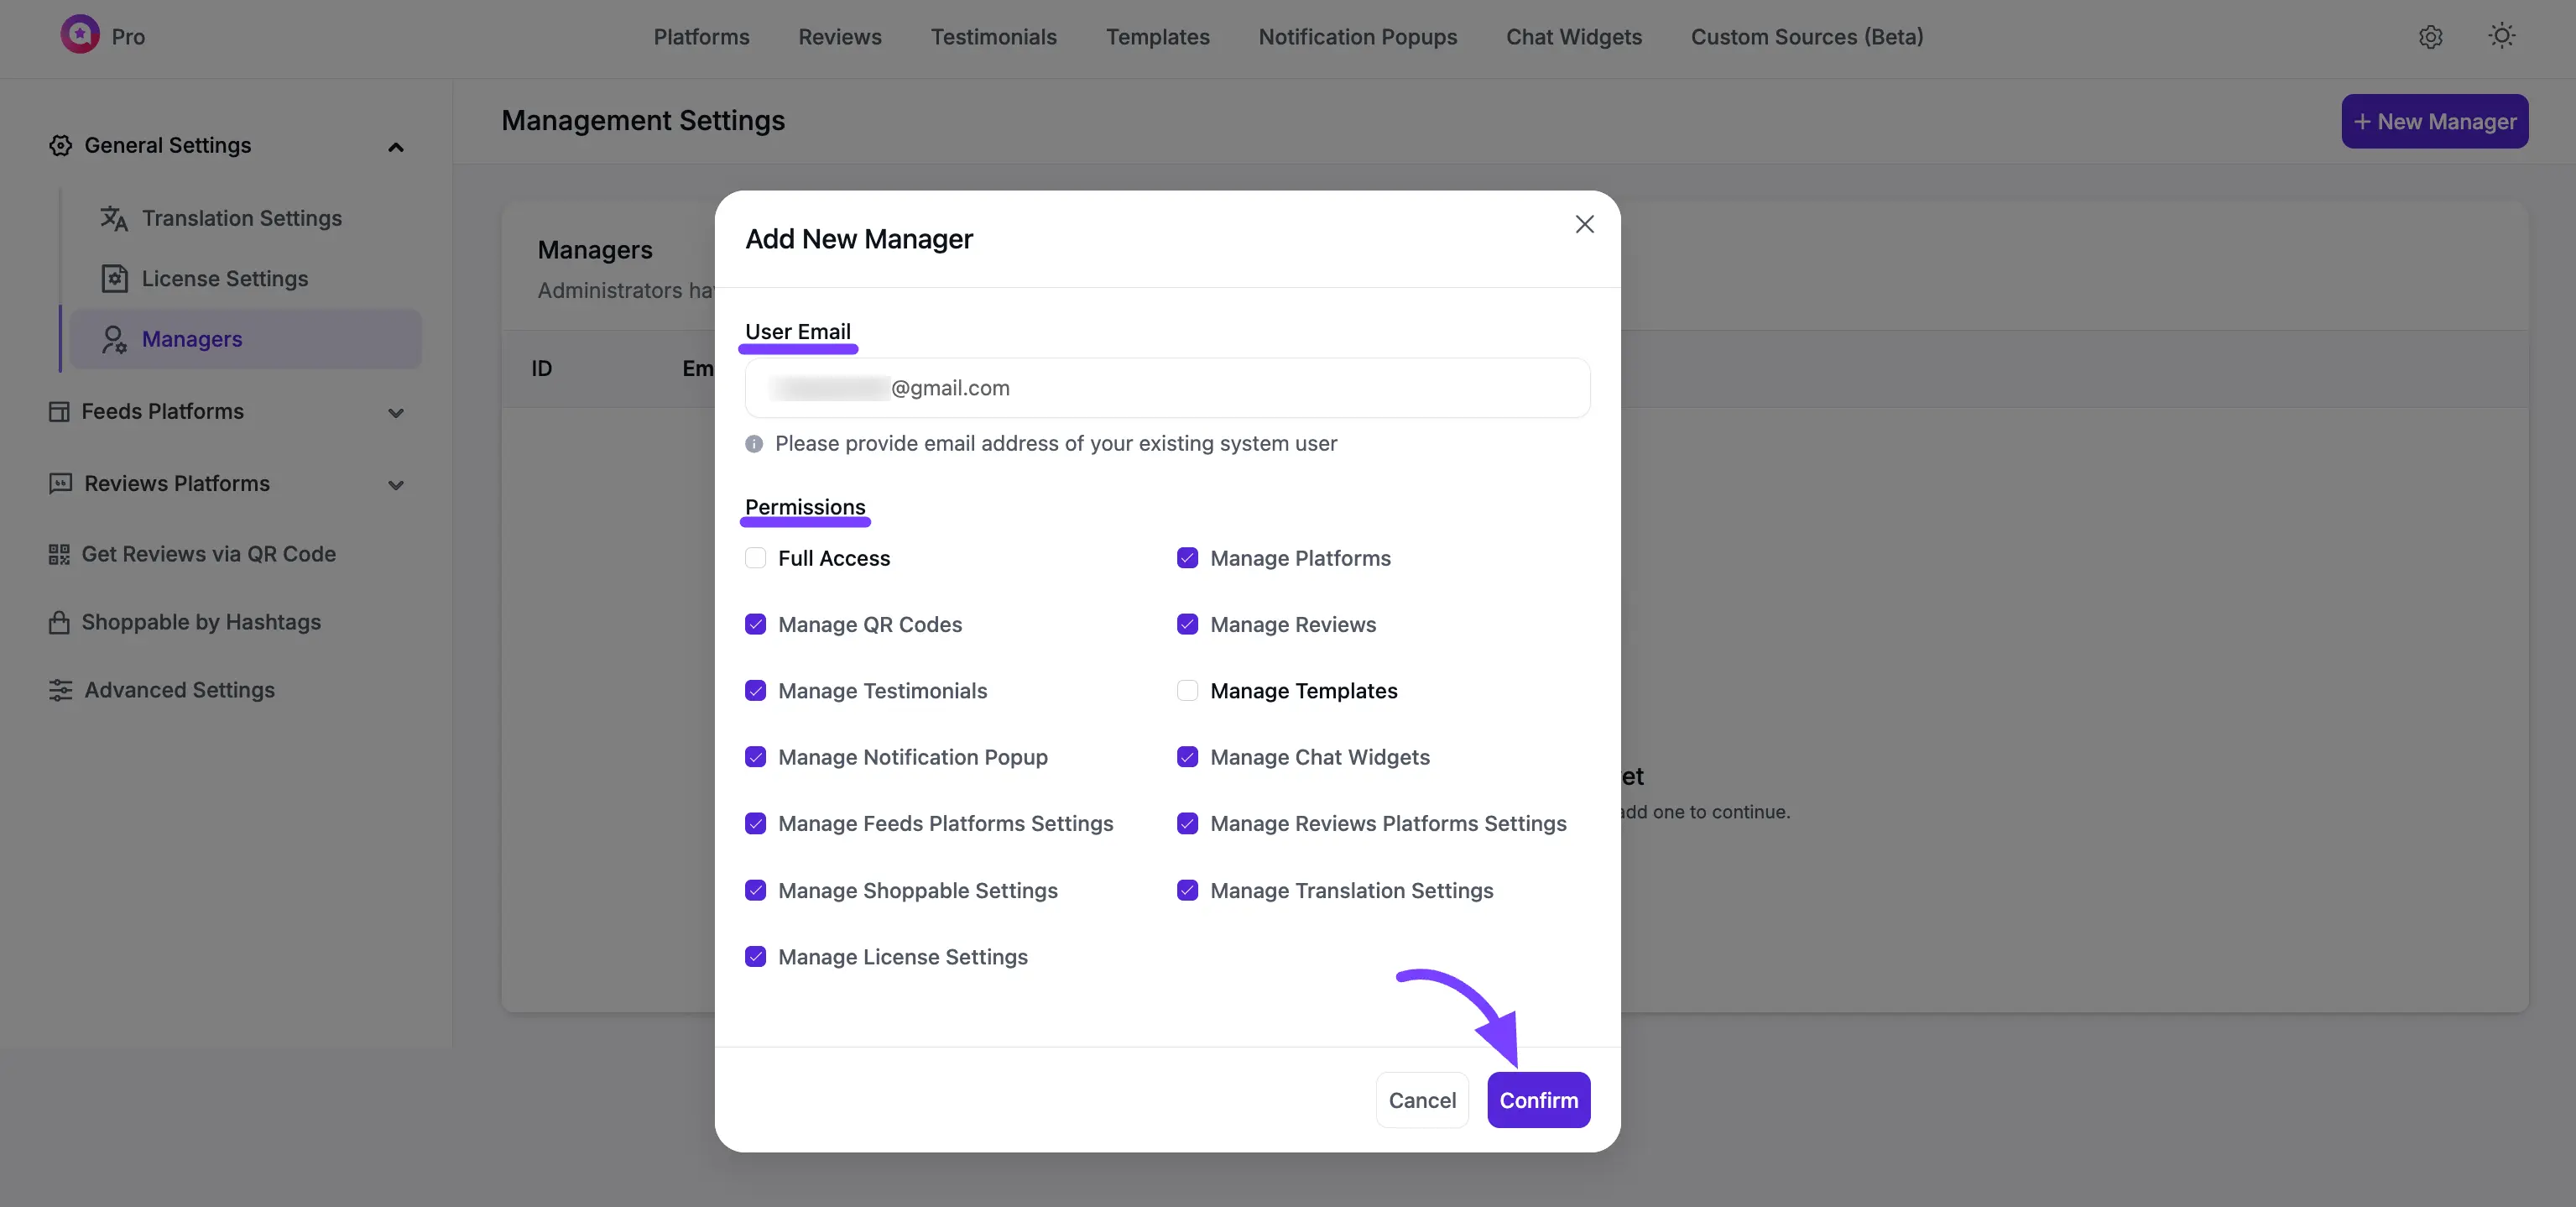
Step 5: Confirm and Add the Manager
After you have selected the permissions, click the Confirm button.
The pop-up will close, and you will see your new manager has been added to the Managers List on the main "Manager" page.
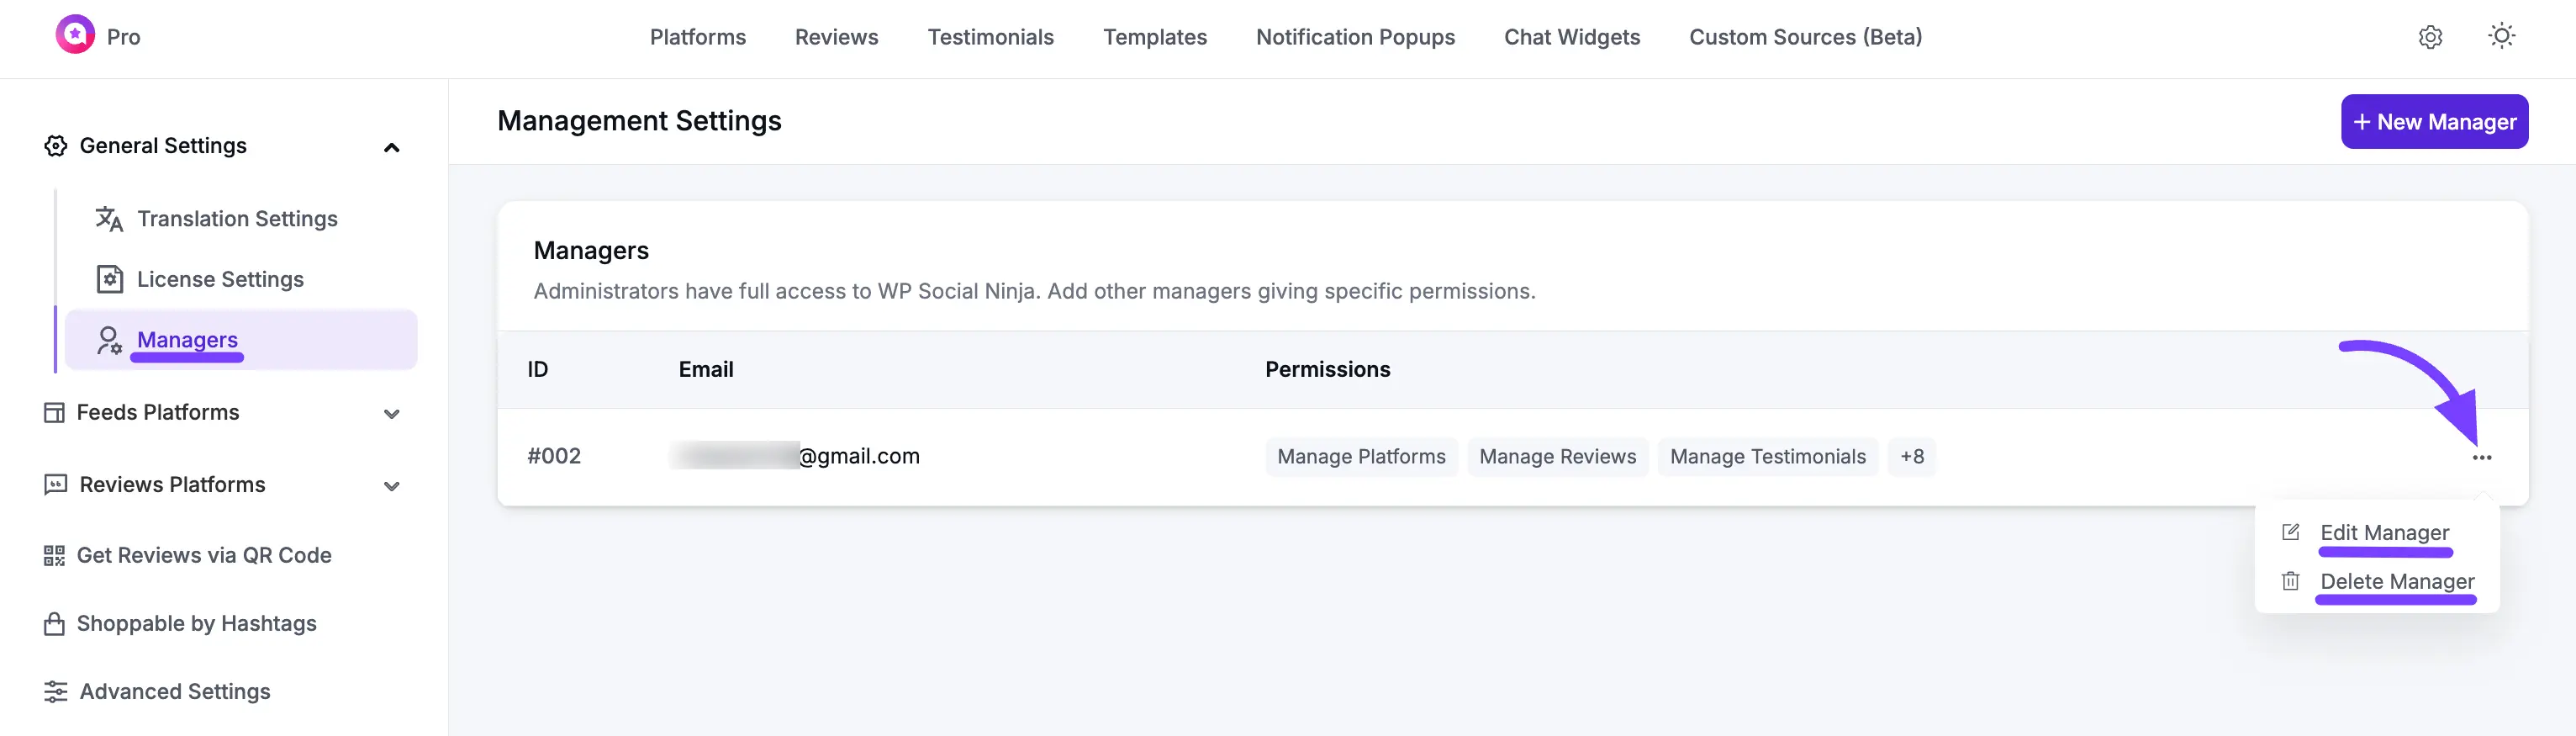
Edit or Delete an Existing Manager
Once a manager is added, you can easily change their permissions or remove them at any time.
- Go to the WP Social Ninja → Settings → Manager tab.
- Find the manager you want to edit or delete in the Managers List.
- On the right side of their name, click the three-dot menu (...) button.
- A small dropdown menu will appear with two options: Edit and Delete.
- If you click "Edit": The pop-up will re-open, allowing you to add or remove permissions by checking/unchecking the boxes. Click Confirm to save your changes.
- If you click "Delete": The manager will be instantly removed from the list, and they will no longer have any special access to the WP Social Ninja plugin.