Appearance
How to Add Testimonials with WP Social Ninja
WP Social Ninja has a multitude of functionality, and Testimonials are one of them. To unlock it, you need to get the premium version.
Let’s see how to add Testimonials.
To add Testimonials, first, go to the WP Social Ninja Dashboard menu, then select the Testimonials option, or you can also access it from the top of the page.
After that, you will get a section where you can add Testimonials by clicking on the button.
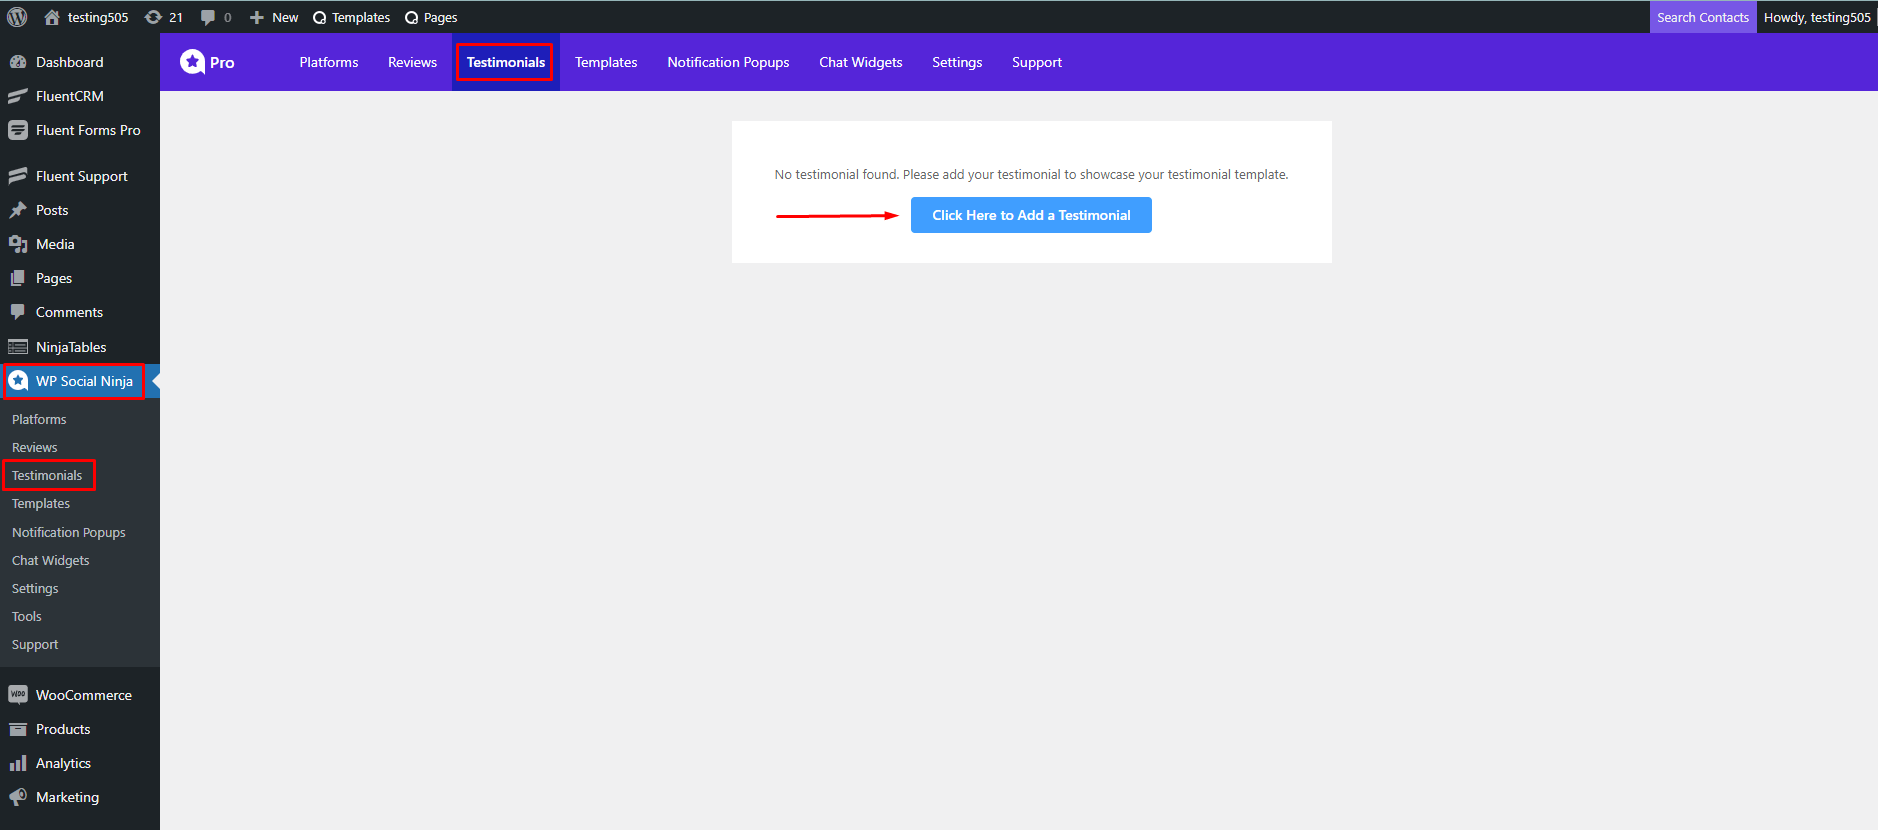
Testimonials
- Now a popup will appear with all the input fields.
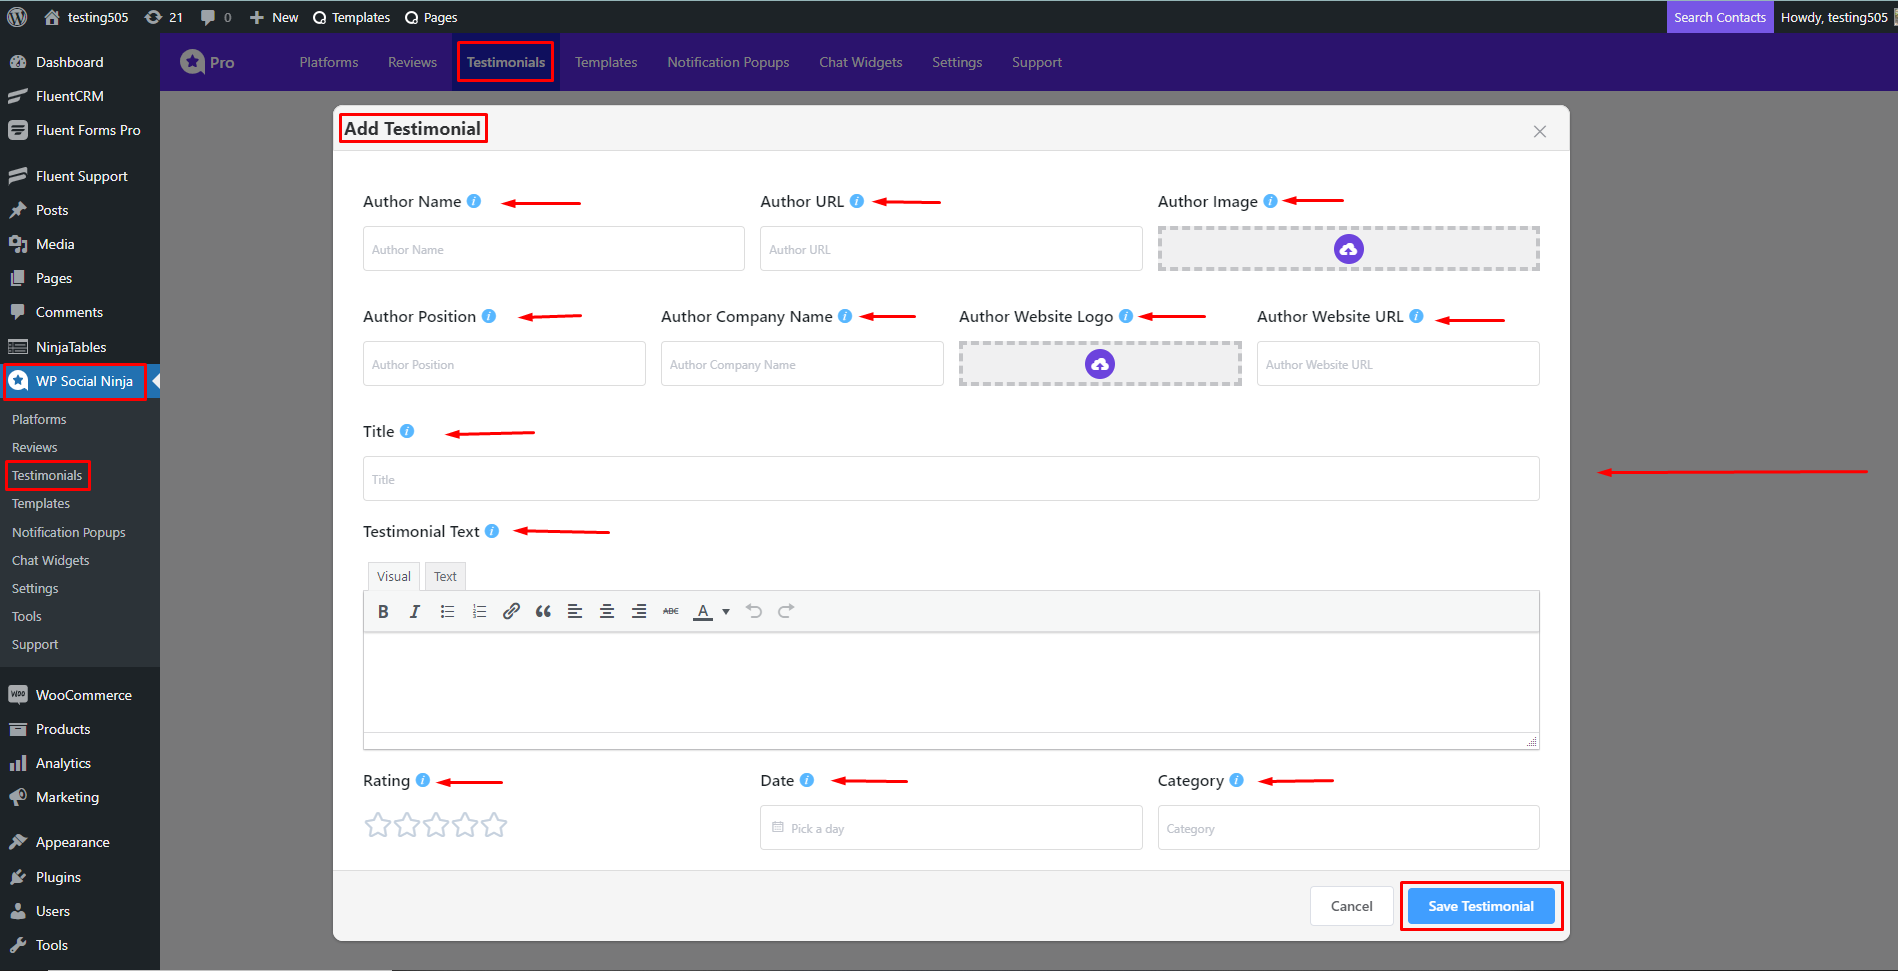
Add Testimonial
Insert all your information/data (Author Name, Author URL, Author Image, Author Position, Author Company Name, Author Website Logo, Author Website URL, Testimonial Title, Testimonial Text, Testimonial Rating, Testimonial Date, and Testimonial Category) and click on the Save Testimonial button.
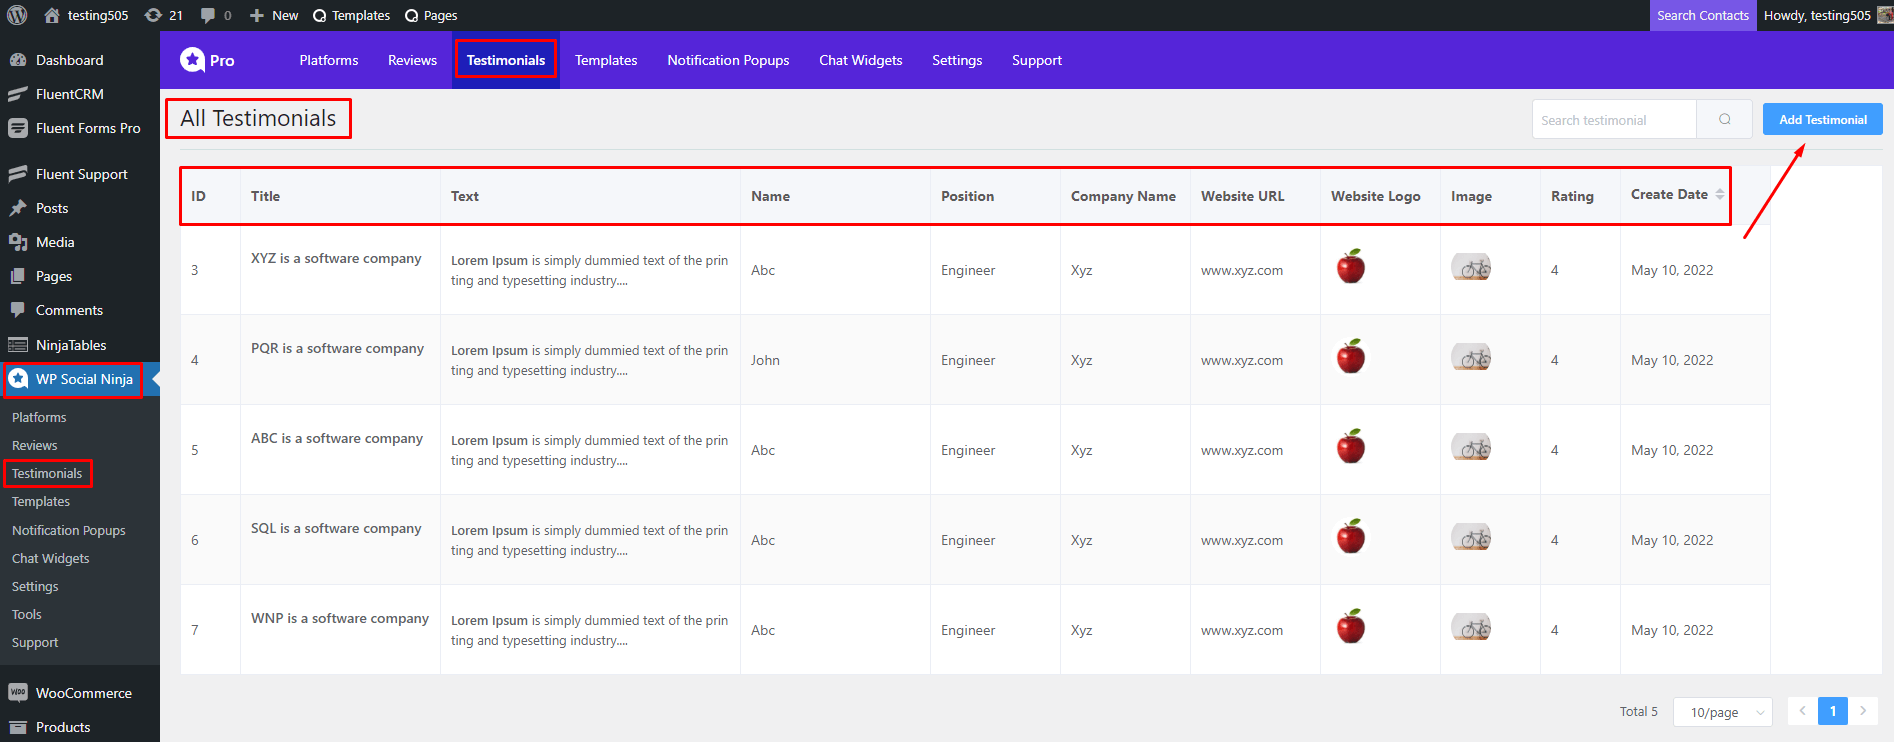
All of your Testimonials will appear on the page after you save them.
By clicking on the Add Testimonial button, you can add more Testimonials.
Display Testimonial
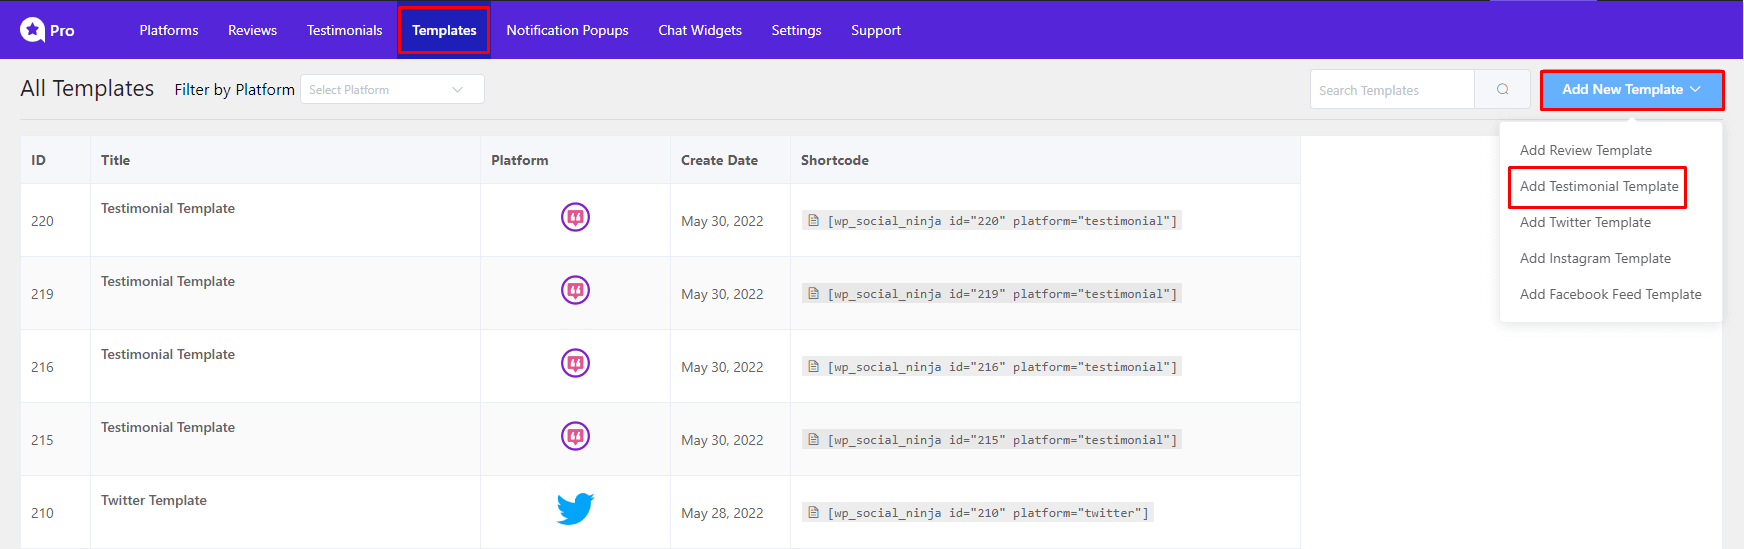
Now you've saved your Testimonials, click on the Template to display the Testimonials on your website.
Click on Add New Template.
A drop-down menu will appear. Now select Add Testimonial Template.
Add Testimonial Template
- This will take you to the WP Social Ninja template editor settings panel.
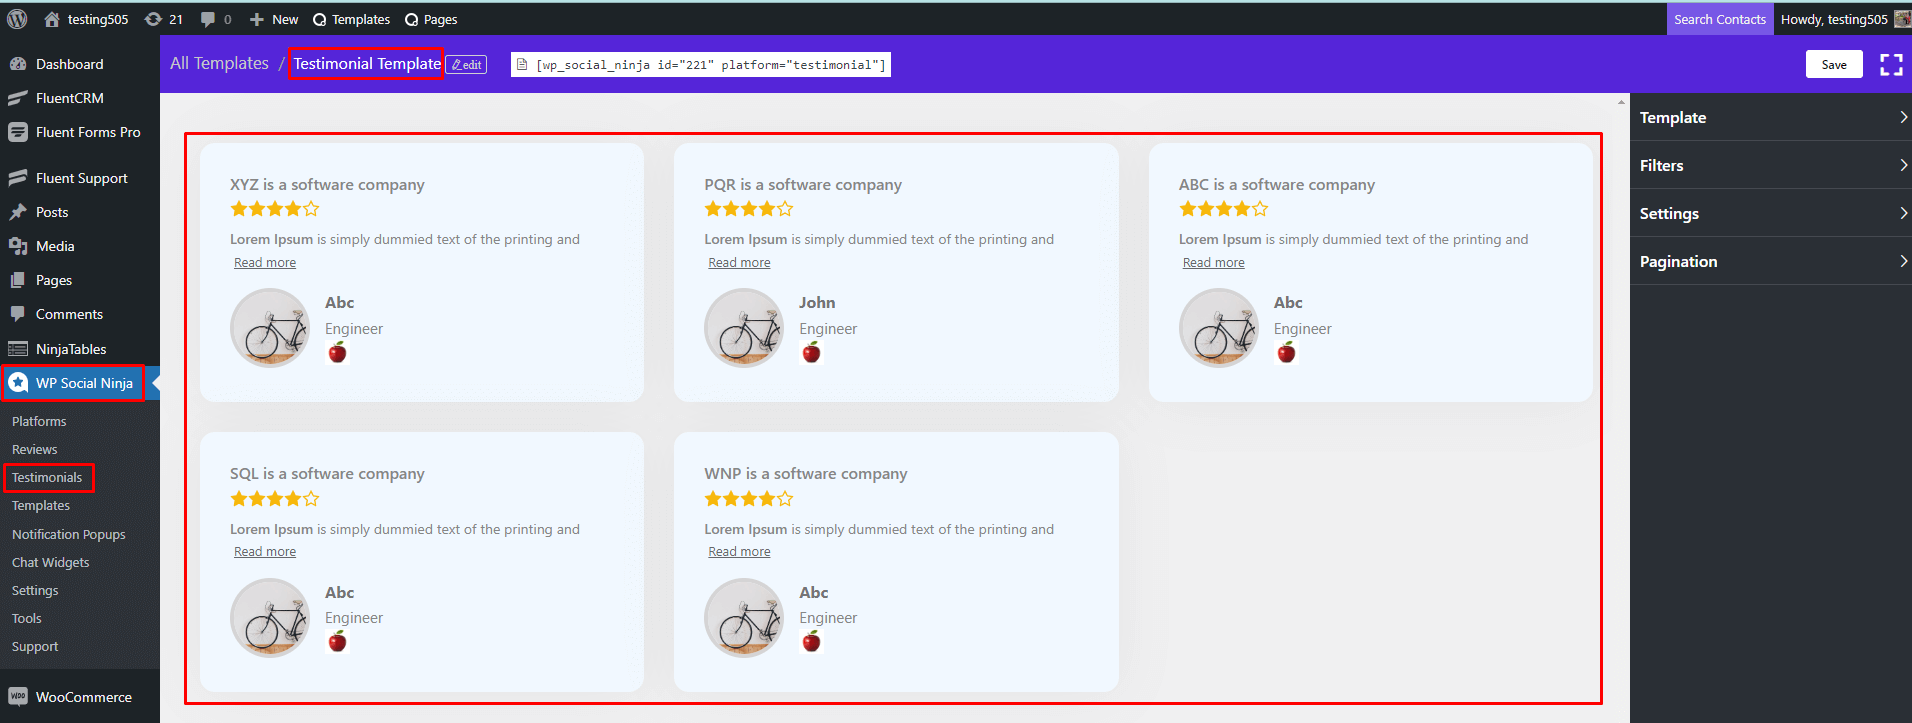
Testimonial Template
- In this section, you can adjust your Template, Filters, Settings, and Pagination using WP Social Ninja to design your website.
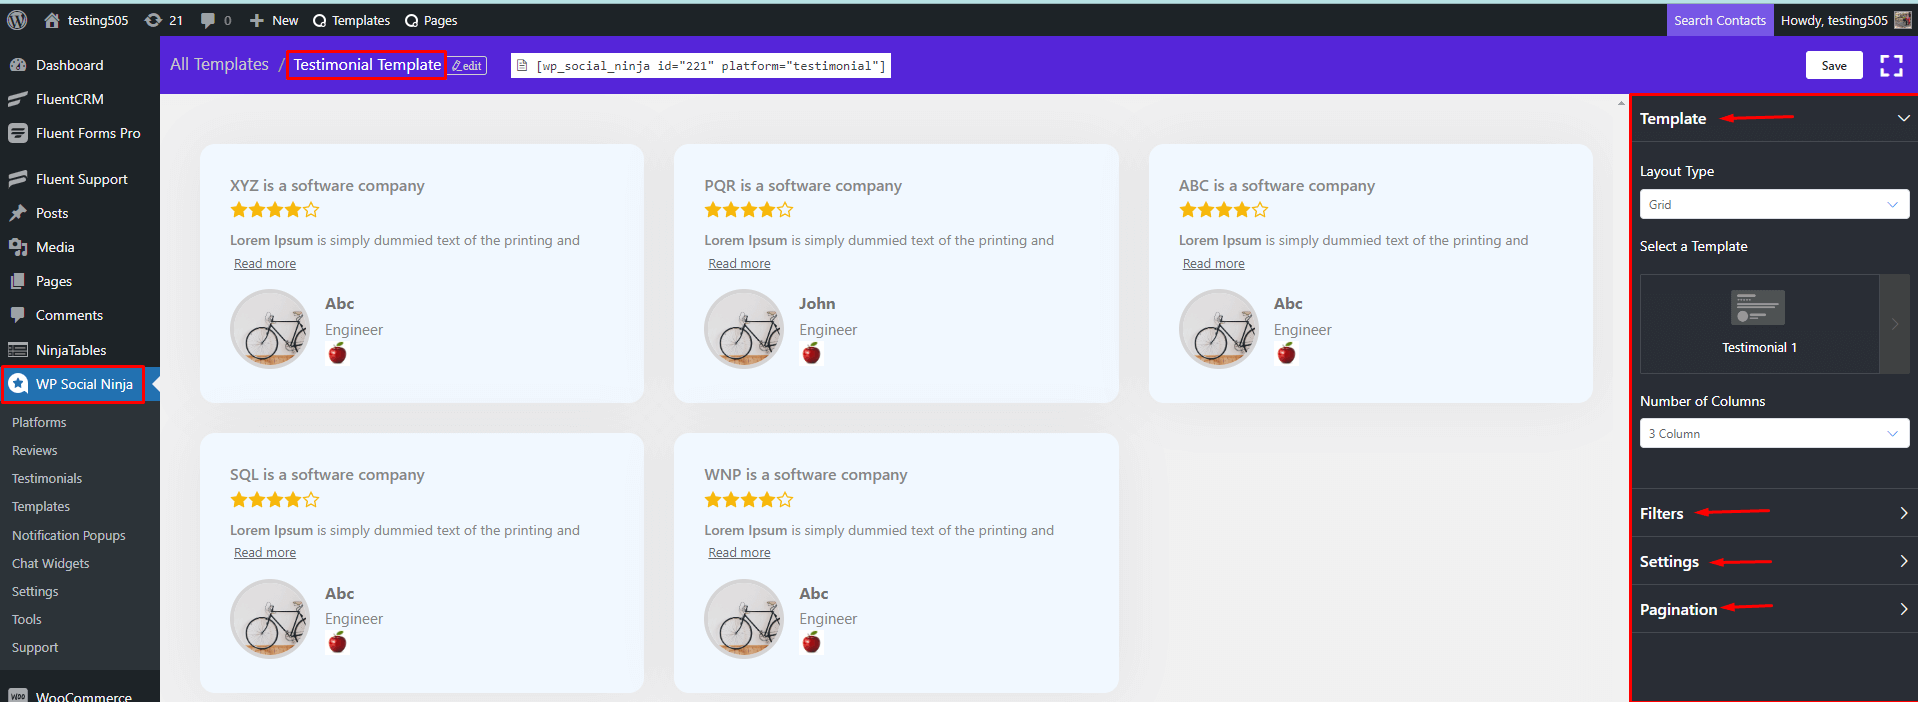
Editor Settings Panel
- Let’s see how these Testimonials will show on the website
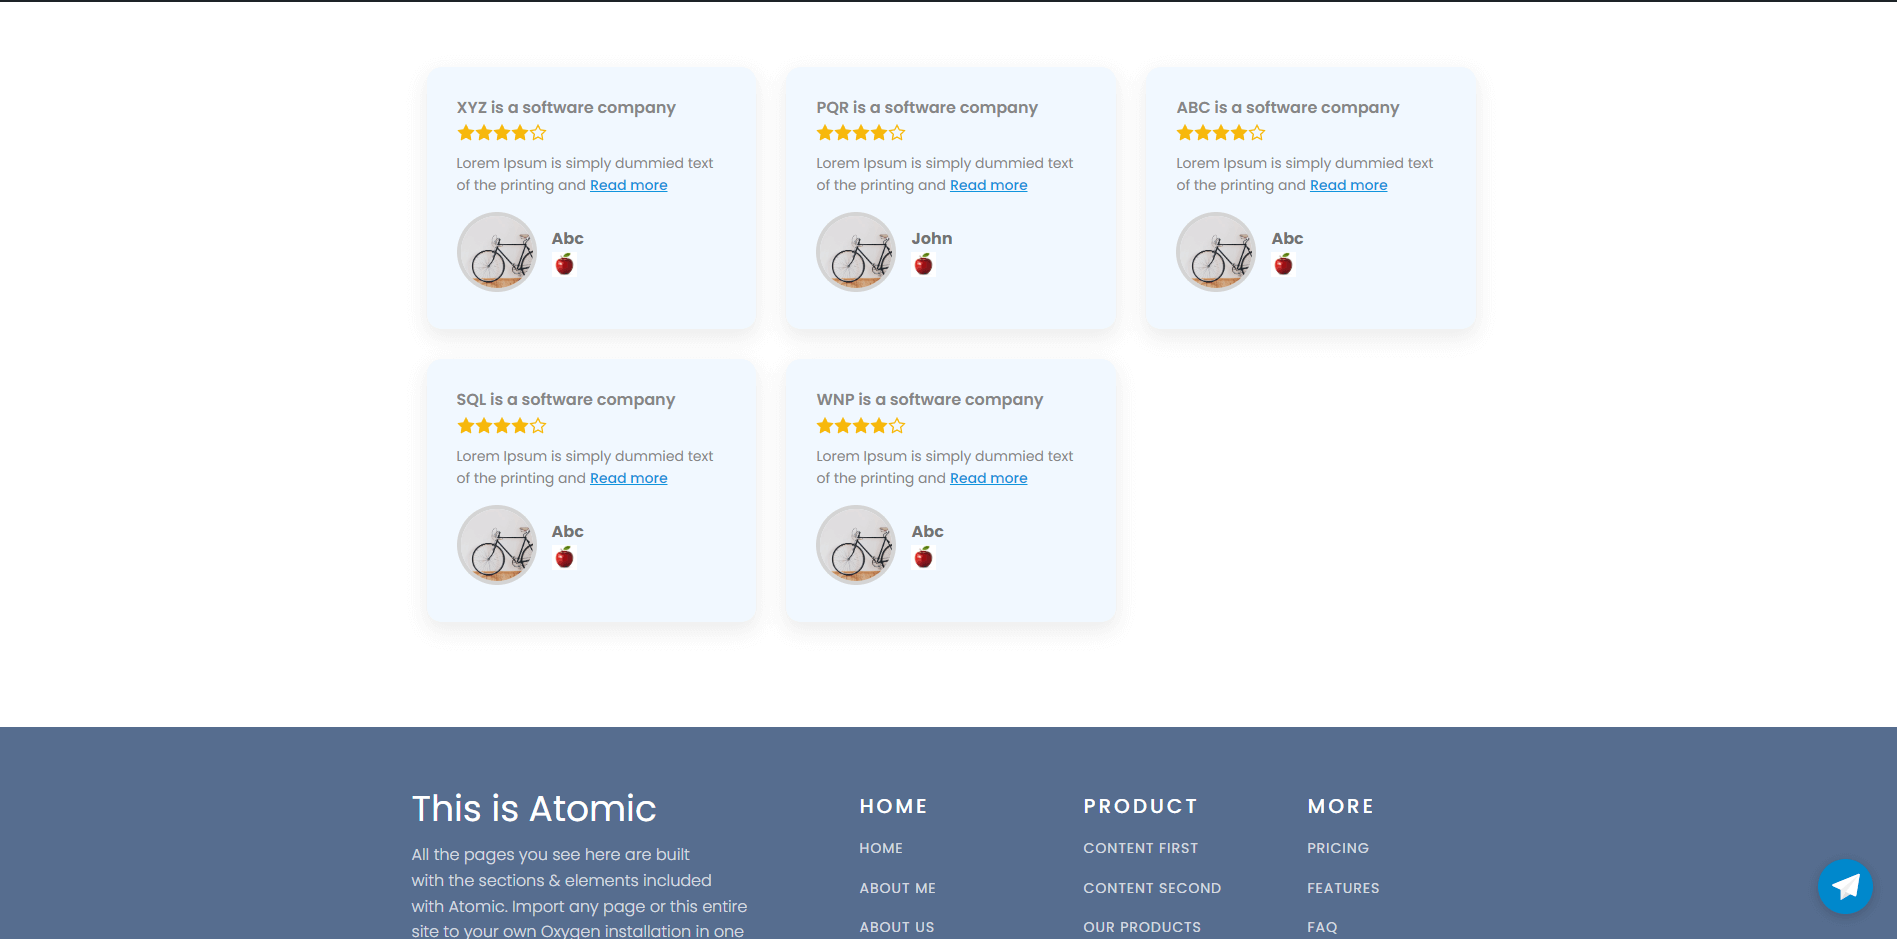
Displaying Testimonials
So, there you go! Adding Testimonials is as easy as a piece of cake.