Appearance
Instagram Shoppable Feed
This guide explains how to use one of WP Social Ninja's most powerful features: the Shoppable Feed. This tool turns your Instagram feed into an interactive, shoppable gallery, allowing you to link posts directly to your product pages.
This helps visitors go from "I like that photo" to "I'm buying that product" in just a few clicks.
Use Case: Imagine a customer sees a photo of your new blue t-shirt on your website's feed. They click a "shopping bag" icon on the post, then click a "Buy Now" button that takes them straight to the product page. This feature turns your social media posts into a direct sales channel.
You can add product links in two ways:
- Manual Method: Add a unique link to each post, one by one. This gives you full control.
- Automatic Method: Set up rules to automatically link posts that contain a specific hashtag. This is a huge time-saver.
Set Up Your Shoppable Feed
You can find all these settings in the General tab when you are editing your Instagram Feed template.
Step 1. Enable the Main Shoppable Feed
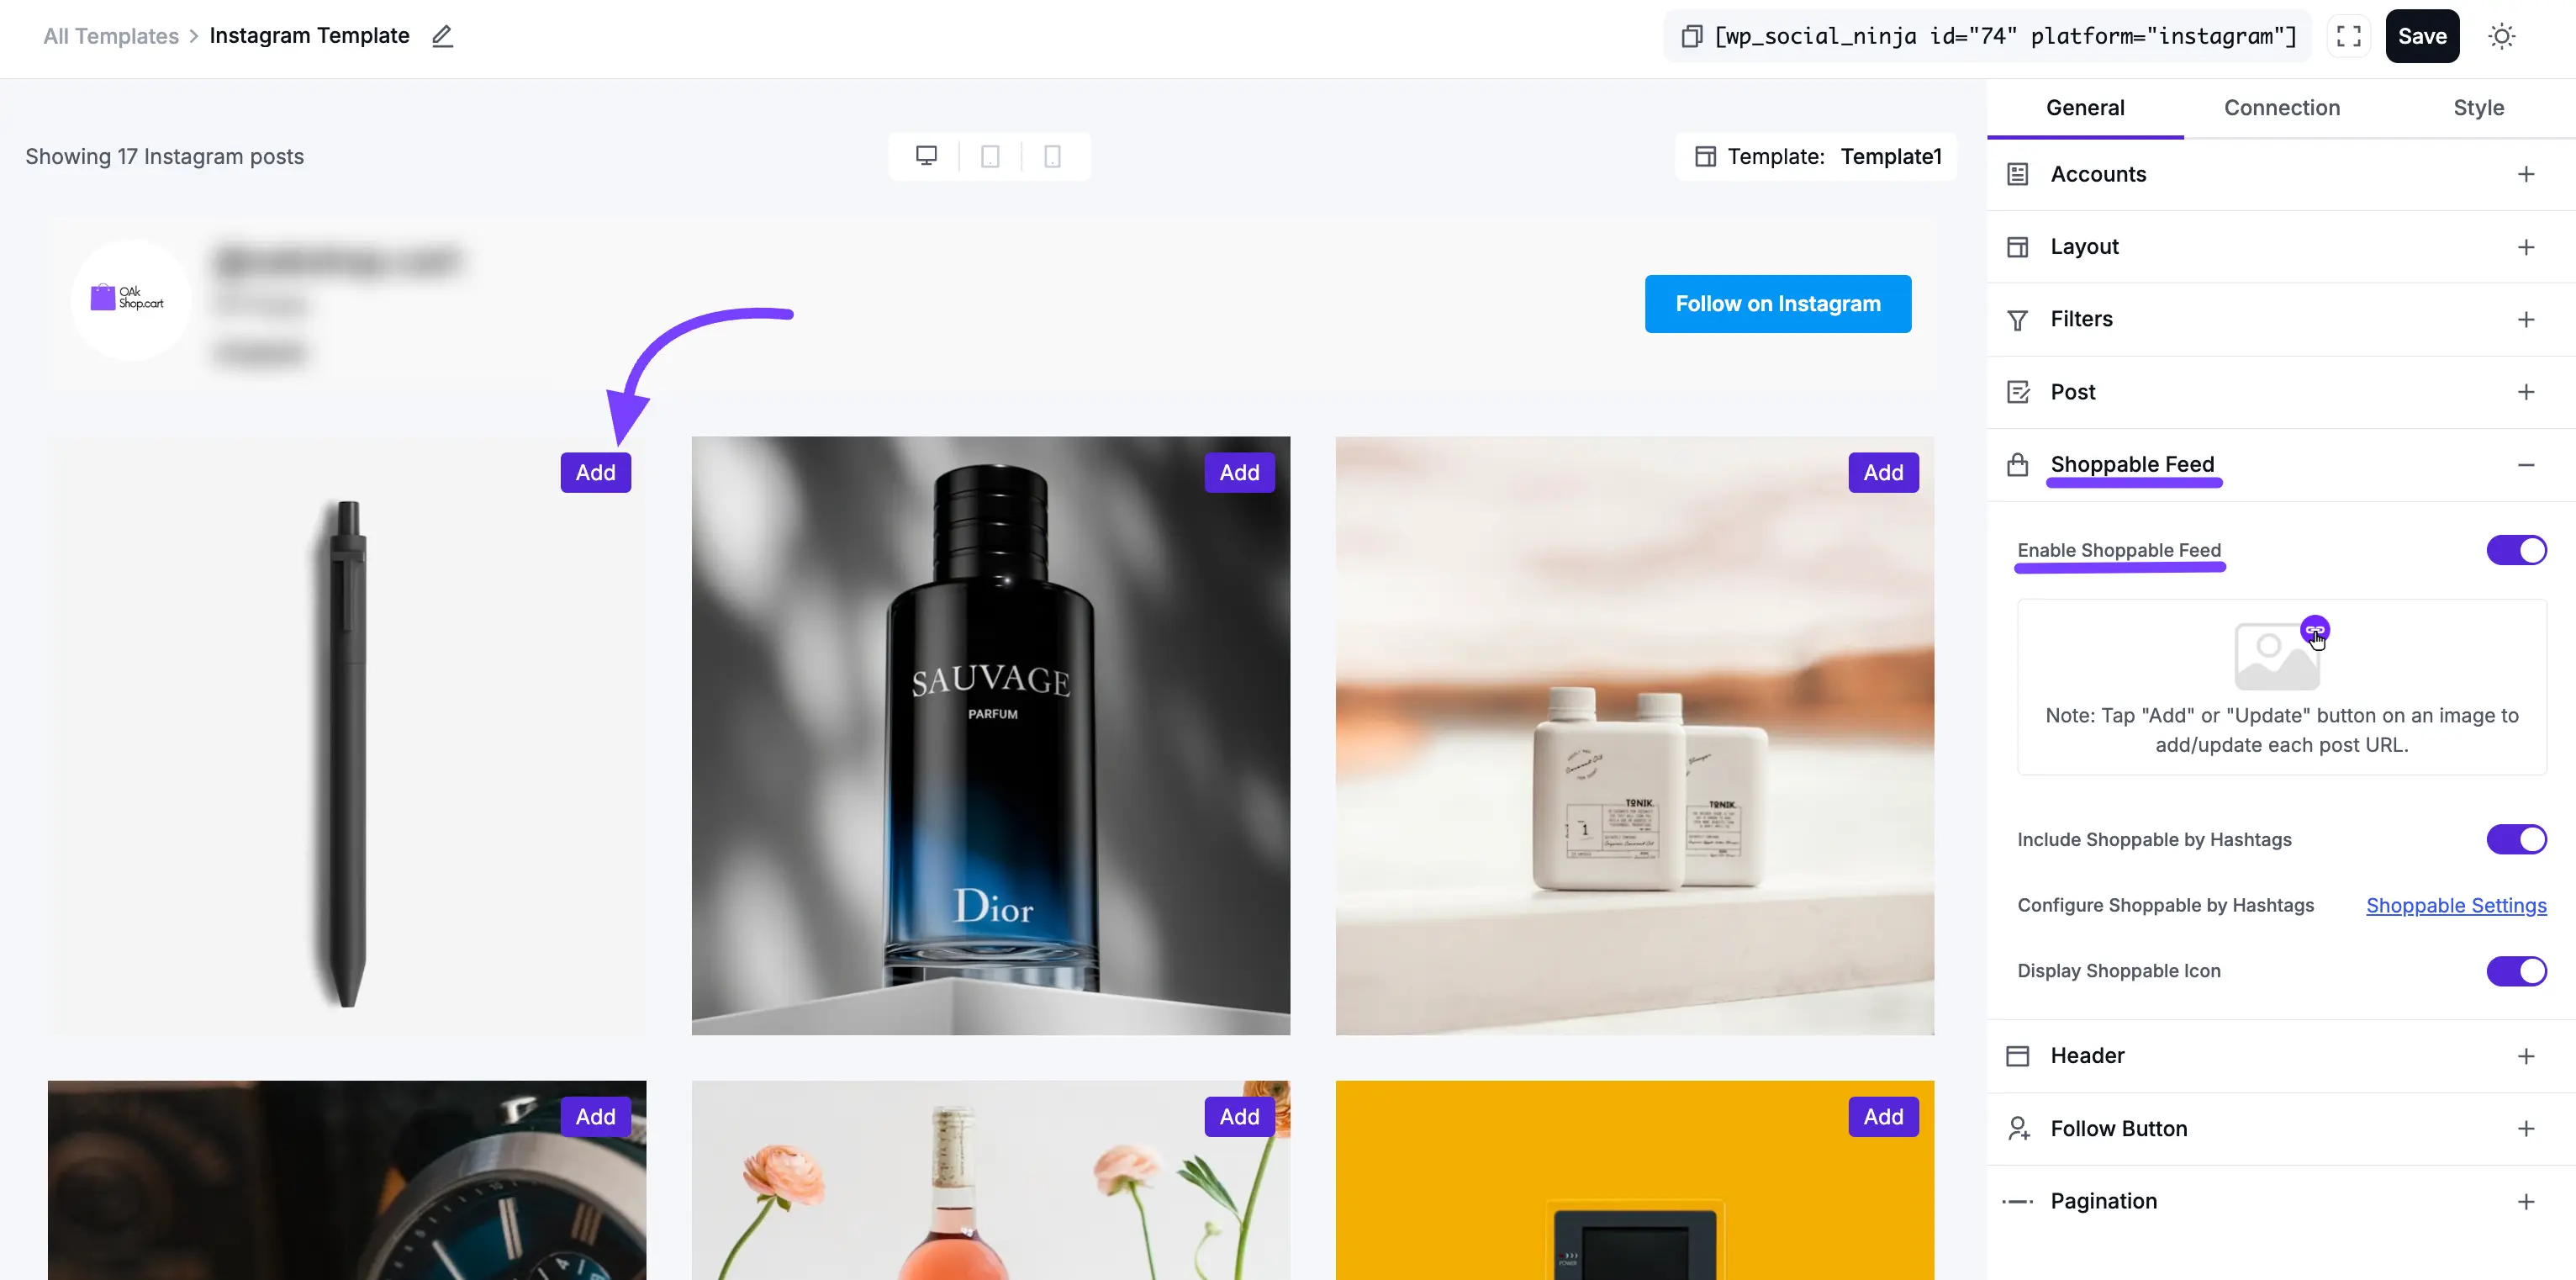
First, you must turn on the main Enable Shoppable Feed toggle. This activates the feature for this template.
Once you turn this on, you will see a new Add button appear on every post in your feed preview. This button is how you'll add links manually.
Step 2. Add Links Manually (Method 1)
This is the best method for adding a specific link to a specific post.
- In the live preview, click the Add button on the post you want to make shoppable.
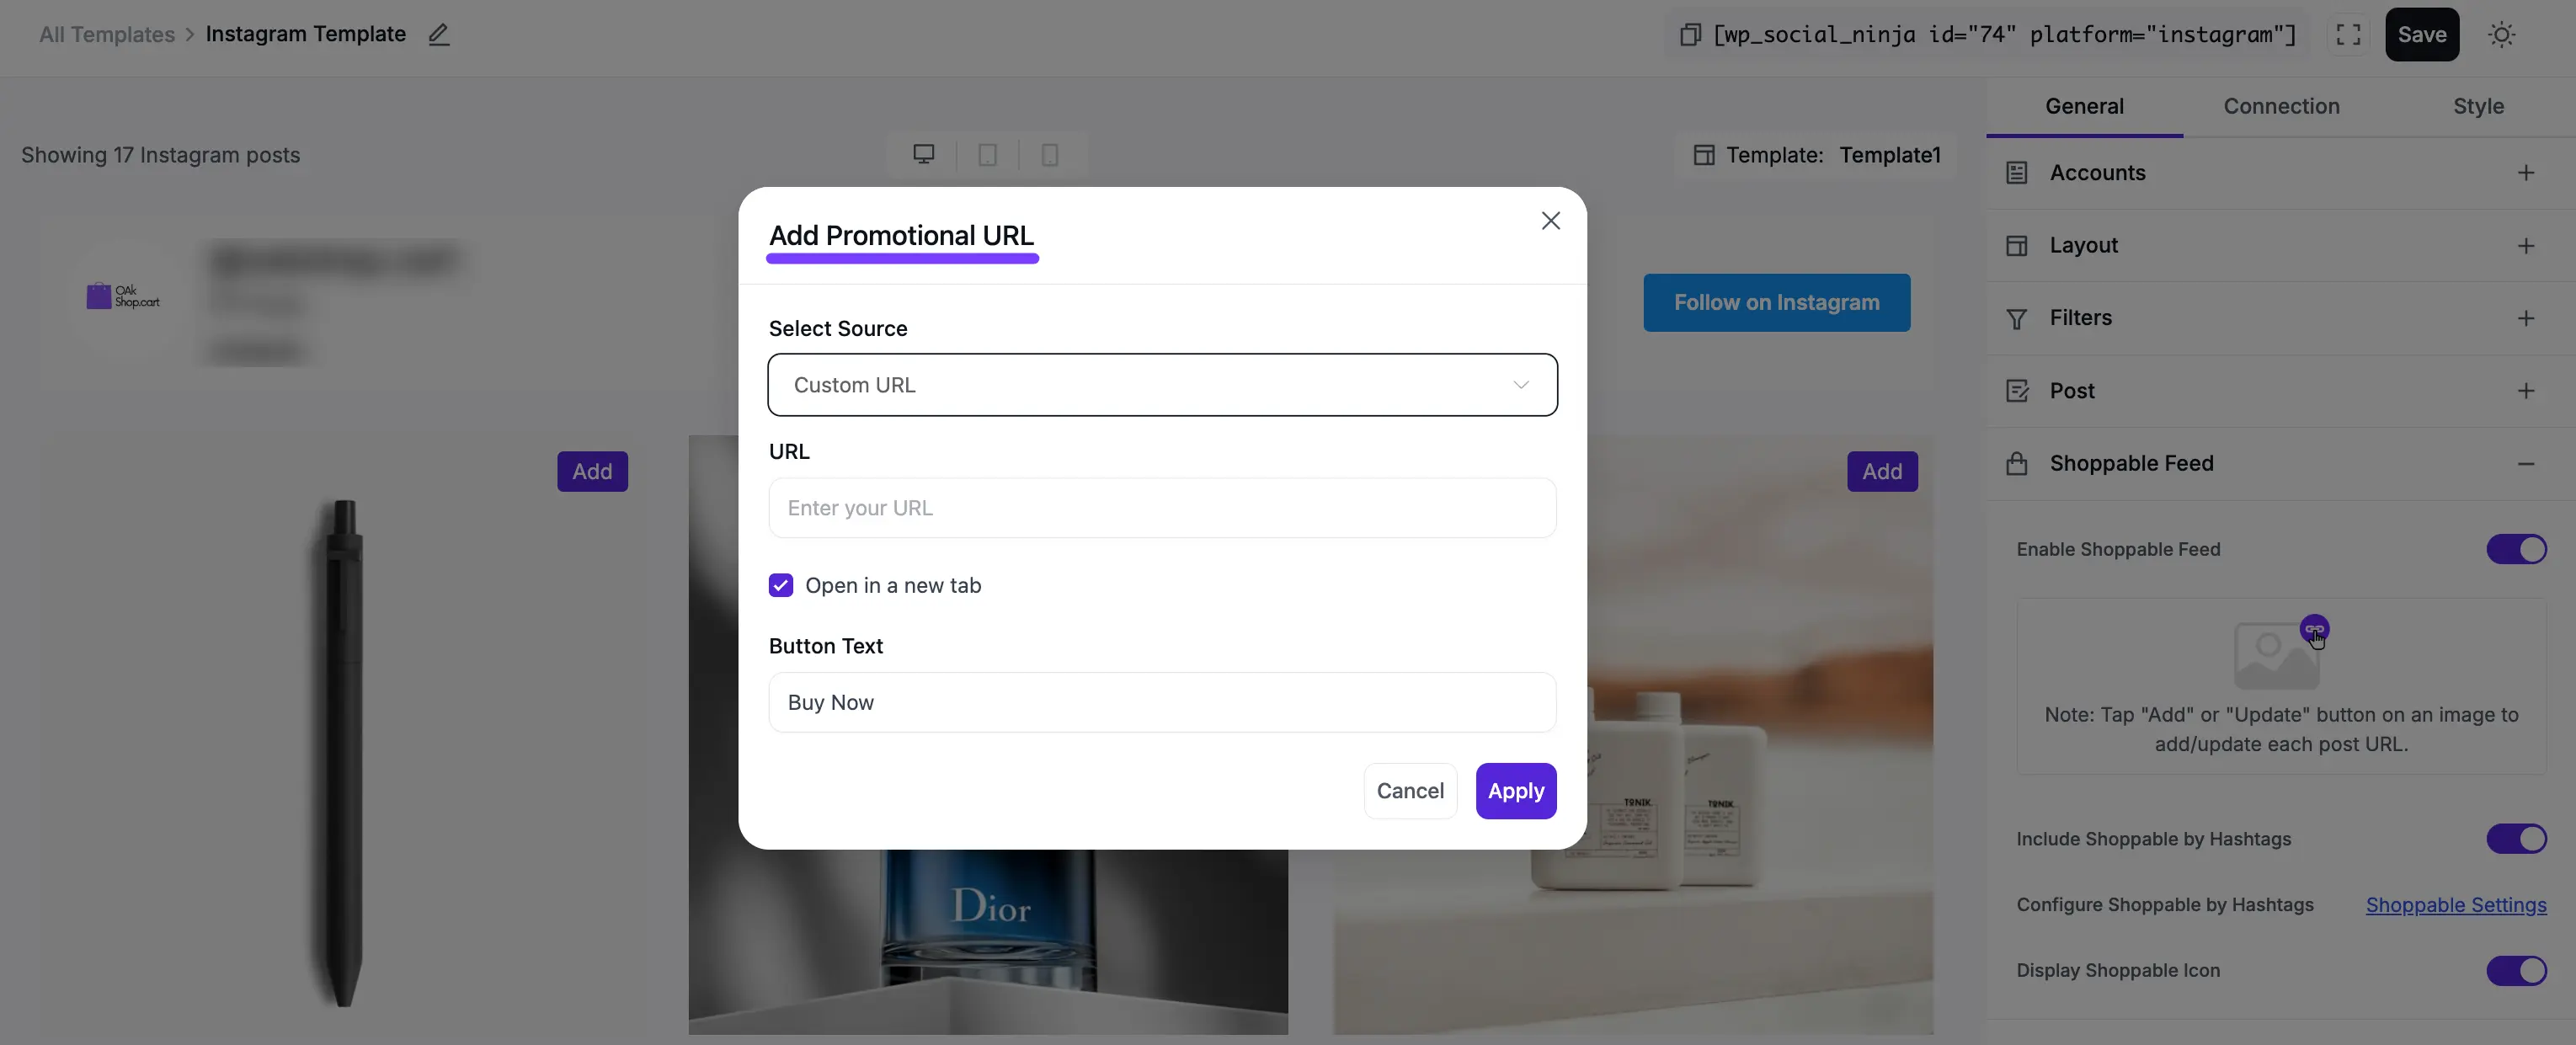
- The "Add Promotional URL" pop-up will appear.
- Click the Select Source dropdown. You have two choices:
- Posts: Link the Instagram post to a WordPress blog post.
- Pages: Link directly to a specific page on your site (for example, “Shop” or “Sale”).
- Products: Connect the post to a product page so customers can buy directly.
- Custom URL: Paste any external link — like an affiliate product, Etsy listing, or landing page.
- In the Button text field, type what you want the button to say (e.g., "Buy Now," "Shop This Look," or "Learn More").
- Click Apply. Your post is now shoppable.
Step 3. Add Links Automatically (Method 2)
This method saves you a ton of time by using hashtags to create links.
Turn on the Include Shoppable by Hashtags toggle.
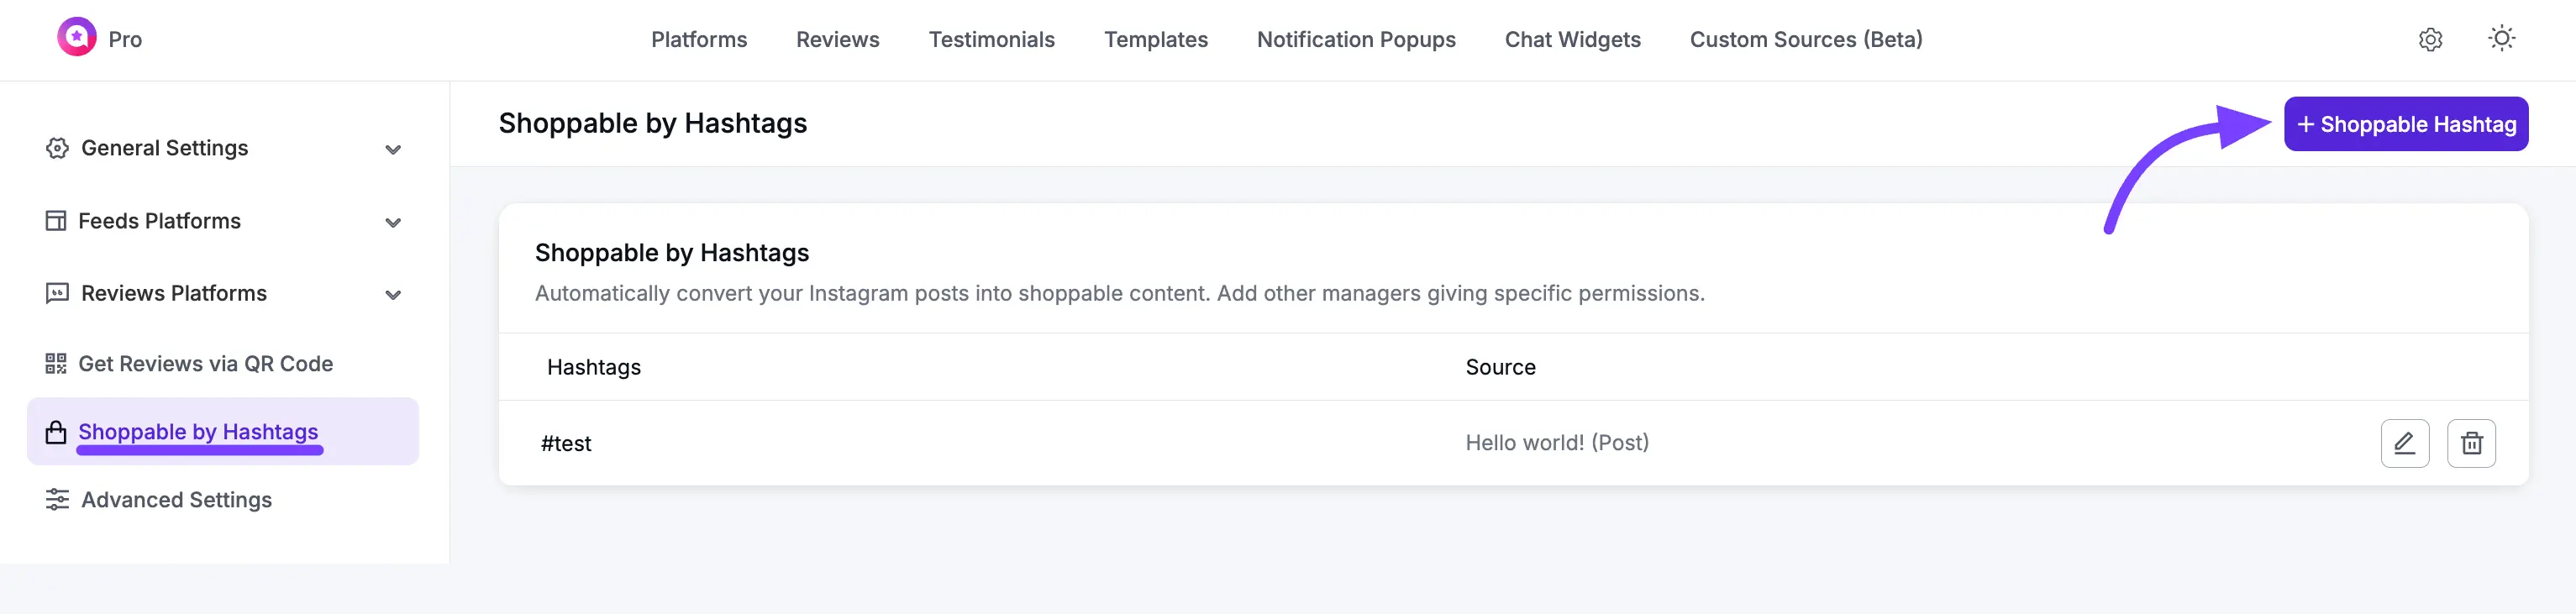
Click the Configure Shoppable by Hashtags link. This will open your main settings page for creating your "hashtag rules."
On this page, you can create rules that connect a hashtag to a link.
Example Rule:
- Hashtag:
#bluehat25 - Link:
yourstore.com/products/blue-hat
- Hashtag:
- Now, whenever you publish a post on Instagram with the
#bluehat25hashtag, WP Social Ninja will automatically add the correct product link to that post on your website.
INFO
Note: You can use both methods at the same time. If you add a link manually to a post, it will always override any automatic hashtag link for that same post.
Step 4. Display the Shoppable Icon
Finally, turn on the Display Shoppable Icon toggle.
This adds a small "shopping bag" icon to every post that has a product link. We highly recommend this, as it gives your customers a clear visual sign that the post is clickable and the item is for sale.