Appearance
WooCommerce Reviews
WP Social Ninja simplifies the process of displaying WooCommerce product reviews on your website. You have to follow some easy steps to do this.
WooCommerce Reviews Settings
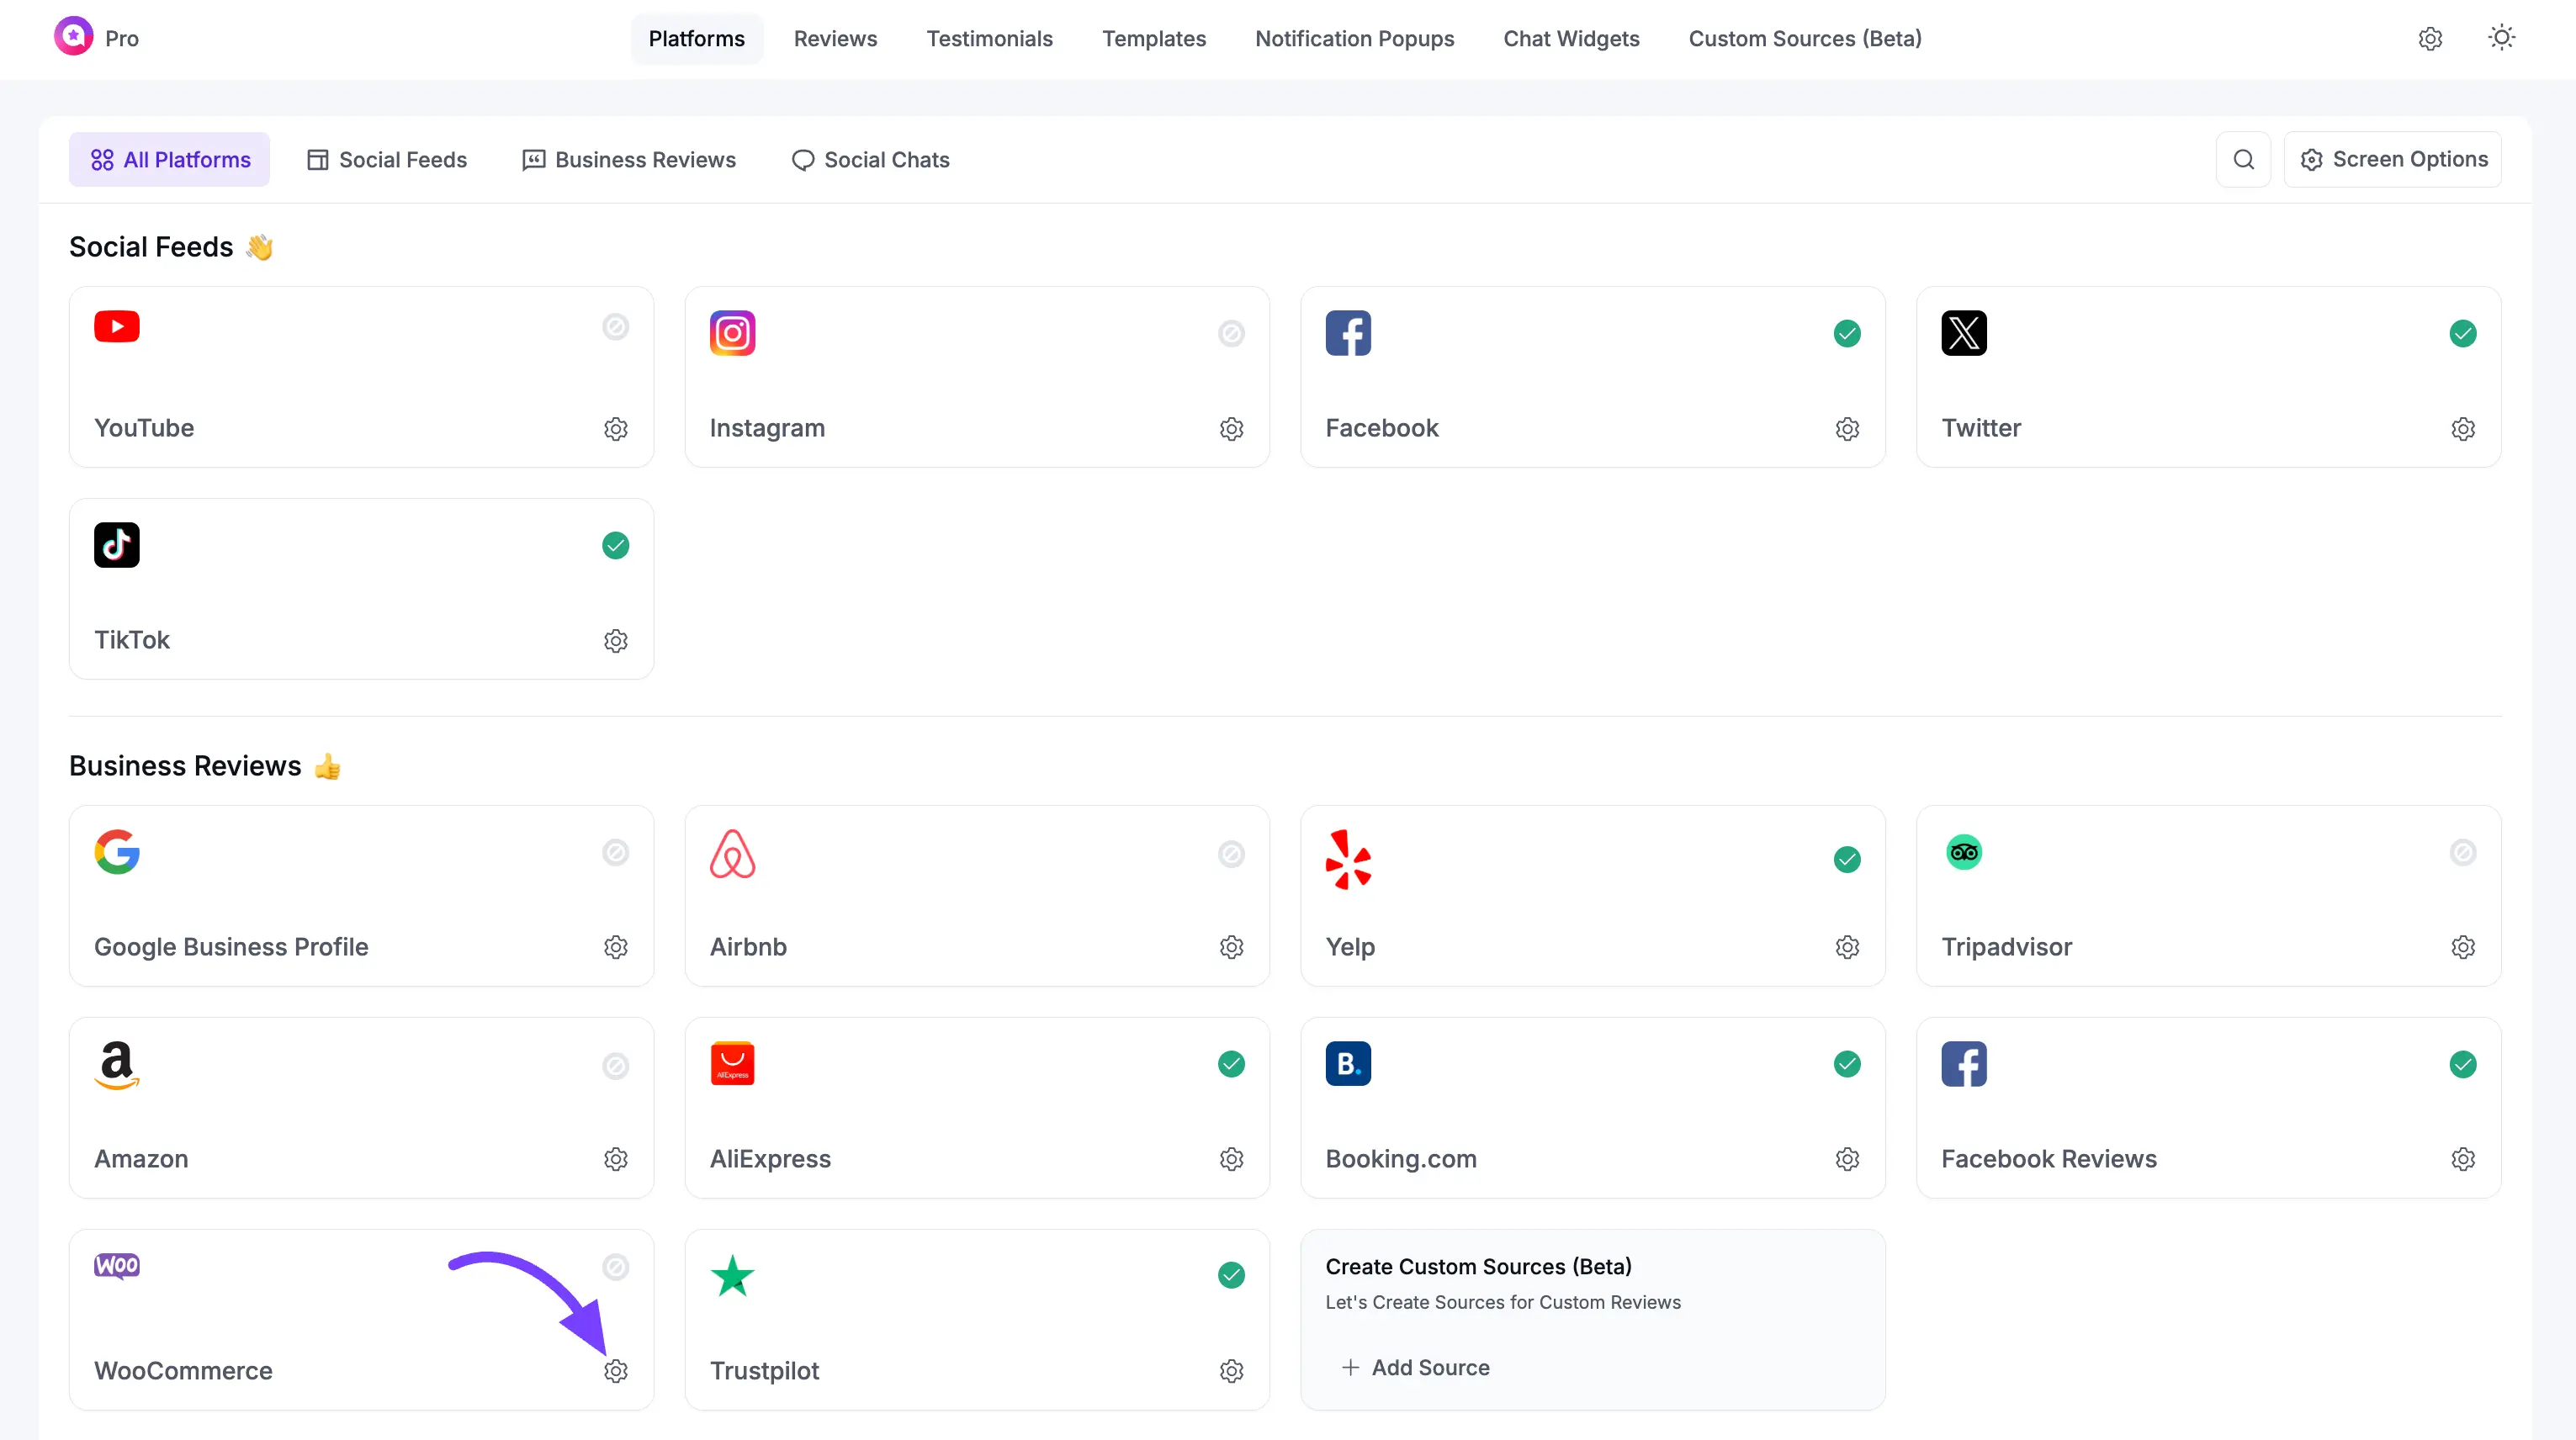
Go to your WP Social Ninja plugins Platforms section and enable the WooCommerce module. Then click on the Settings icon in the right corner.
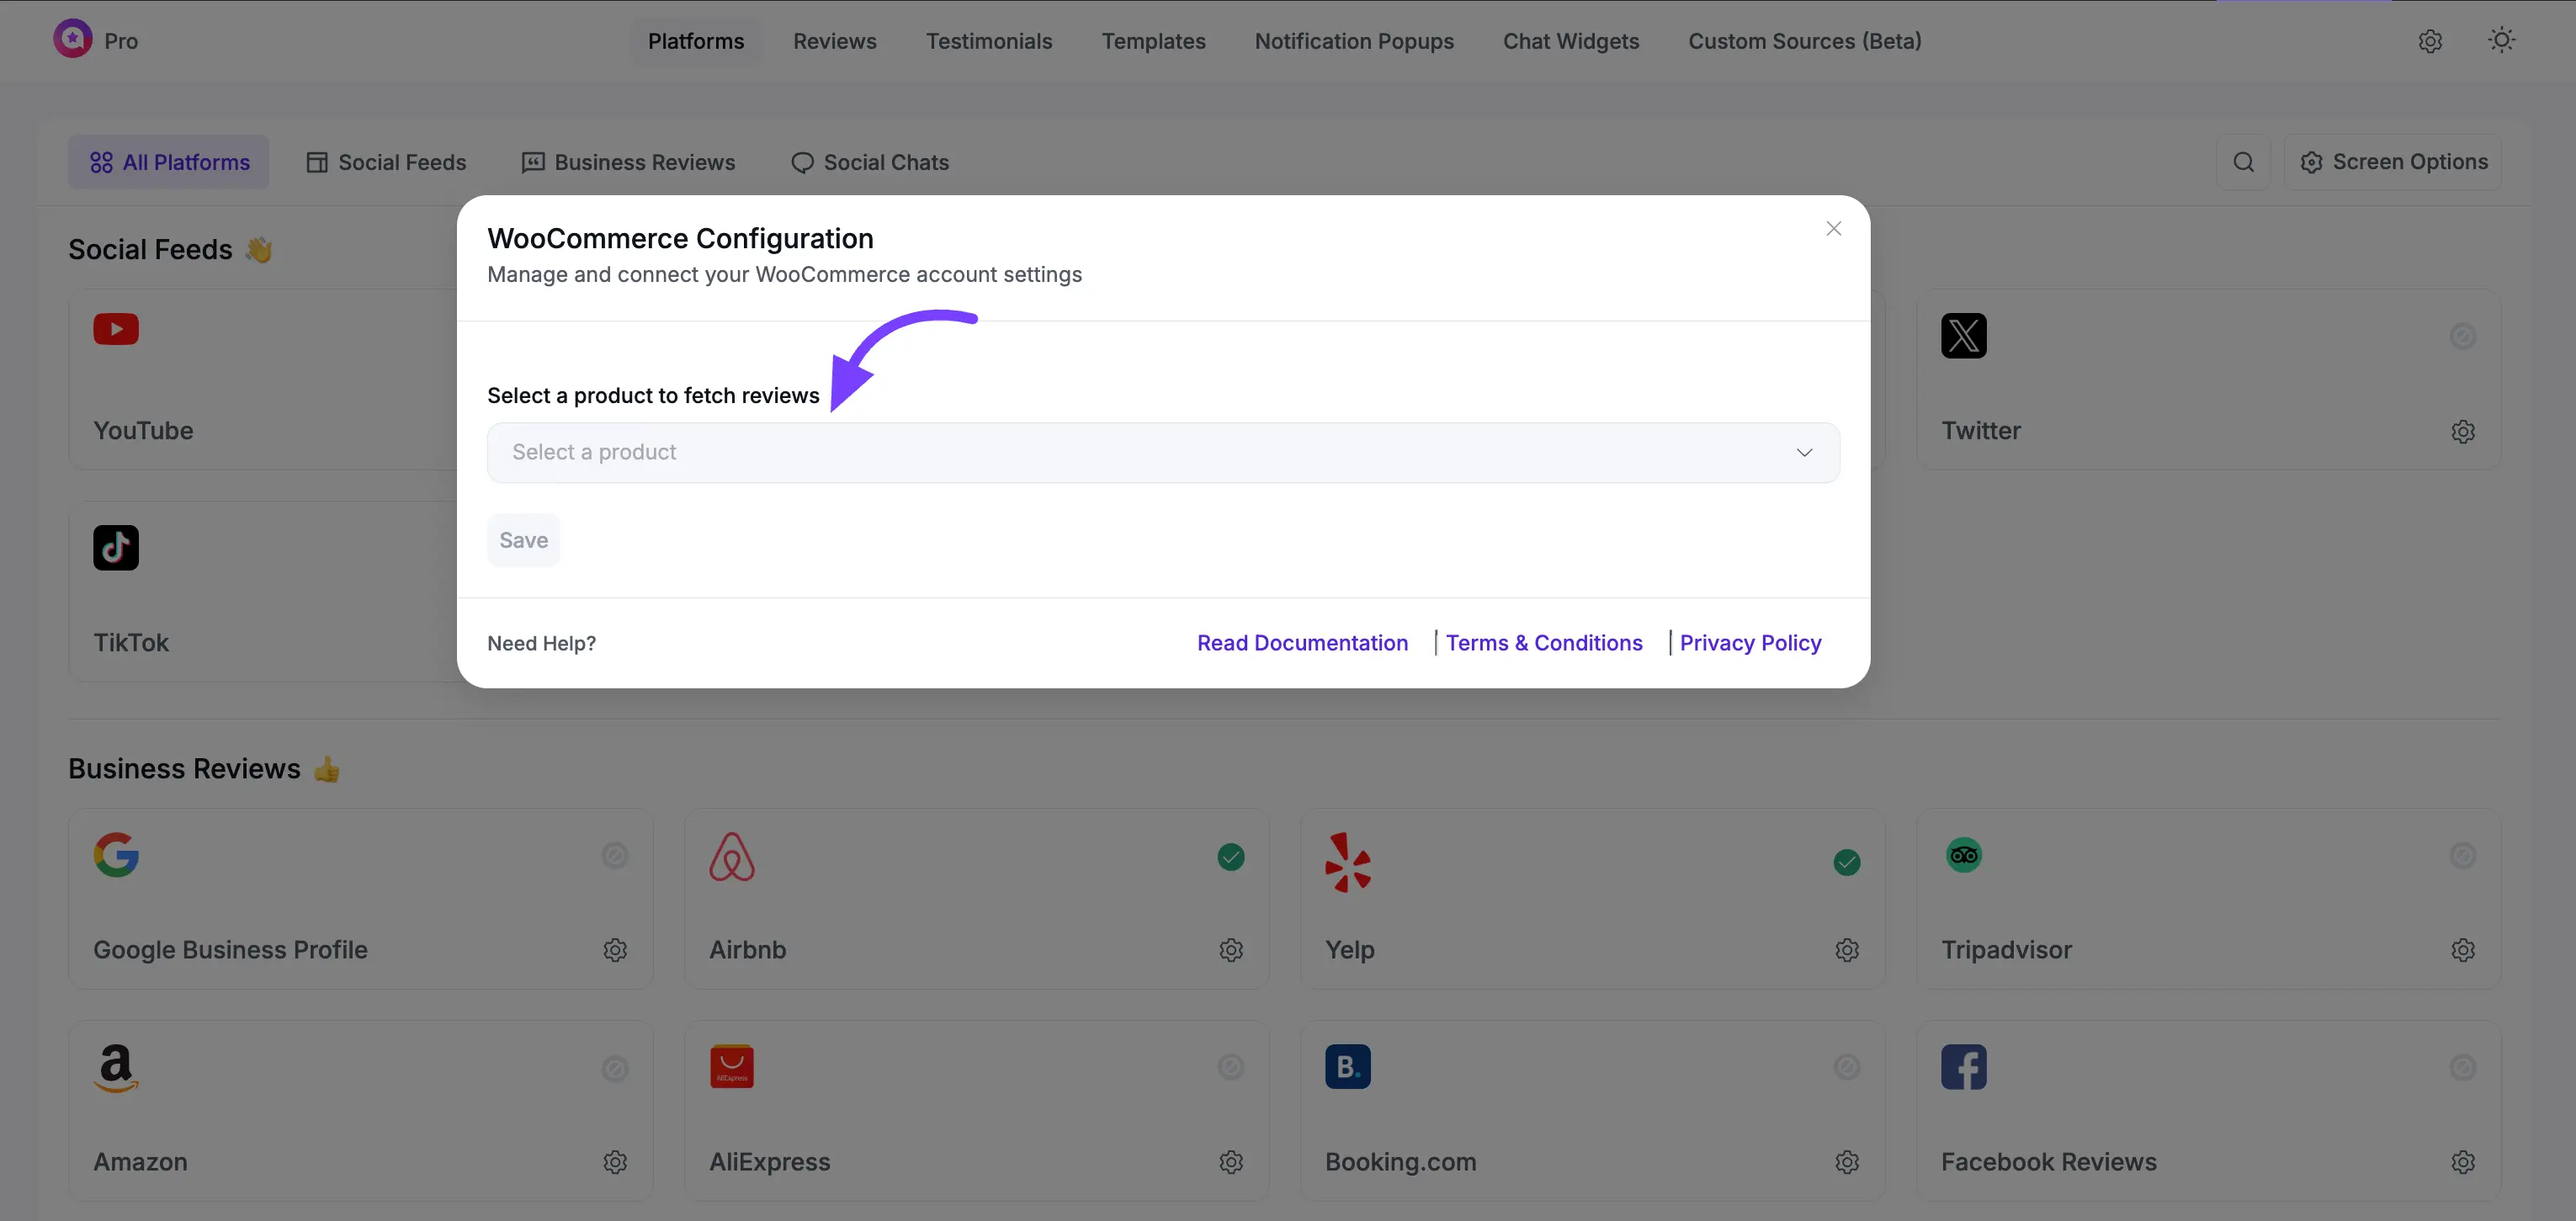
After clicking on the settings icon, a pop-up will appear. Now select your WooCommerce products from here to show their reviews on your site.
INFO
Make sure that you have installed the WooCommerce plugin on your site and that you have at least one product with a review.
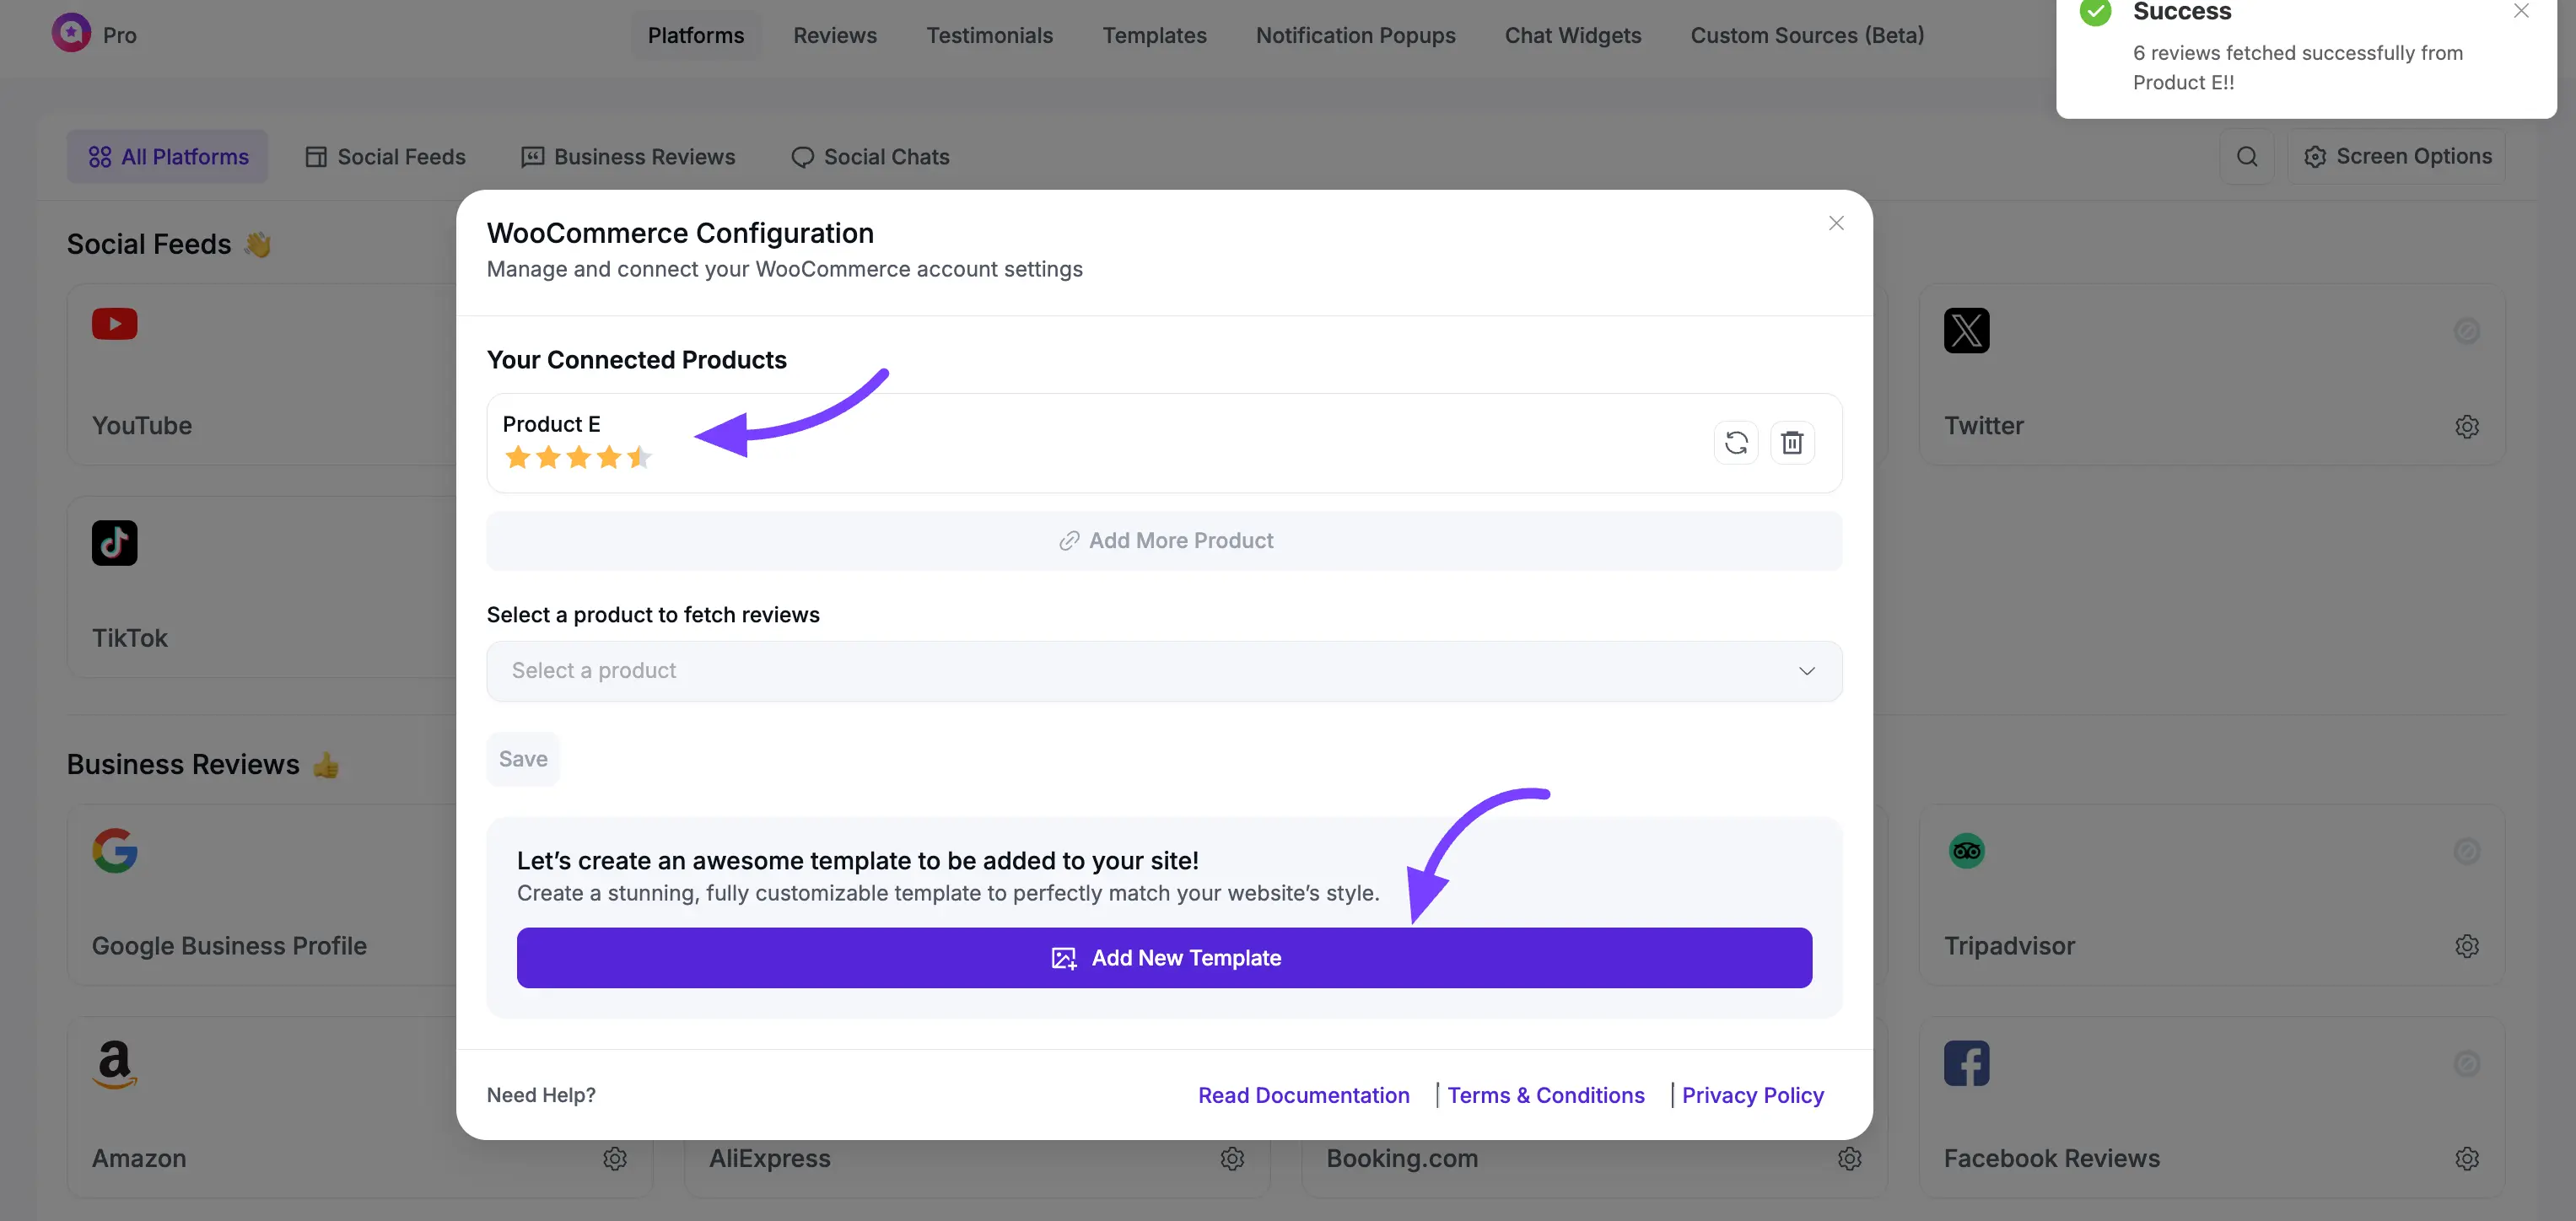
Click the Add More Product button to include multiple product reviews. From the Select a product to fetch reviews dropdown menu, choose the specific product whose reviews you want to display in a template.
After selecting a product, click the Save button to confirm your choice.
Once you have saved your product selection, click the Add New Template button. This will take you to the template editor, where you can design the layout and style for displaying the fetched reviews on your website.
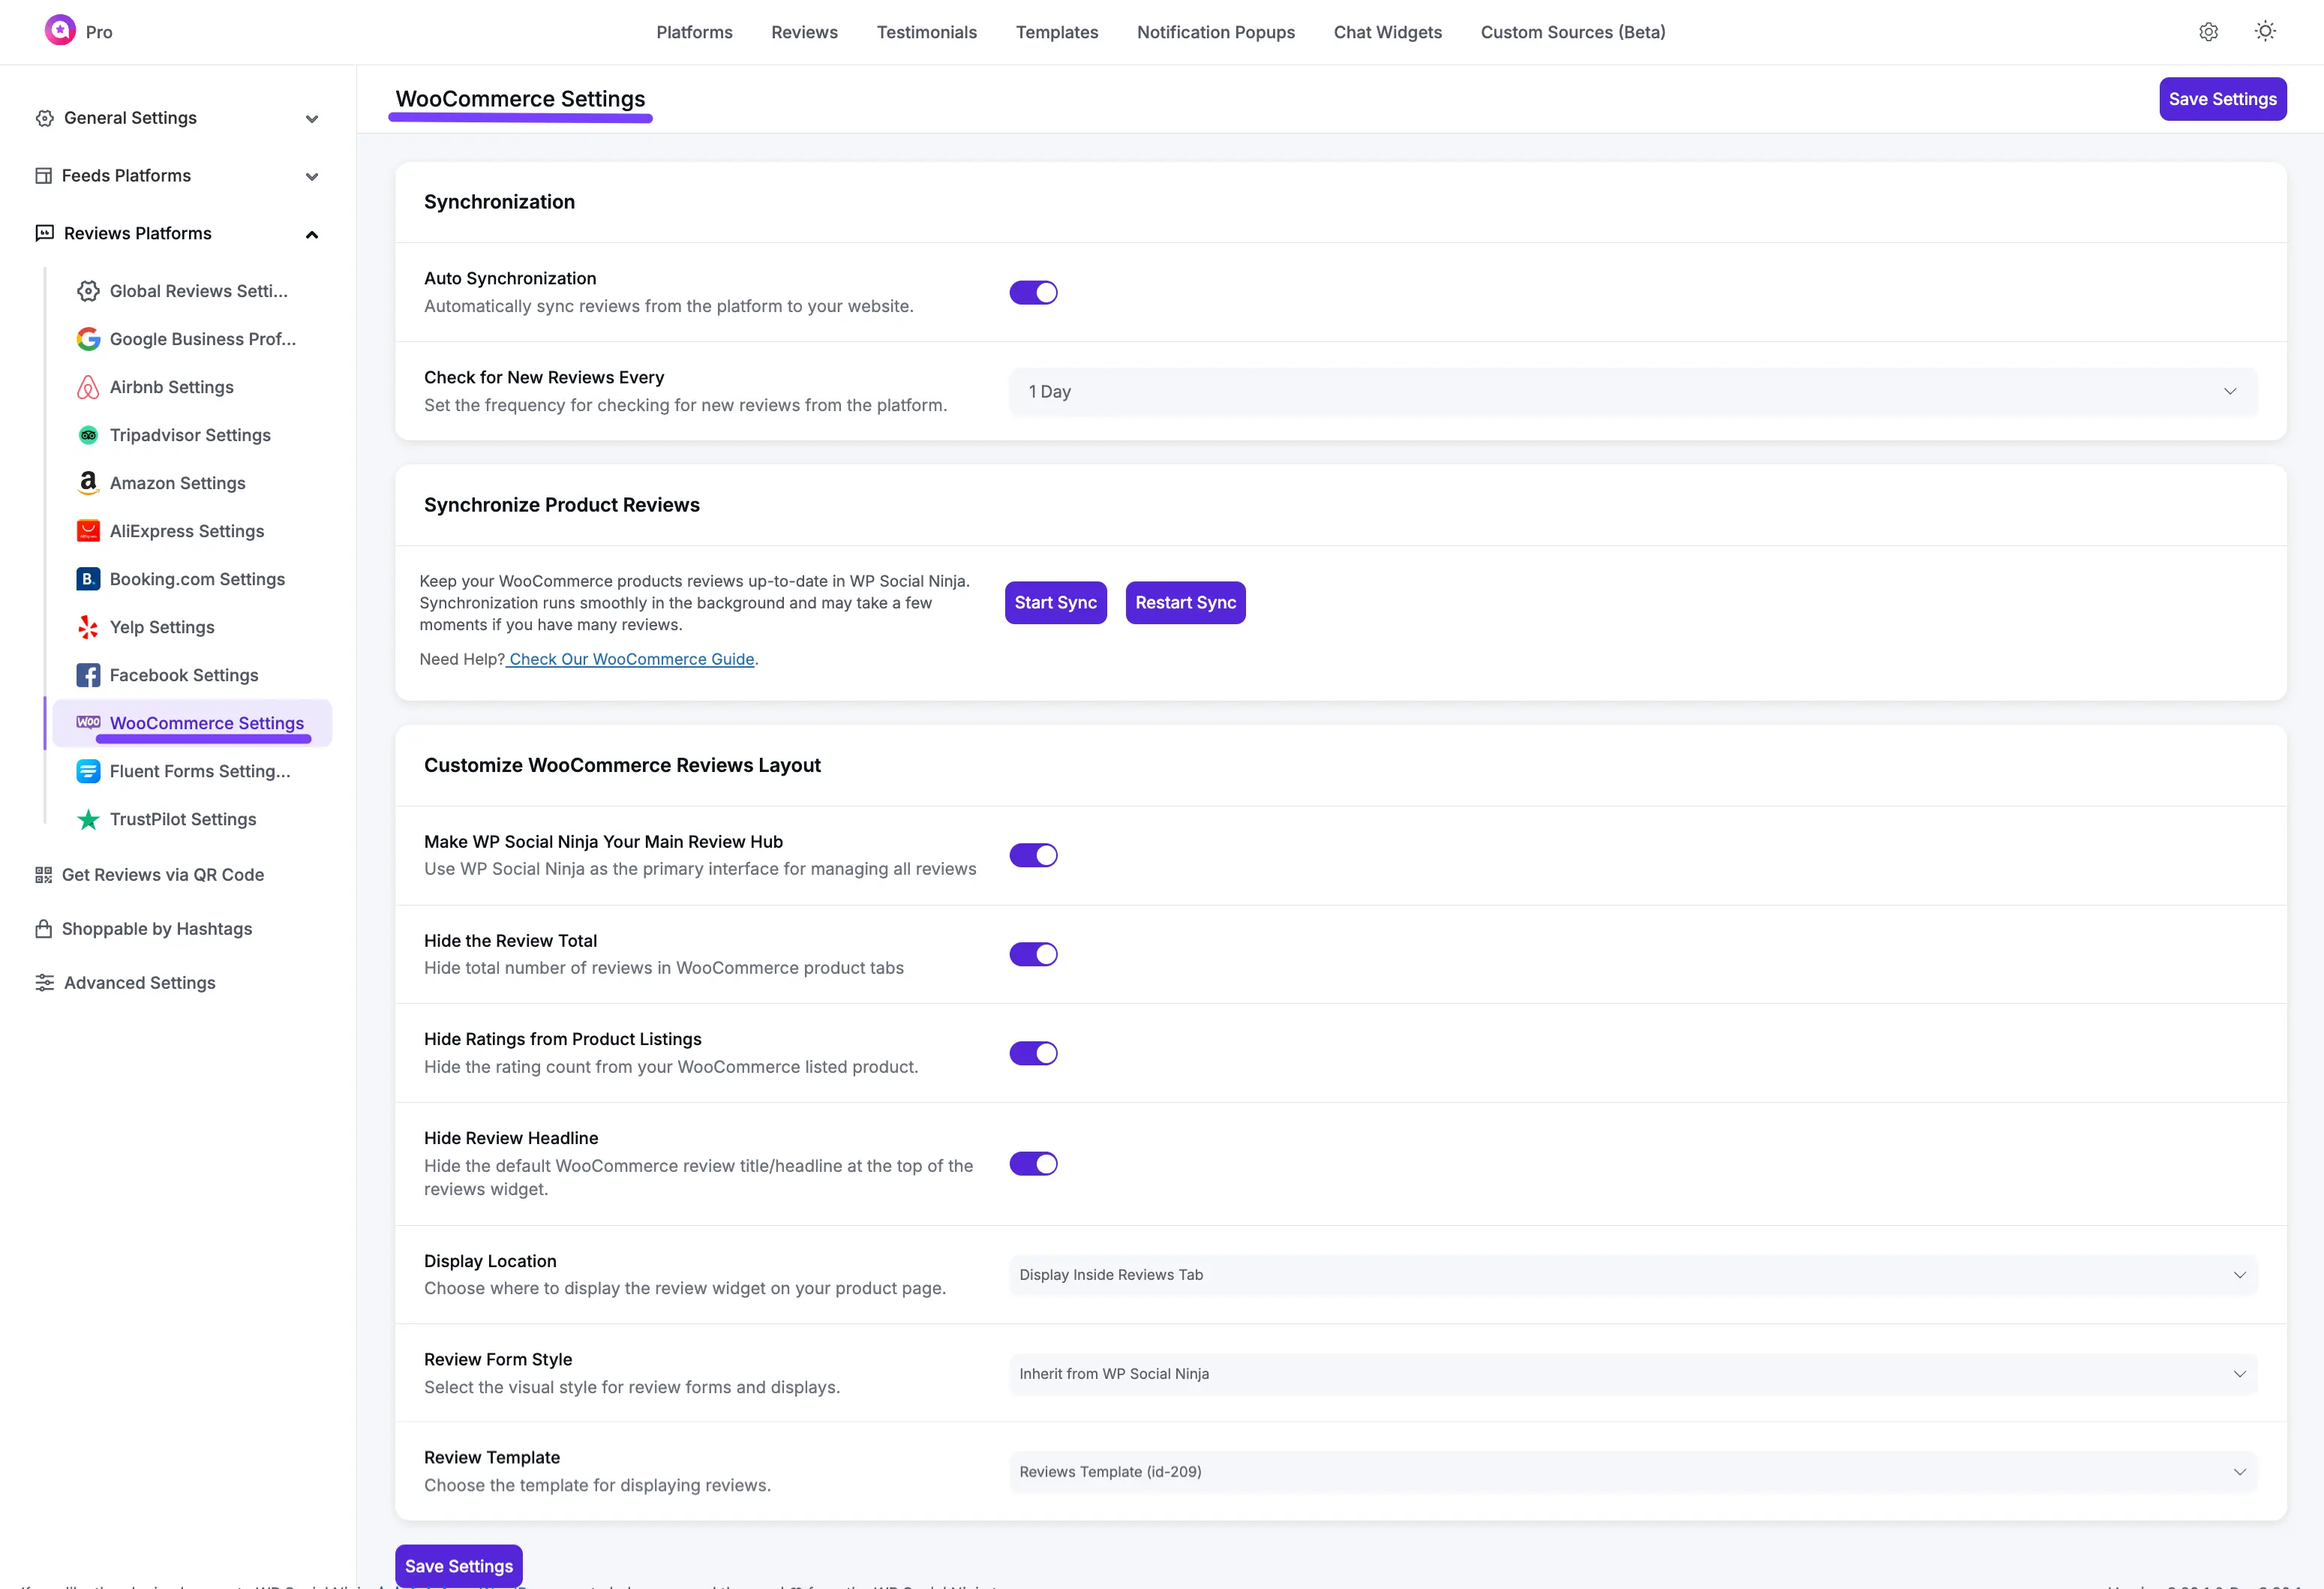
Global WooCommerce Review Settings
These settings allow you to control how reviews are collected and displayed across all your WooCommerce products. They apply to every product by default, but you can override them on individual product pages.
Note: These review settings will only apply to products that are connected with a WooCommerce Review Template in WP Social Ninja. If a product is not included in a template, these settings won’t take effect.
Auto Syncing: Enable this to automatically fetch new reviews submitted through WooCommerce. Use the dropdown menu to set how often the plugin should check for new reviews (e.g., every day).
Sync Product Reviews: This button allows you to manually sync all your WooCommerce product reviews at any time. Clicking it will immediately fetch any new reviews from your products and add them to WP Social Ninja. This is useful if you have just received new reviews and don't want to wait for the next scheduled auto-sync.
Make WP Social Ninja Your Main Review Hub: When enabled, WP Social Ninja takes control of your review display, replacing the standard WooCommerce review style with your selected WP Social Ninja template.
Hide the Review Total: Enable this option to hide the summary text that shows the total number of reviews (e.g., "Based on 15 Reviews").
Hide ReviewHeadline: Enable this to hide the main heading (e.g., "Reviews") from the top of the reviews section on your product pages.
Display Location: This dropdown lets you choose where the review template will appear.
Display Inside Reviews Tab: Places reviews inside the default WooCommerce "Reviews" tab.
Display Outside Tabs: Places reviews outside of the tabbed content area.
Reviews FormStyle: Select which form visitors will use to submit reviews.
Inherit from WP Social Ninja: Uses the custom form you have styled globally.
Default Woocommerce Form: Uses the standard, unstyled WooCommerce form.
Review Template: Choose the default review template that will be applied to all WooCommerce products across your site. This serves as the primary template for your entire store.
After configuring these options, always click the Save Settings button to apply your changes.
Enabling Template from WooCommerce product
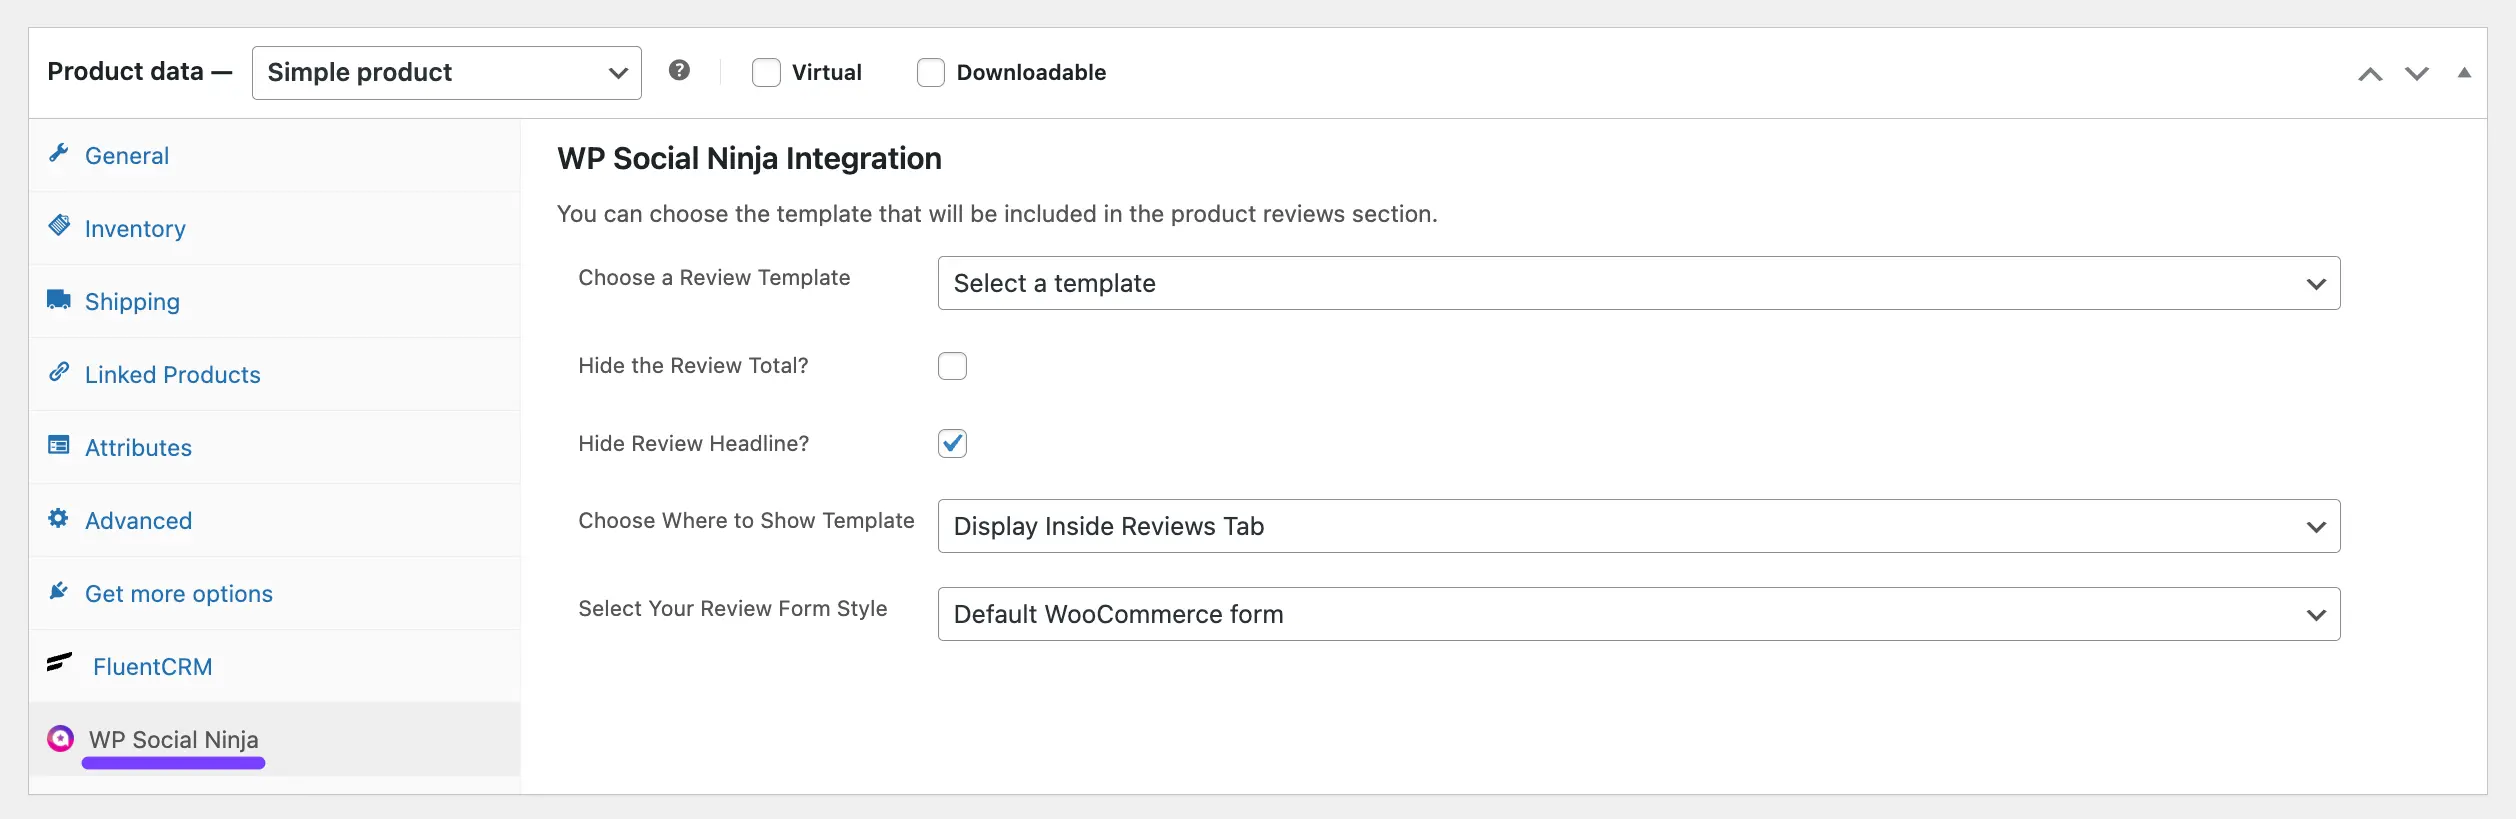
To customize your product reviews in WooCommerce, go to the specific product you want to edit. Click on Edit then go to the Product Data section and select WP Social Ninja.
These settings on the WooCommerce product page let you control how reviews are displayed for this specific item.
Select a Template: Choose a WP Social Ninja template to control the visual style and layout of the reviews on this product page.
Hide reviews total?: Enable this checkbox to hide the total number of reviews from being displayed.
Hide reviews headline?: Enable this checkbox to hide the "Reviews" heading above the review section.
Template placement: Select where the review template will appear. The default is typically within the WooCommerce "Reviews" tab.
Reviews Form: Choose which review submission form to use. You can select the form from your global WP Social Ninja settings or use the default WooCommerce form.
Reviews Notification Popup
You can also set a pop-up notification of WooCommerce product reviews on your site. The pop-up review notification will show up on your font end site like this.
Go to your Notification pop-settings from WP Social Ninja Dashboard and select Notification Popups then select the WooCommerce platform from the General tab platform option.

By following these steps, you can integrate WooCommerce product reviews into your website using WP Social Ninja, enhancing your user experience and showcasing valuable customer feedback.