Appearance
Facebook Reviews
This guide will show you how to easily connect your Facebook Page to WP Social Ninja's Business Reviews feature. Once connected, you can pull in all your customer reviews to display on your website, building trust and social proof.
This process is very simple and uses the recommended "OAuth" method, which means you just need to log in to your Facebook account and give permission. There are no complicated developer keys needed.
Use Case: This is the first and most important step for displaying your Facebook Reviews. Once you connect your page, you can create a beautiful Business Reviews template to show off your 5-star ratings, helping to convince new customers that your business is trusted and legitimate.
How to Connect Your Facebook Page
Follow these simple steps to get your page connected in less than a minute.
Step 1: Go to Platforms
First, go to your WordPress dashboard. In the left-hand menu, click on WP Social Ninja, and then select the Platforms sub-menu. This is your main hub for connecting all your social accounts for feeds and business reviews.
Step 2: Choose Your Connection Method
On the "Platforms" page, find the Facebook row. On the right side, click the Settings icon button.
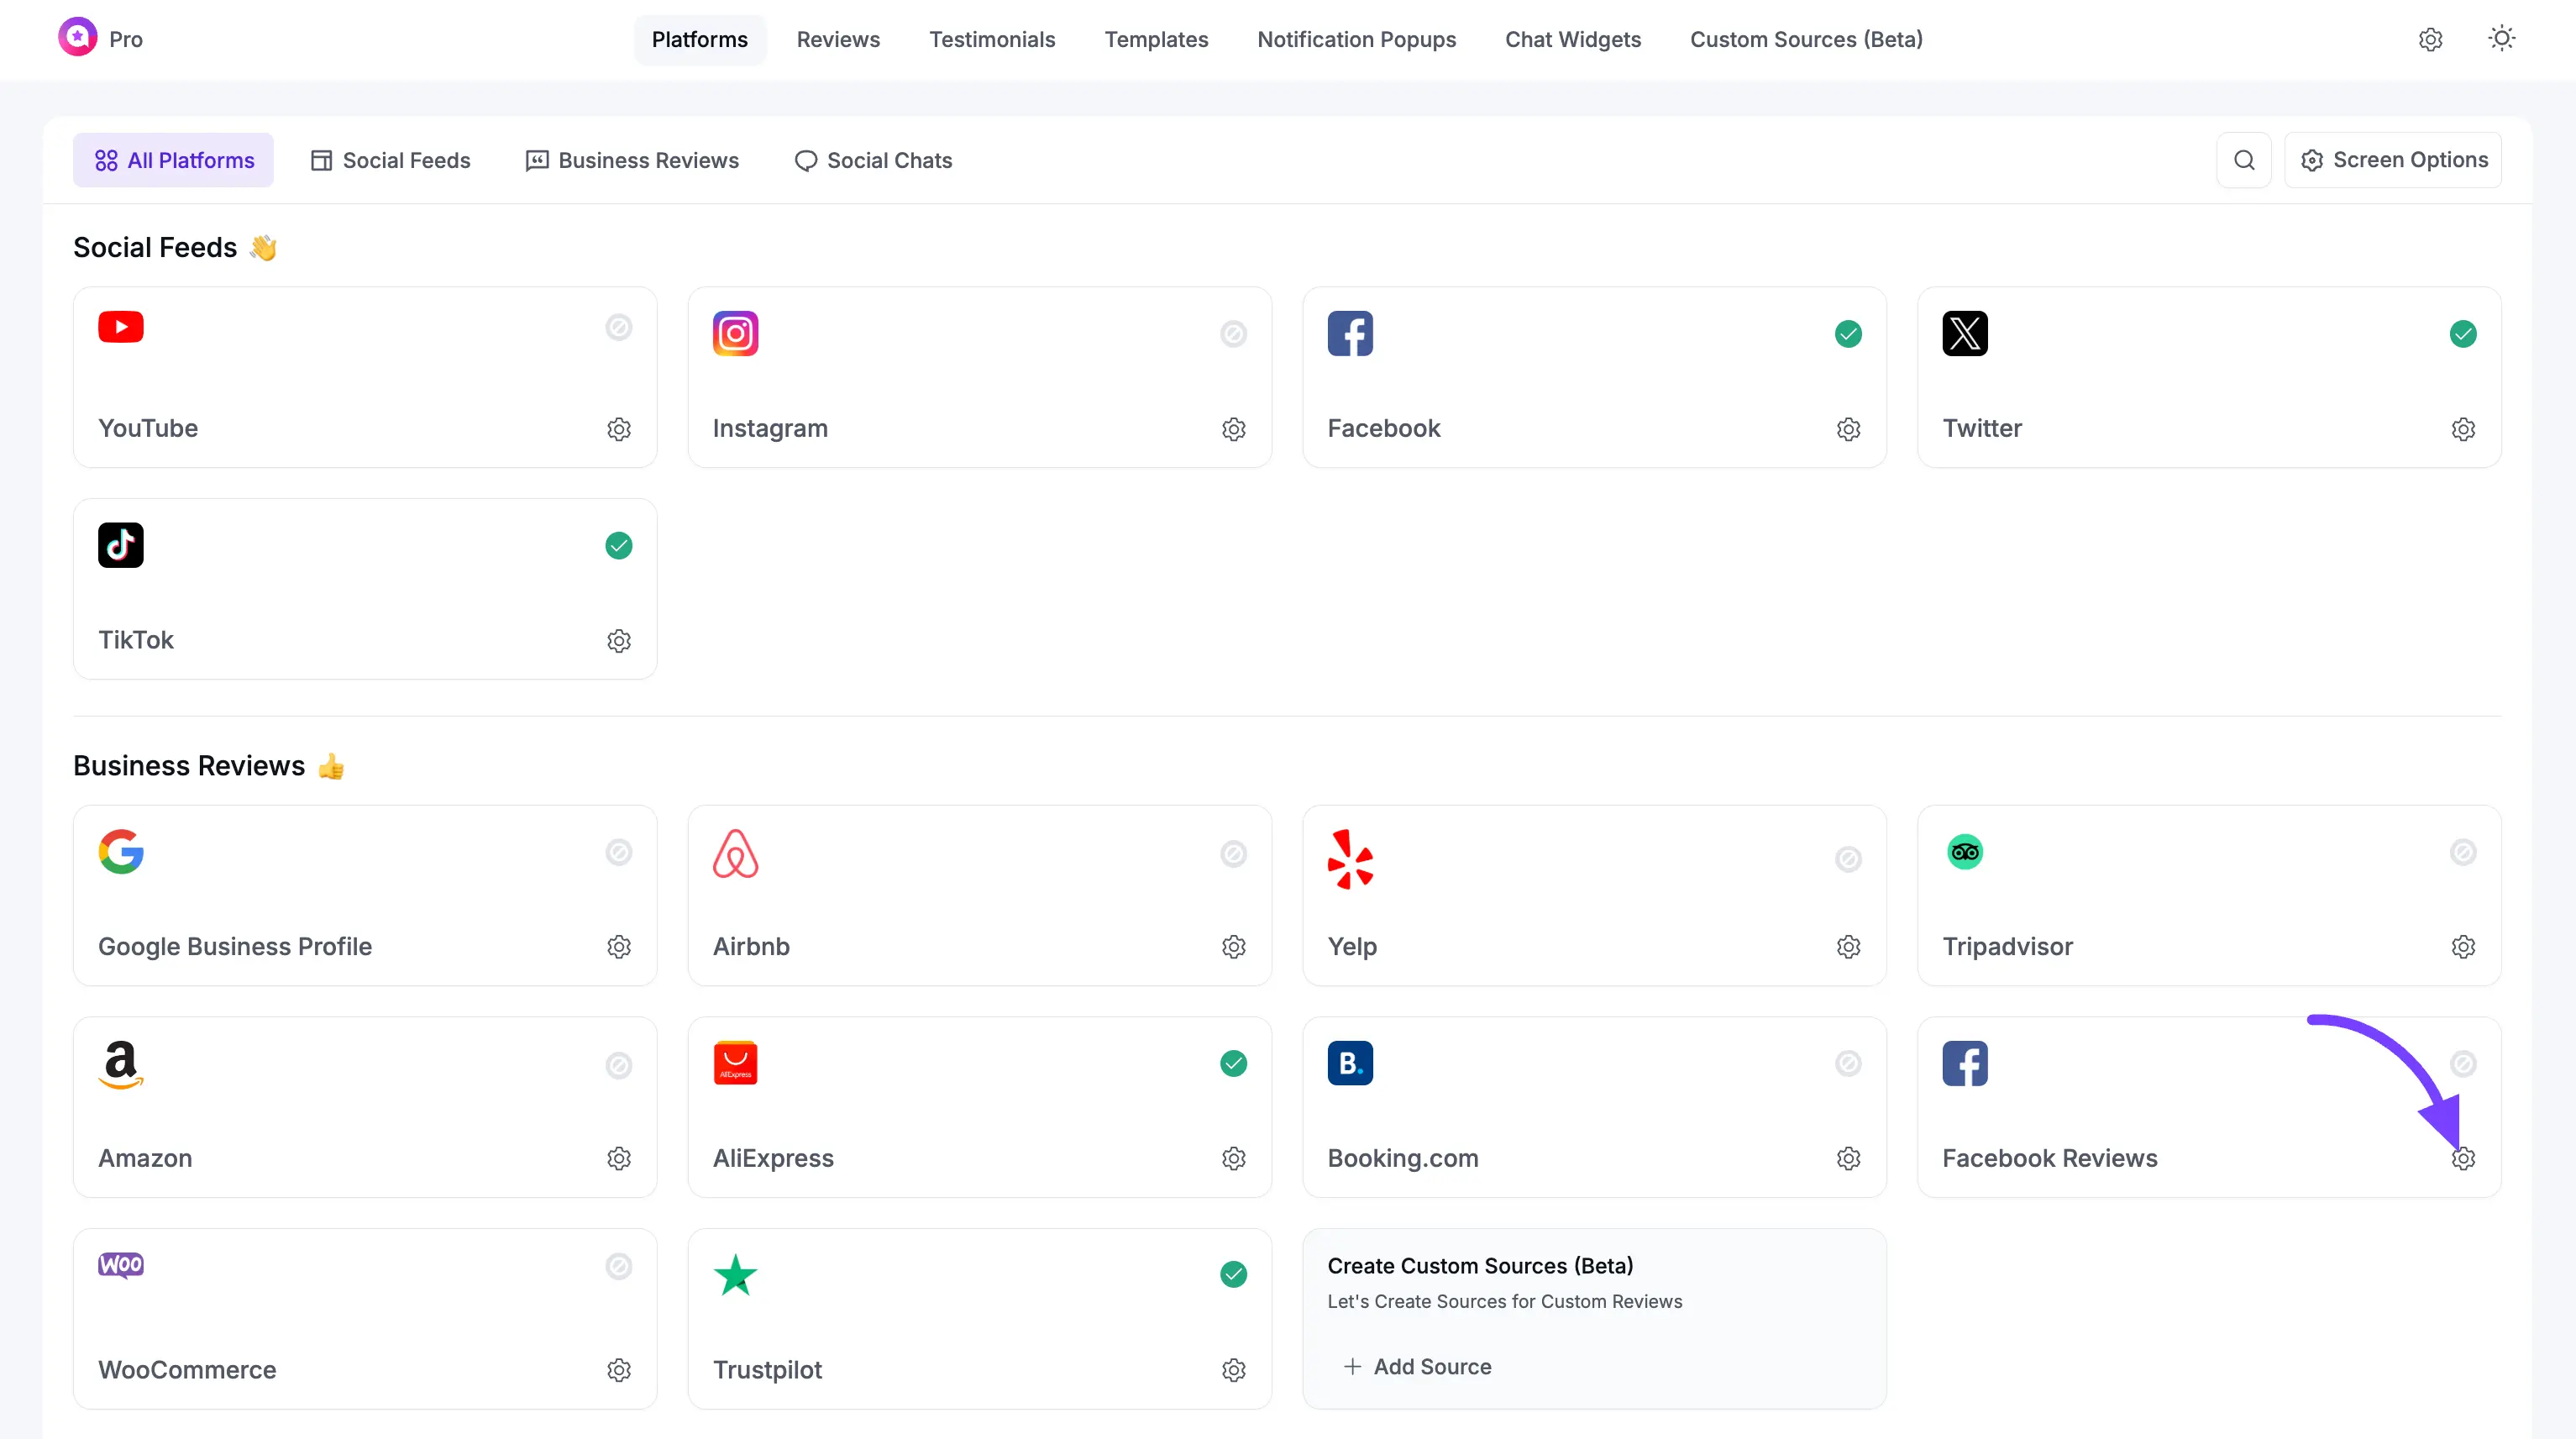
A pop-up window will appear asking you to "Select Credential Type." You have two choices OAuth 2.0 and Manually Connect a Page. In this guide we will show you the OAuth 2.0 connection process. To manually connect your Facebook Page follow this documentation.
For the easiest and fastest setup, select the first option: OAuth 2.0 (Recommended).
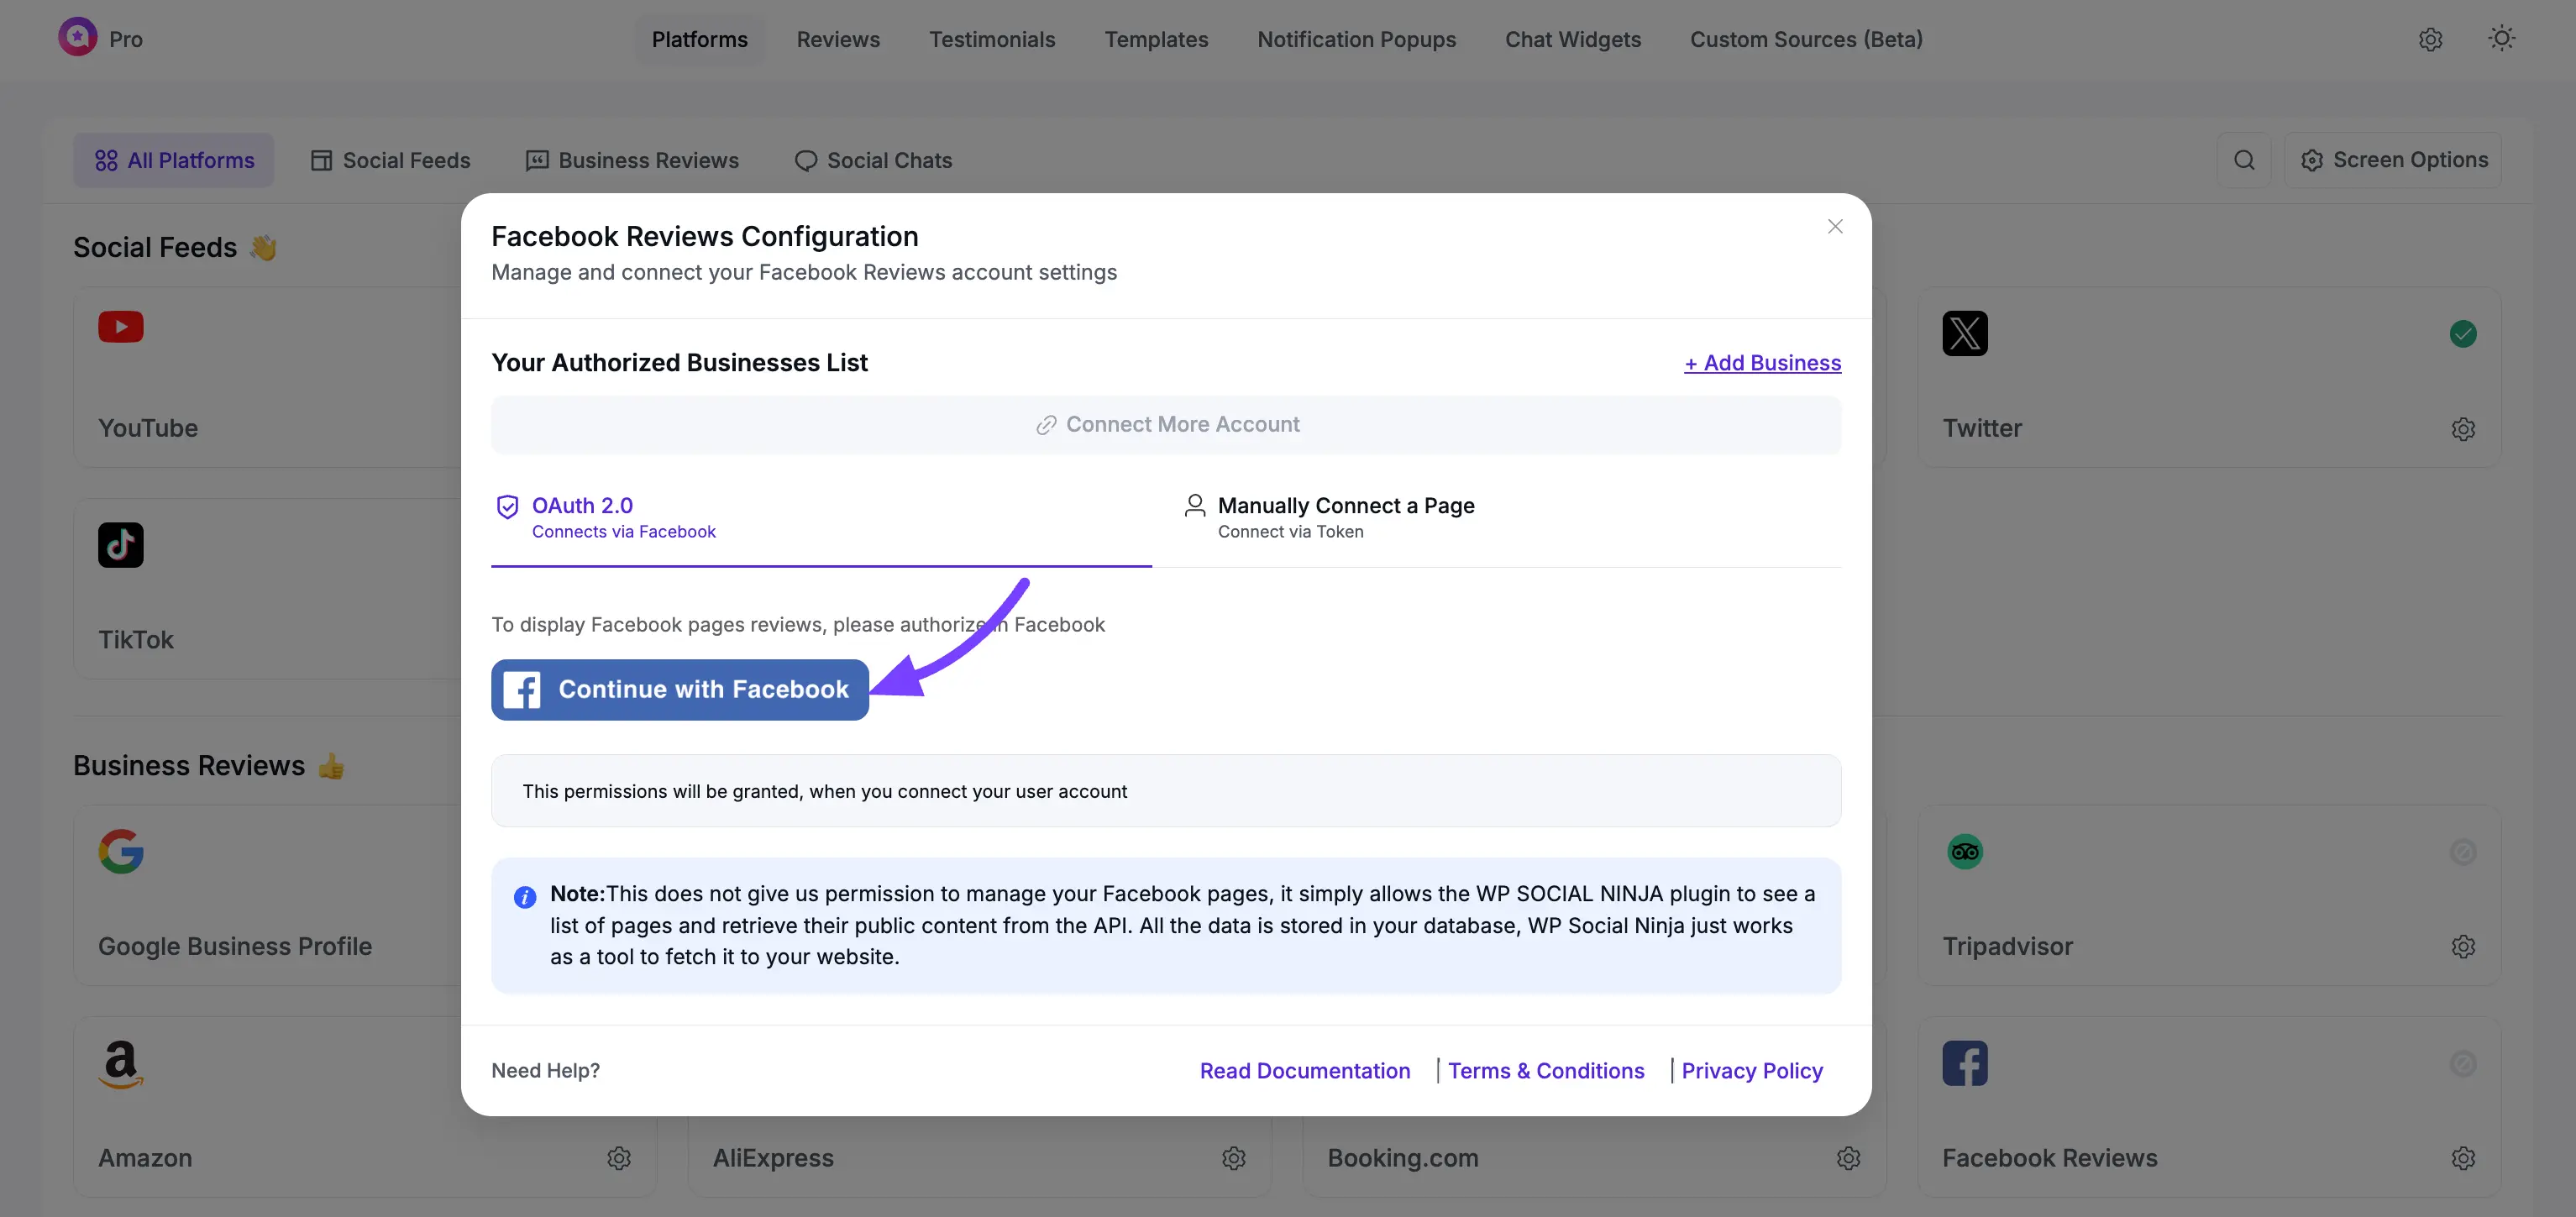
Step 3: Authorize Your Facebook Account
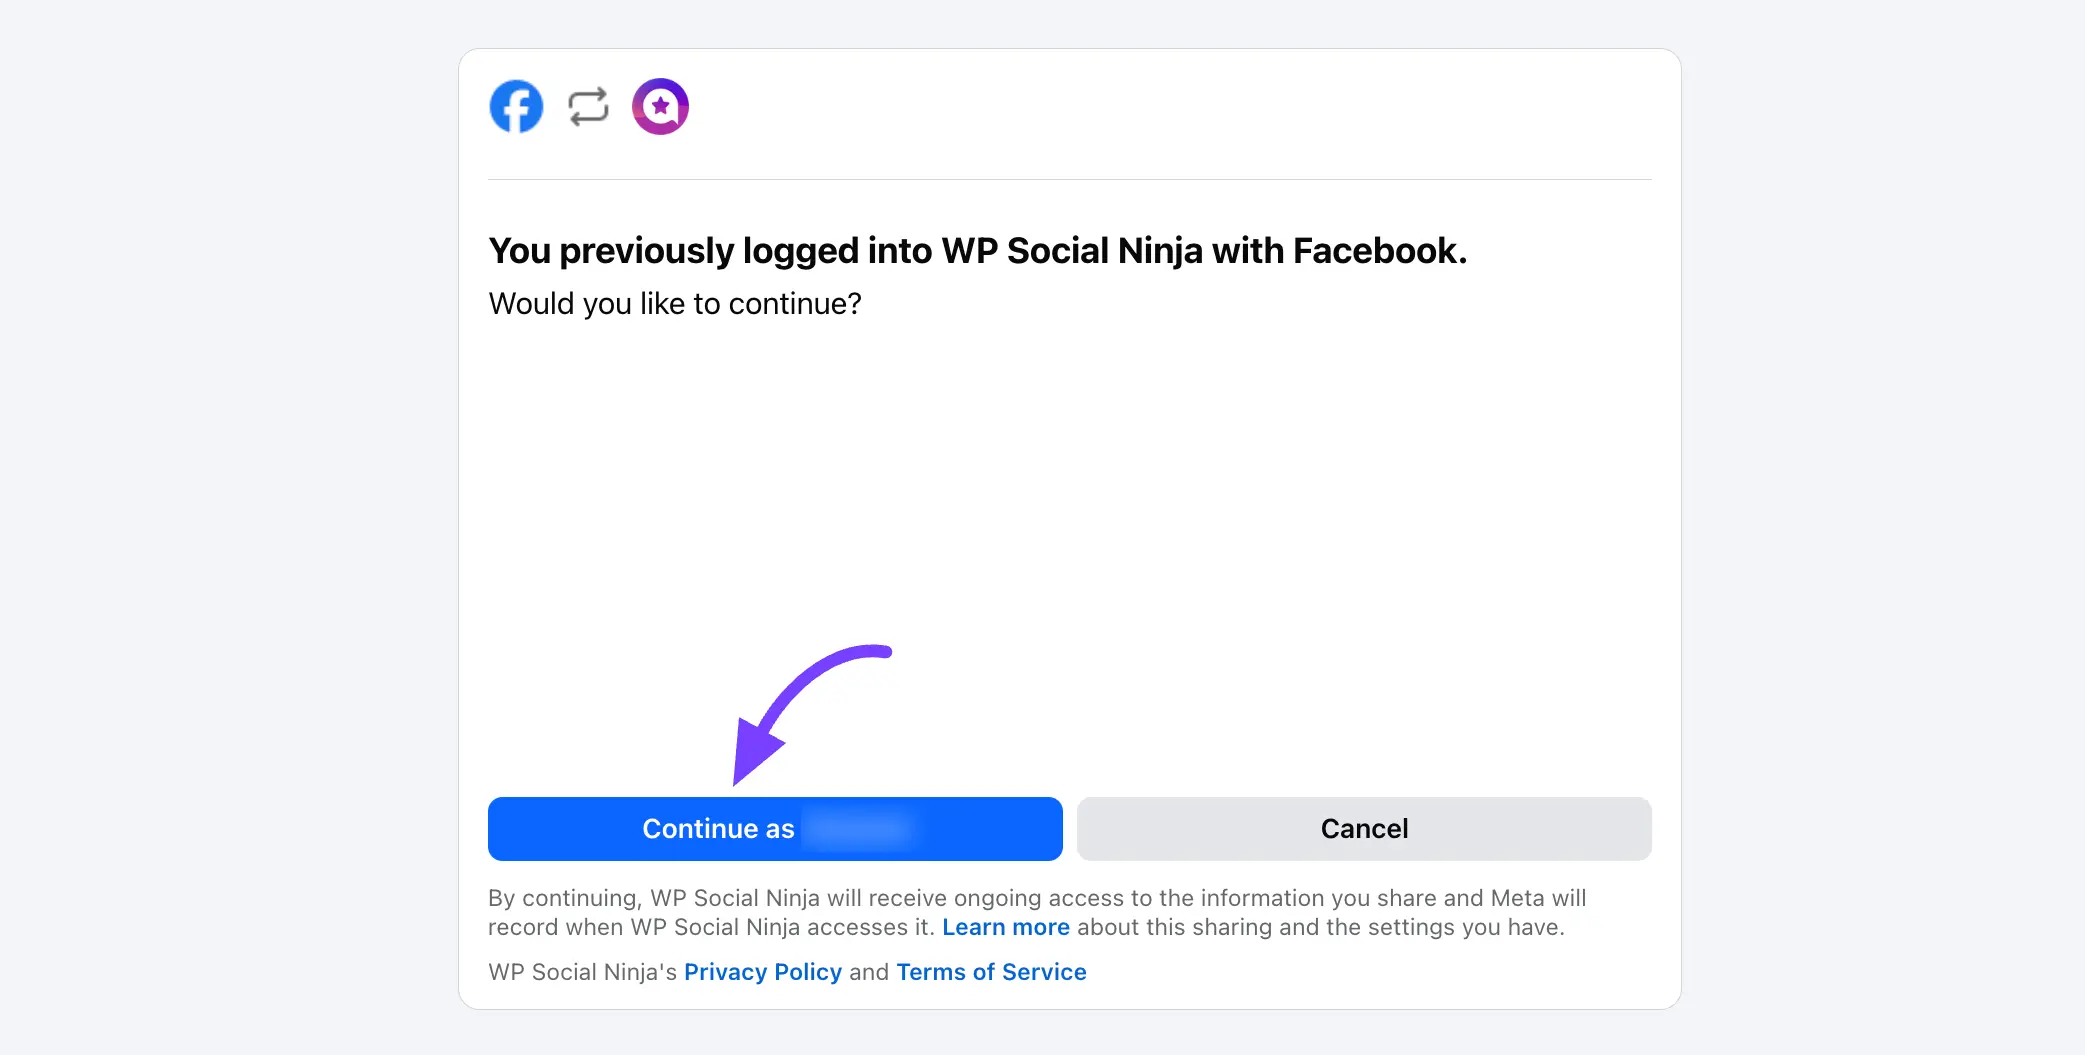
After you select the recommended method, a new Facebook pop-up window will open. This is a secure window directly from Facebook.
- If you are not already logged in, Facebook will ask you to log in.
- Next, it will ask you to grant permission for "WP Social Ninja" to access your information. Click the "Continue as..." button to proceed. This is a standard and safe process.
Step 4: Select Your Facebook Page(s)
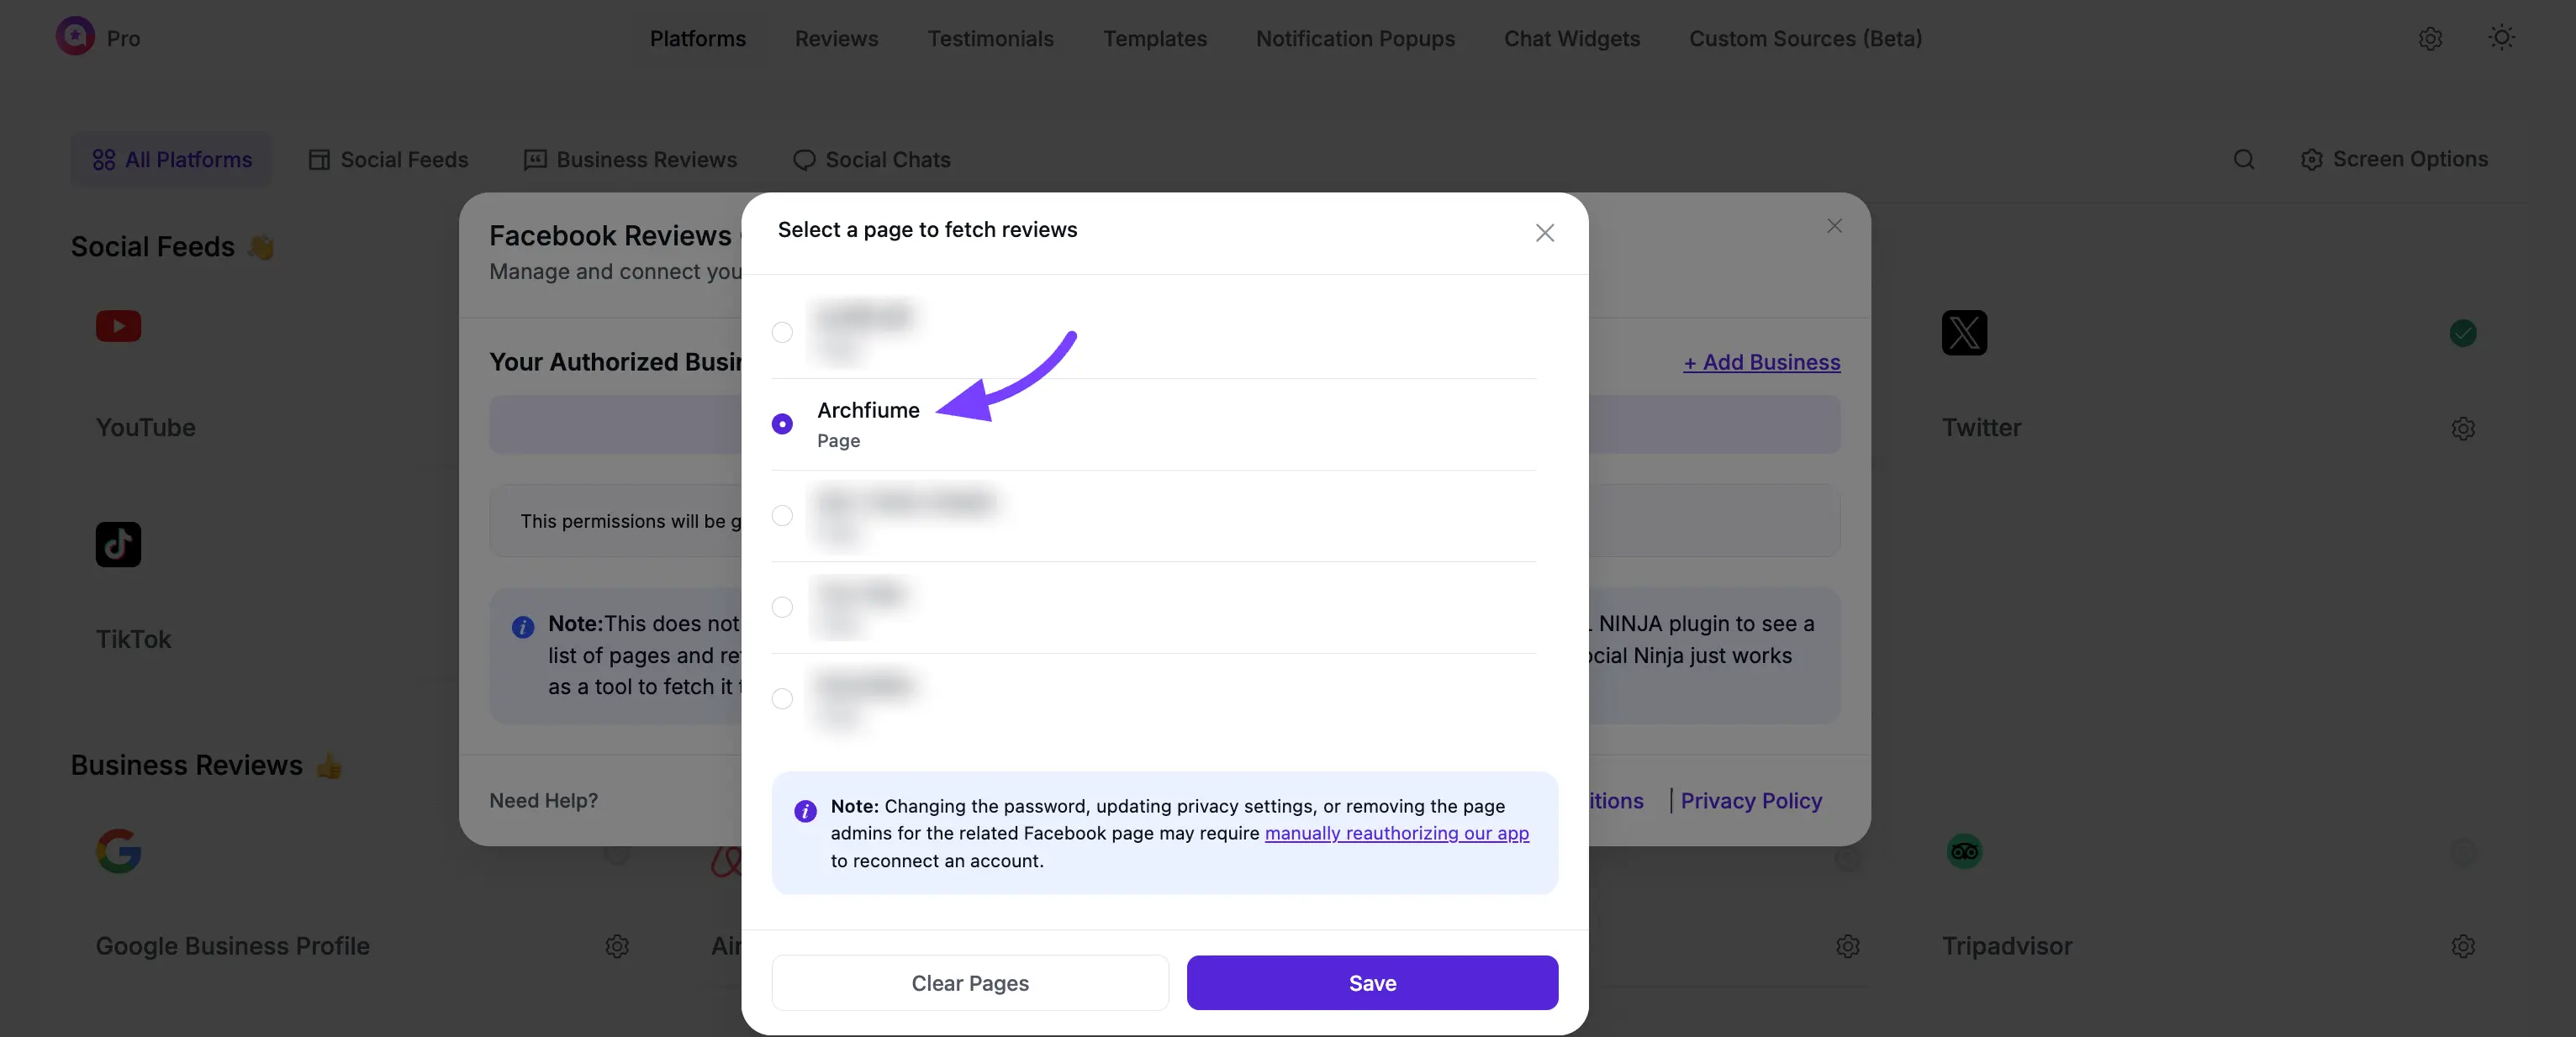
After you grant permission, you will be brought back to a WP Social Ninja pop-up titled Select Page(s).
- This window will show a list of all the Facebook Business Pages that your personal Facebook account manages.
- Find the Page (or Pages) you want to get reviews from.
- Click the checkbox next to each Page you want to connect.
- Once you have selected your Page(s), click the blue Connect Pages button.
Step 5: You're Connected!
The pop-up will close, and you will be returned to the main Platforms page.
You will now see that the Facebook row has a green "Connected" status and lists the Page(s) you just added.
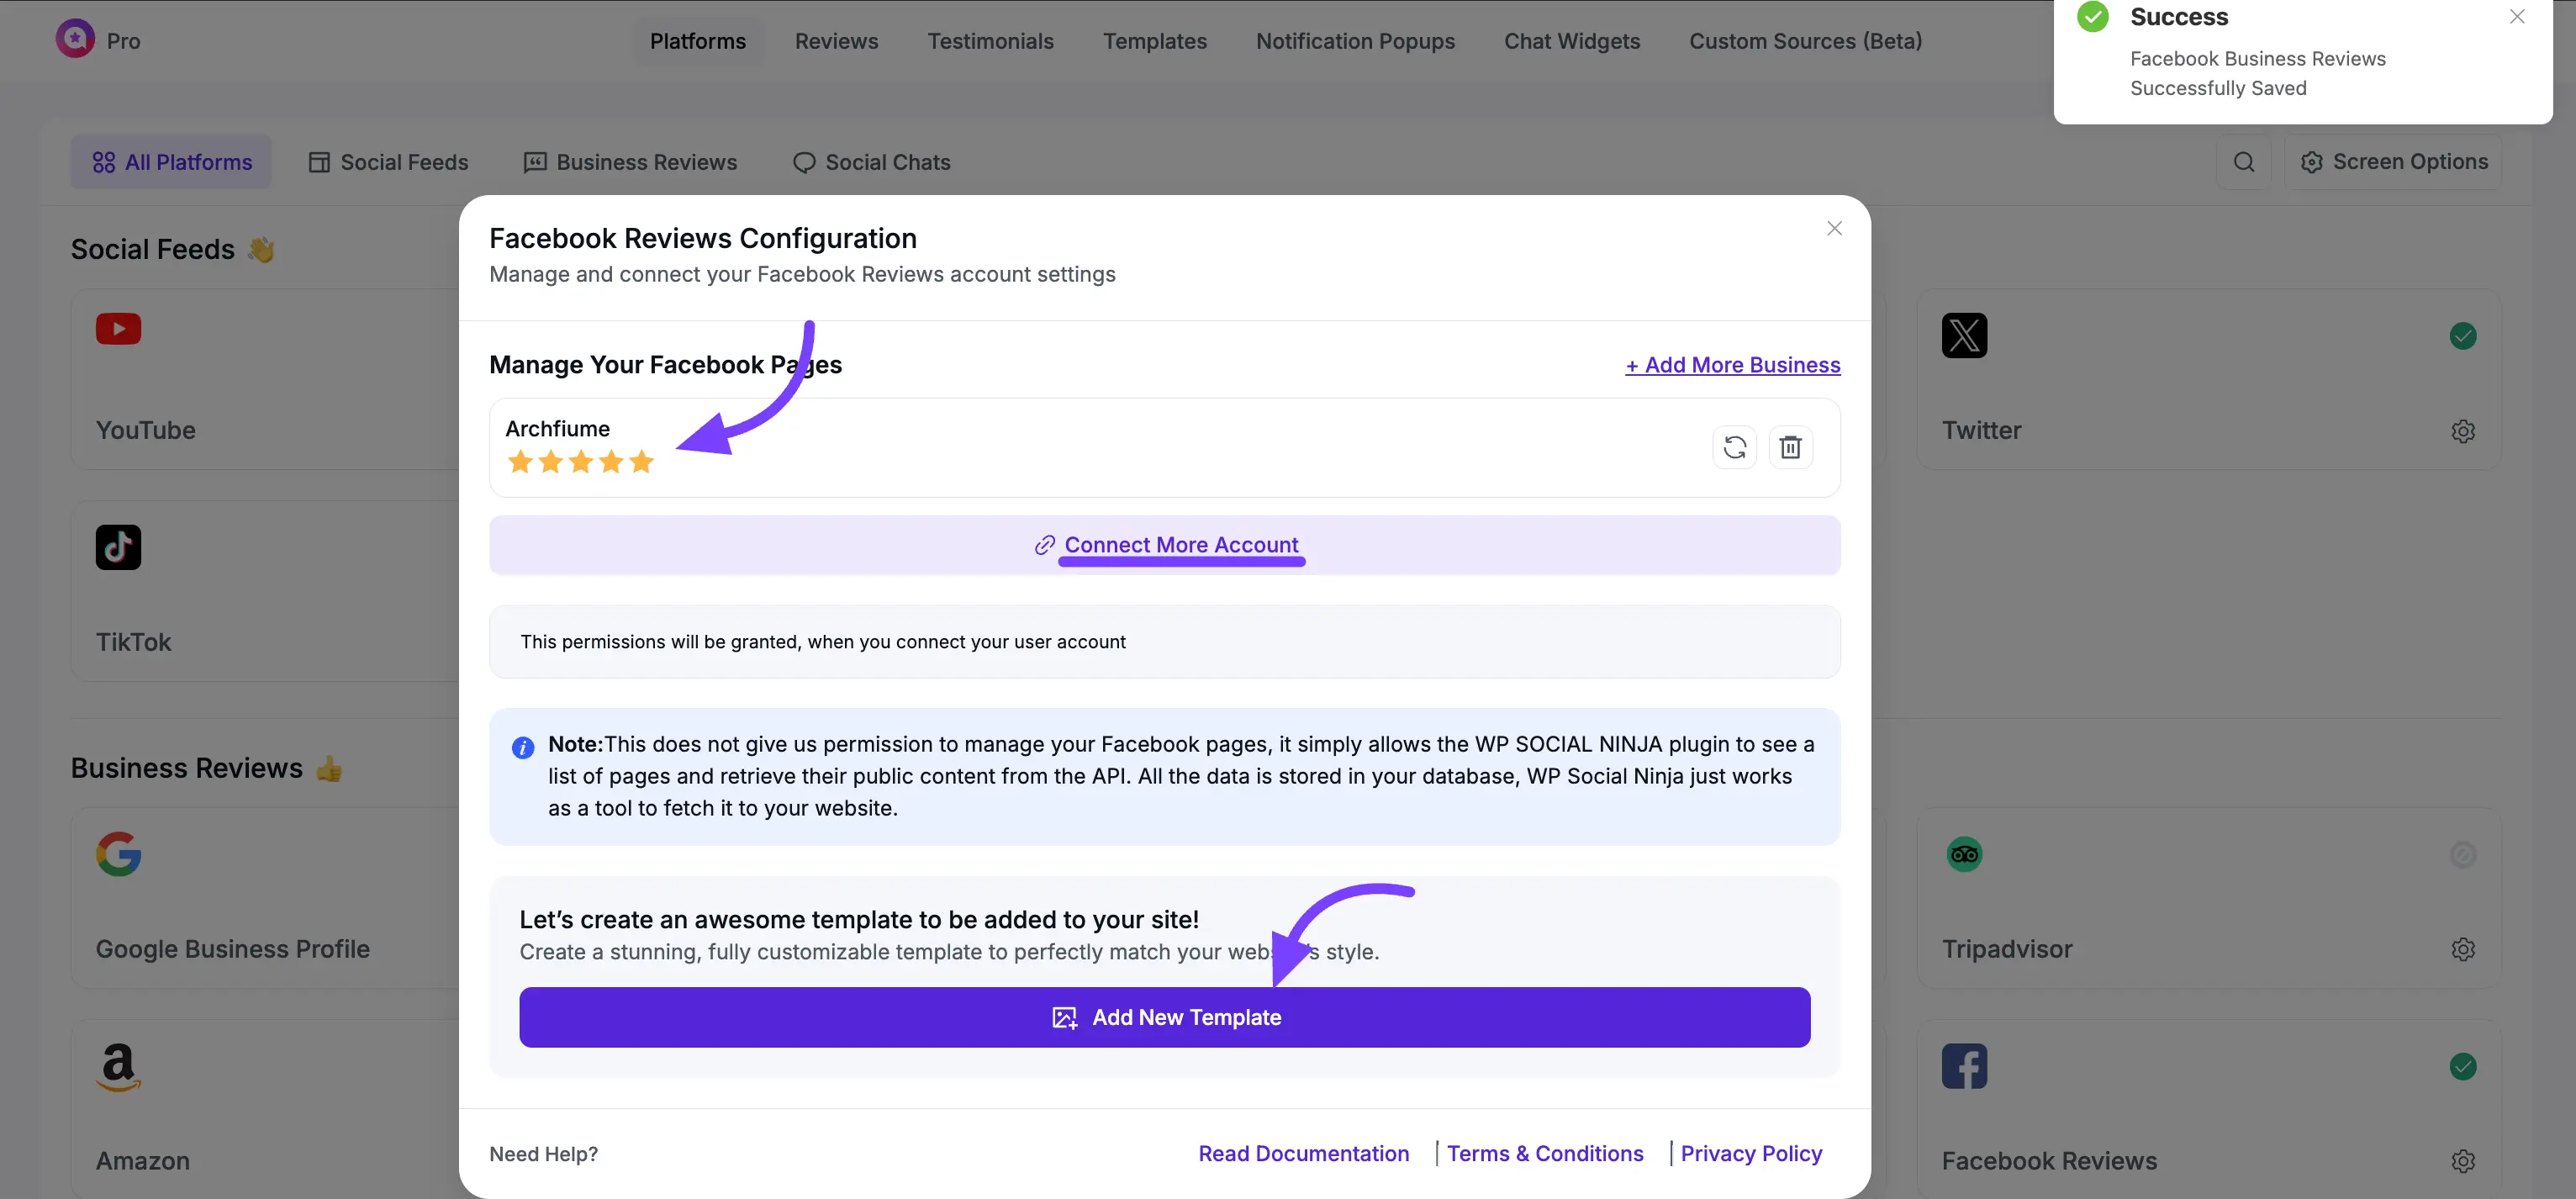
Next Steps
Congratulations! Your Facebook Page is fully connected and ready to sync reviews.
Now that your account is connected, you're ready for the fun part:
- Click the Add New Template button to go to the template editor and start designing your Business Reviews template for Facebook.
- If you manage pages under a different Facebook account, you can click the Connect More Account button to repeat this process and add those as well.