Appearance
Twitter Configuration
This guide will show you exactly how to connect your X (Twitter) account to WP Social Ninja. This allows you to display your latest tweets and feed activity directly on your website.
To connect your account, you will first open the X (Twitter) settings inside WP Social Ninja. The plugin will ask you for specific "credentials" (like an API Key or Token). We will then show you exactly where to find these keys by creating a simple "App" in the X (Twitter) Developer Portal.
We will walk you through every step.
Start the Connection in WP Social Ninja
This is the first step. You will begin inside your WordPress dashboard to see what information you need to find.
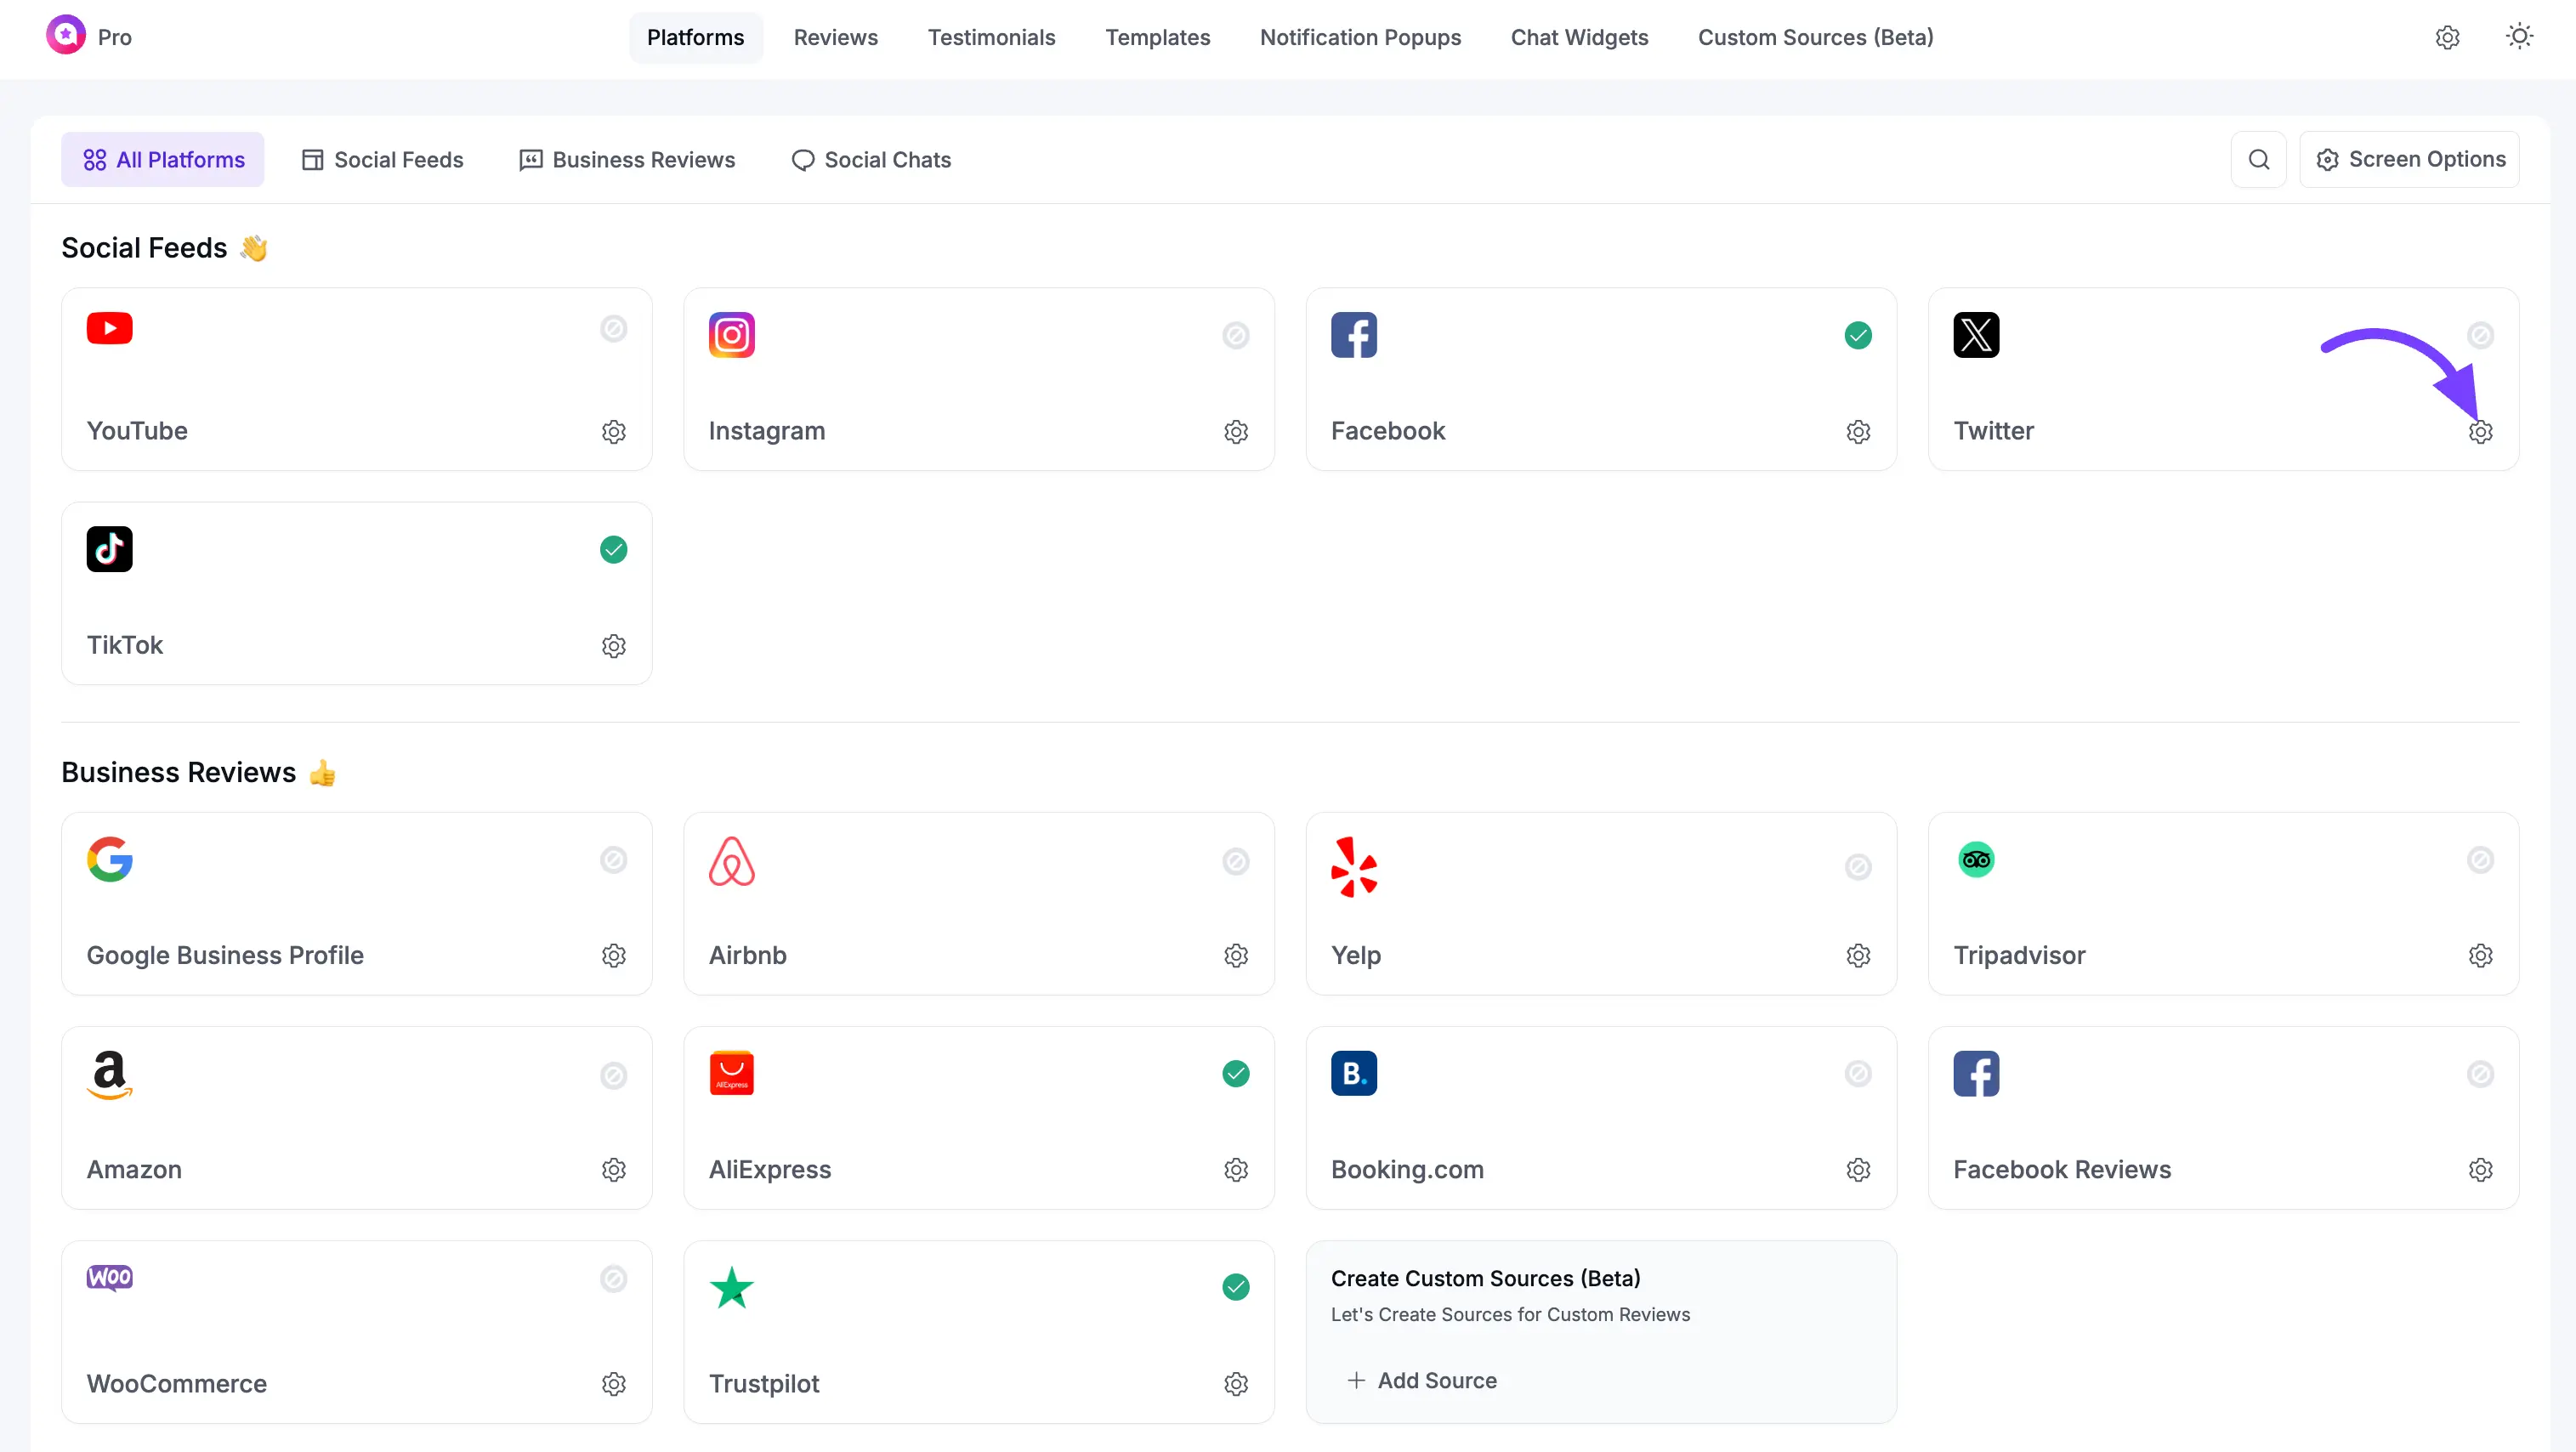
First, go to your WordPress dashboard. In the left-hand menu, click on WP Social Ninja, and then select the Platforms. This is your main hub for connecting all your social accounts.
On the "Platforms" page, you will see a list of all available social networks. Find the X (Twitter) row and click the Connect button (or Settings icon) on the right side.
See the Connection Methods
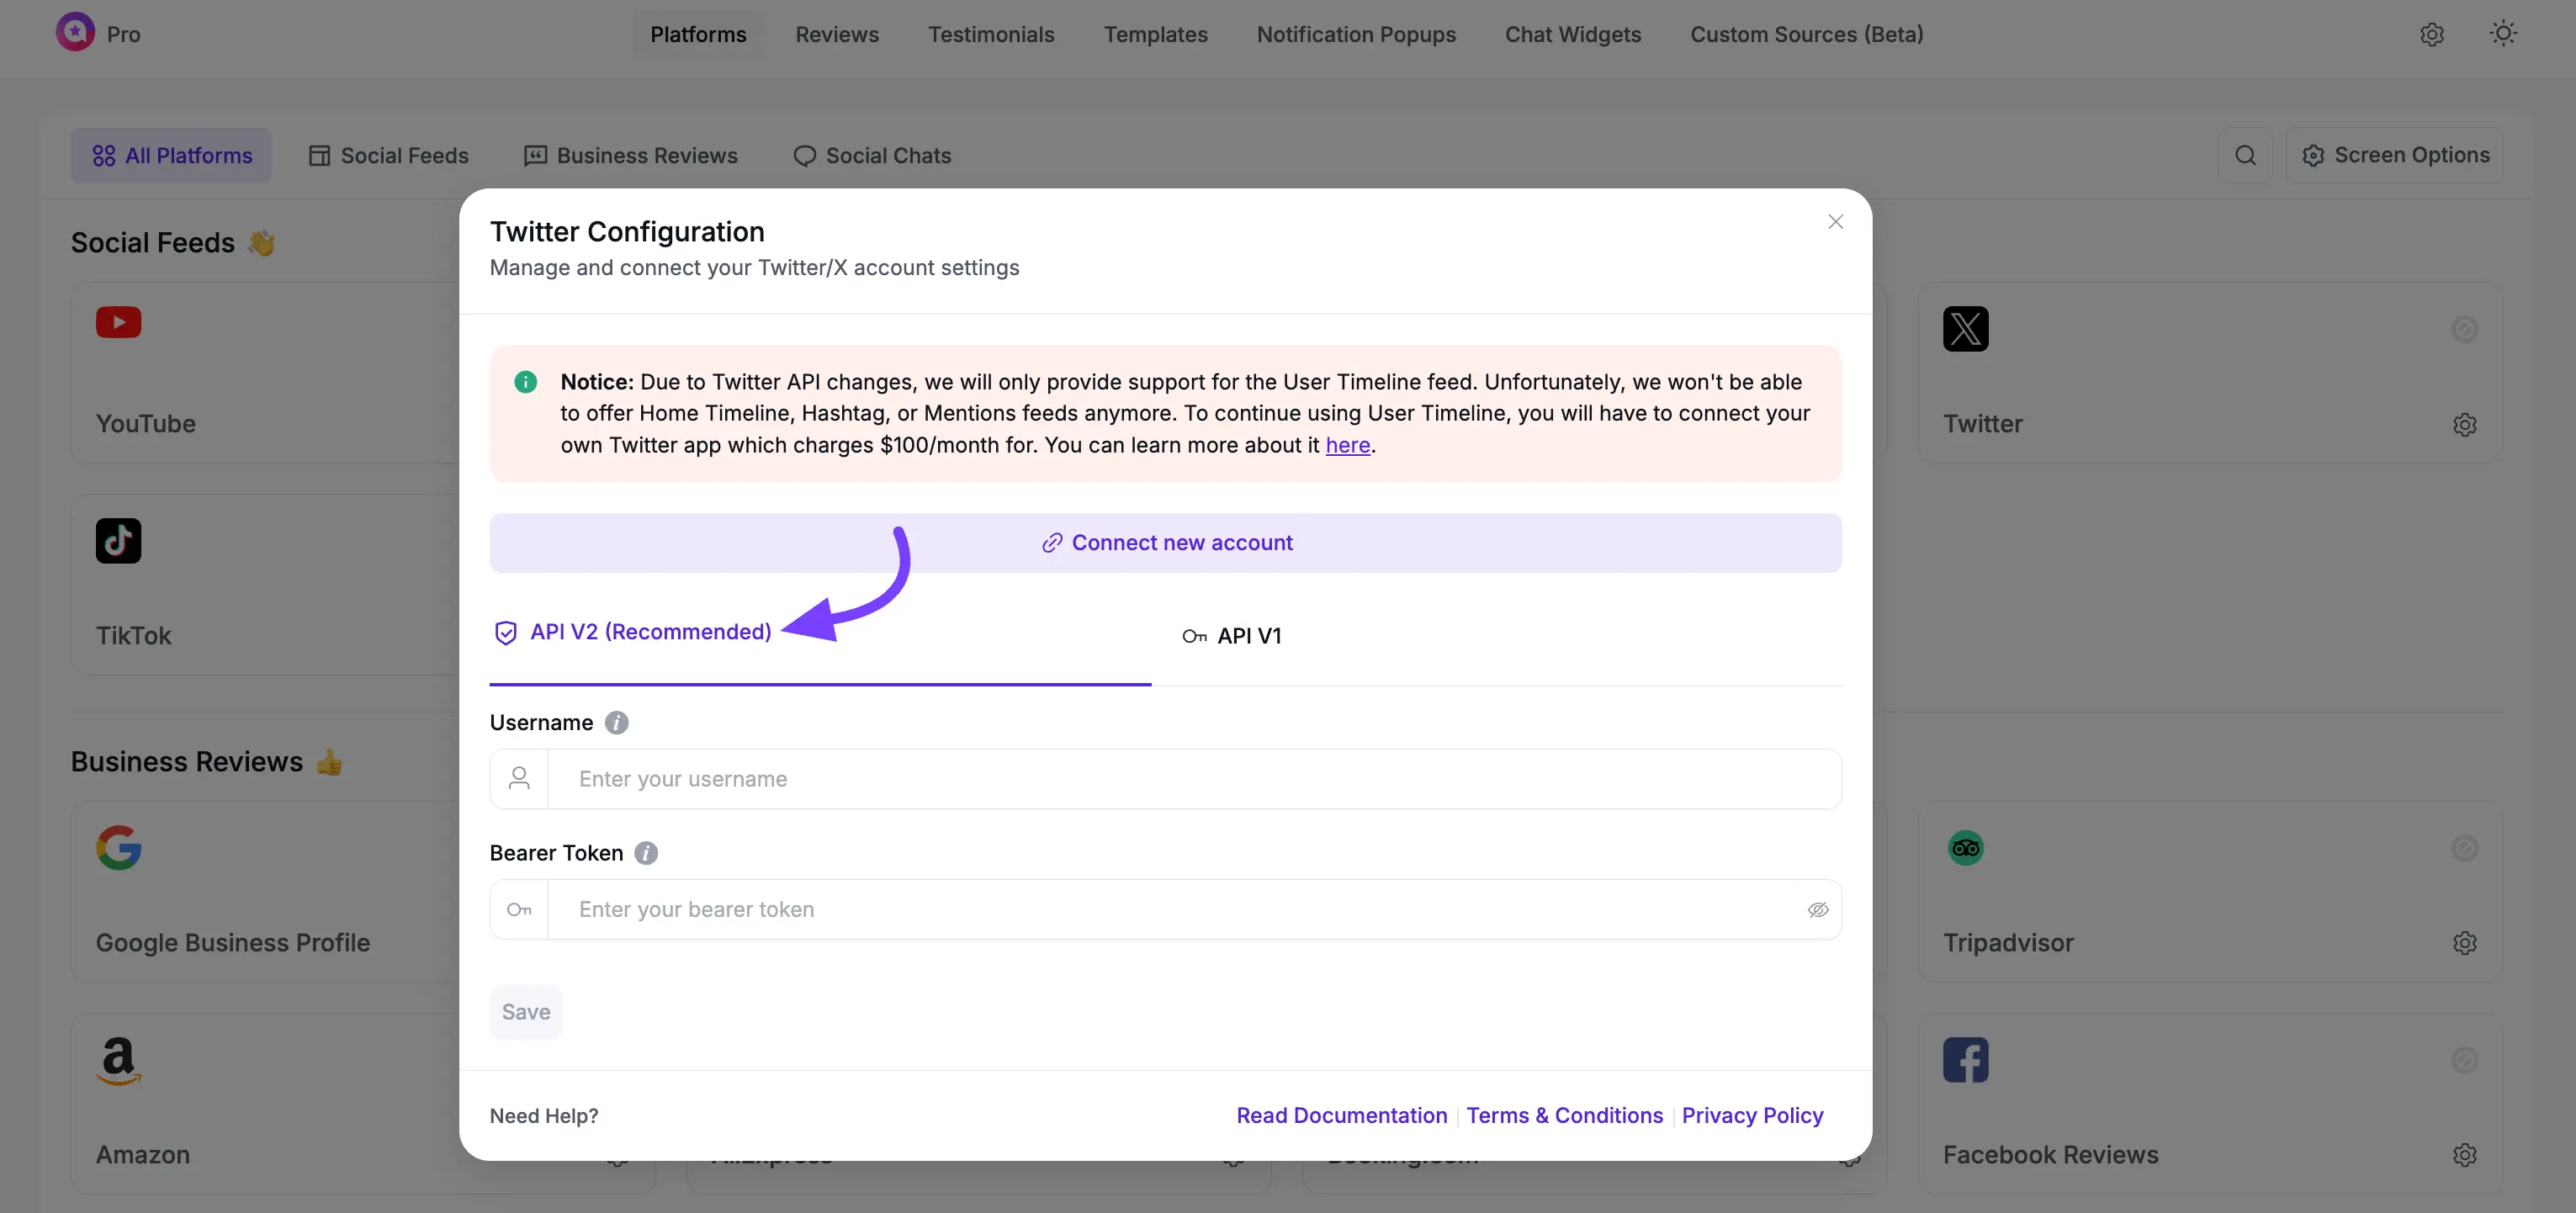
A pop-up window will appear. This is where you will paste your credentials after you get them. You will see two methods:
- API V2 (Recommended): This is the modern, simple method. It only requires a Username and a Bearer Token.
- API V1 (Advanced): This is the older method. It is more complex and requires four different keys: API Key, API Key Secret, Access Token, and Access Token Secret.
Now that you know what you need, let's go get those keys! Keep this browser tab open.
Part 1: Create Your X (Twitter) App (To Get Your Keys)
In a new browser tab, you must create an "App" in your X (Twitter) Developer account. This app is what will generate the keys you need.
Create a New Project (If You Don't Have One)
This is a mandatory first step. Before you can create an App, you must have a "Project" to put it in. This Project organizes your work, and it is required for the API V2 Bearer Token to be generated correctly.
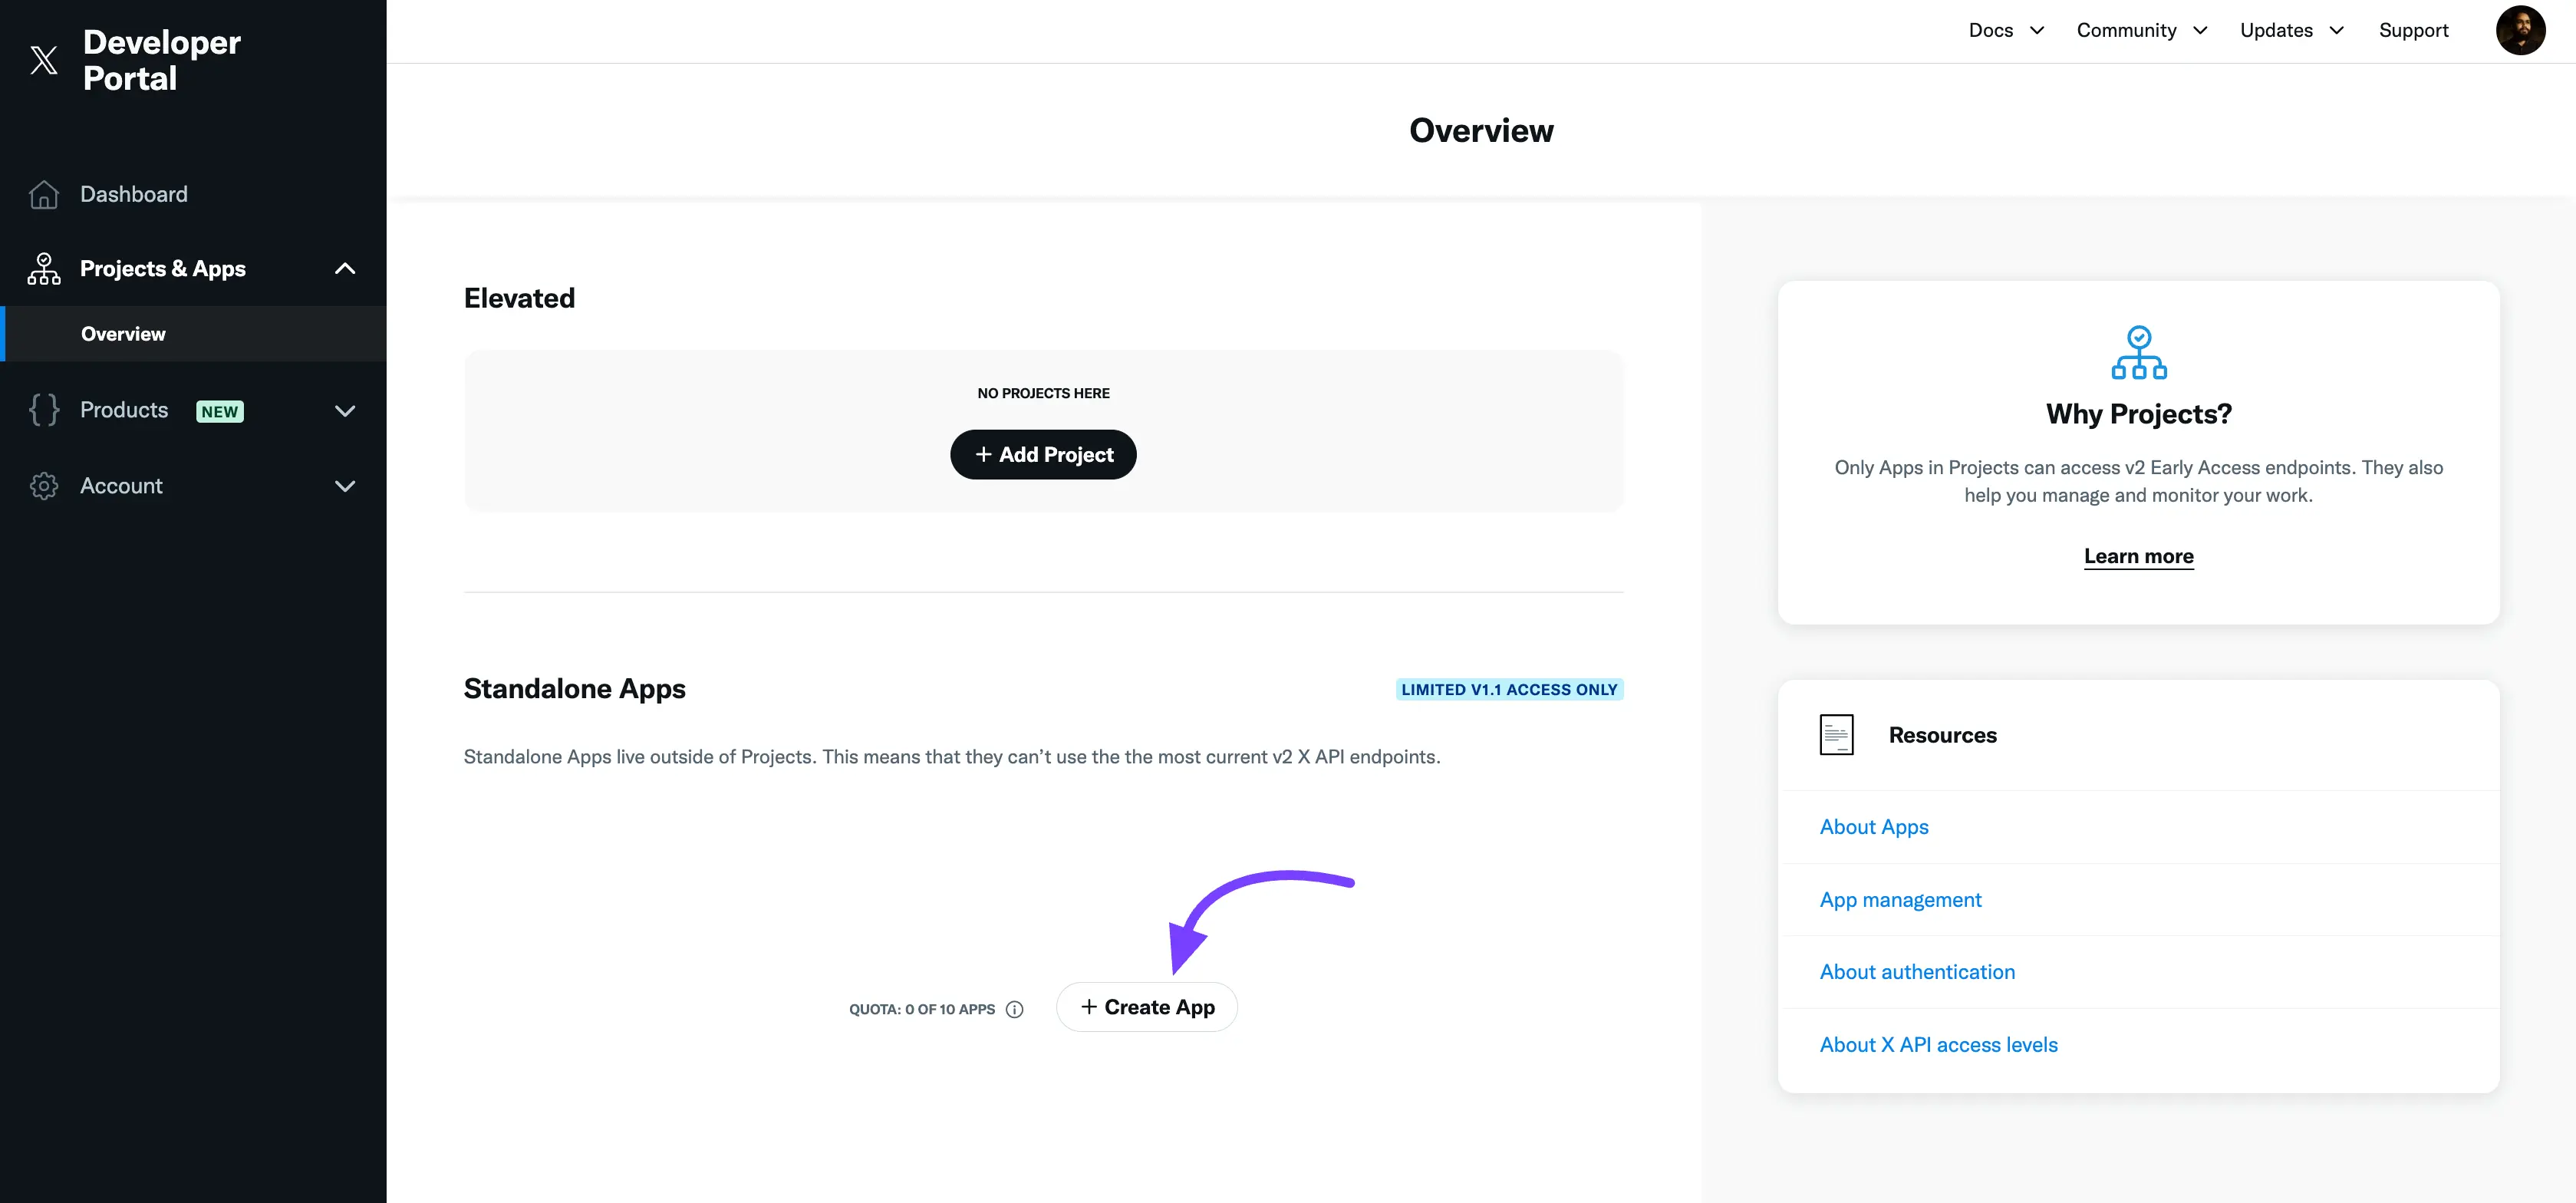
- In your developer dashboard, navigate to the Project & Apps section in the left-hand sidebar.
- If you do not already have a project, click the +Add Project button.
- Follow the prompts from X (Twitter). You will need to provide basic information like a Project Name and Purpose.
- Once your Project is created, you will be taken inside its dashboard.
Create a New App
Log in to your X (Twitter) Developer account. In the dashboard, look for the Project & Apps section in the left-hand sidebar. Click on your Project to open it.
Inside your Project, you will see a list of your existing apps. At the bottom of this list, click the + Create App button to start making a new one.
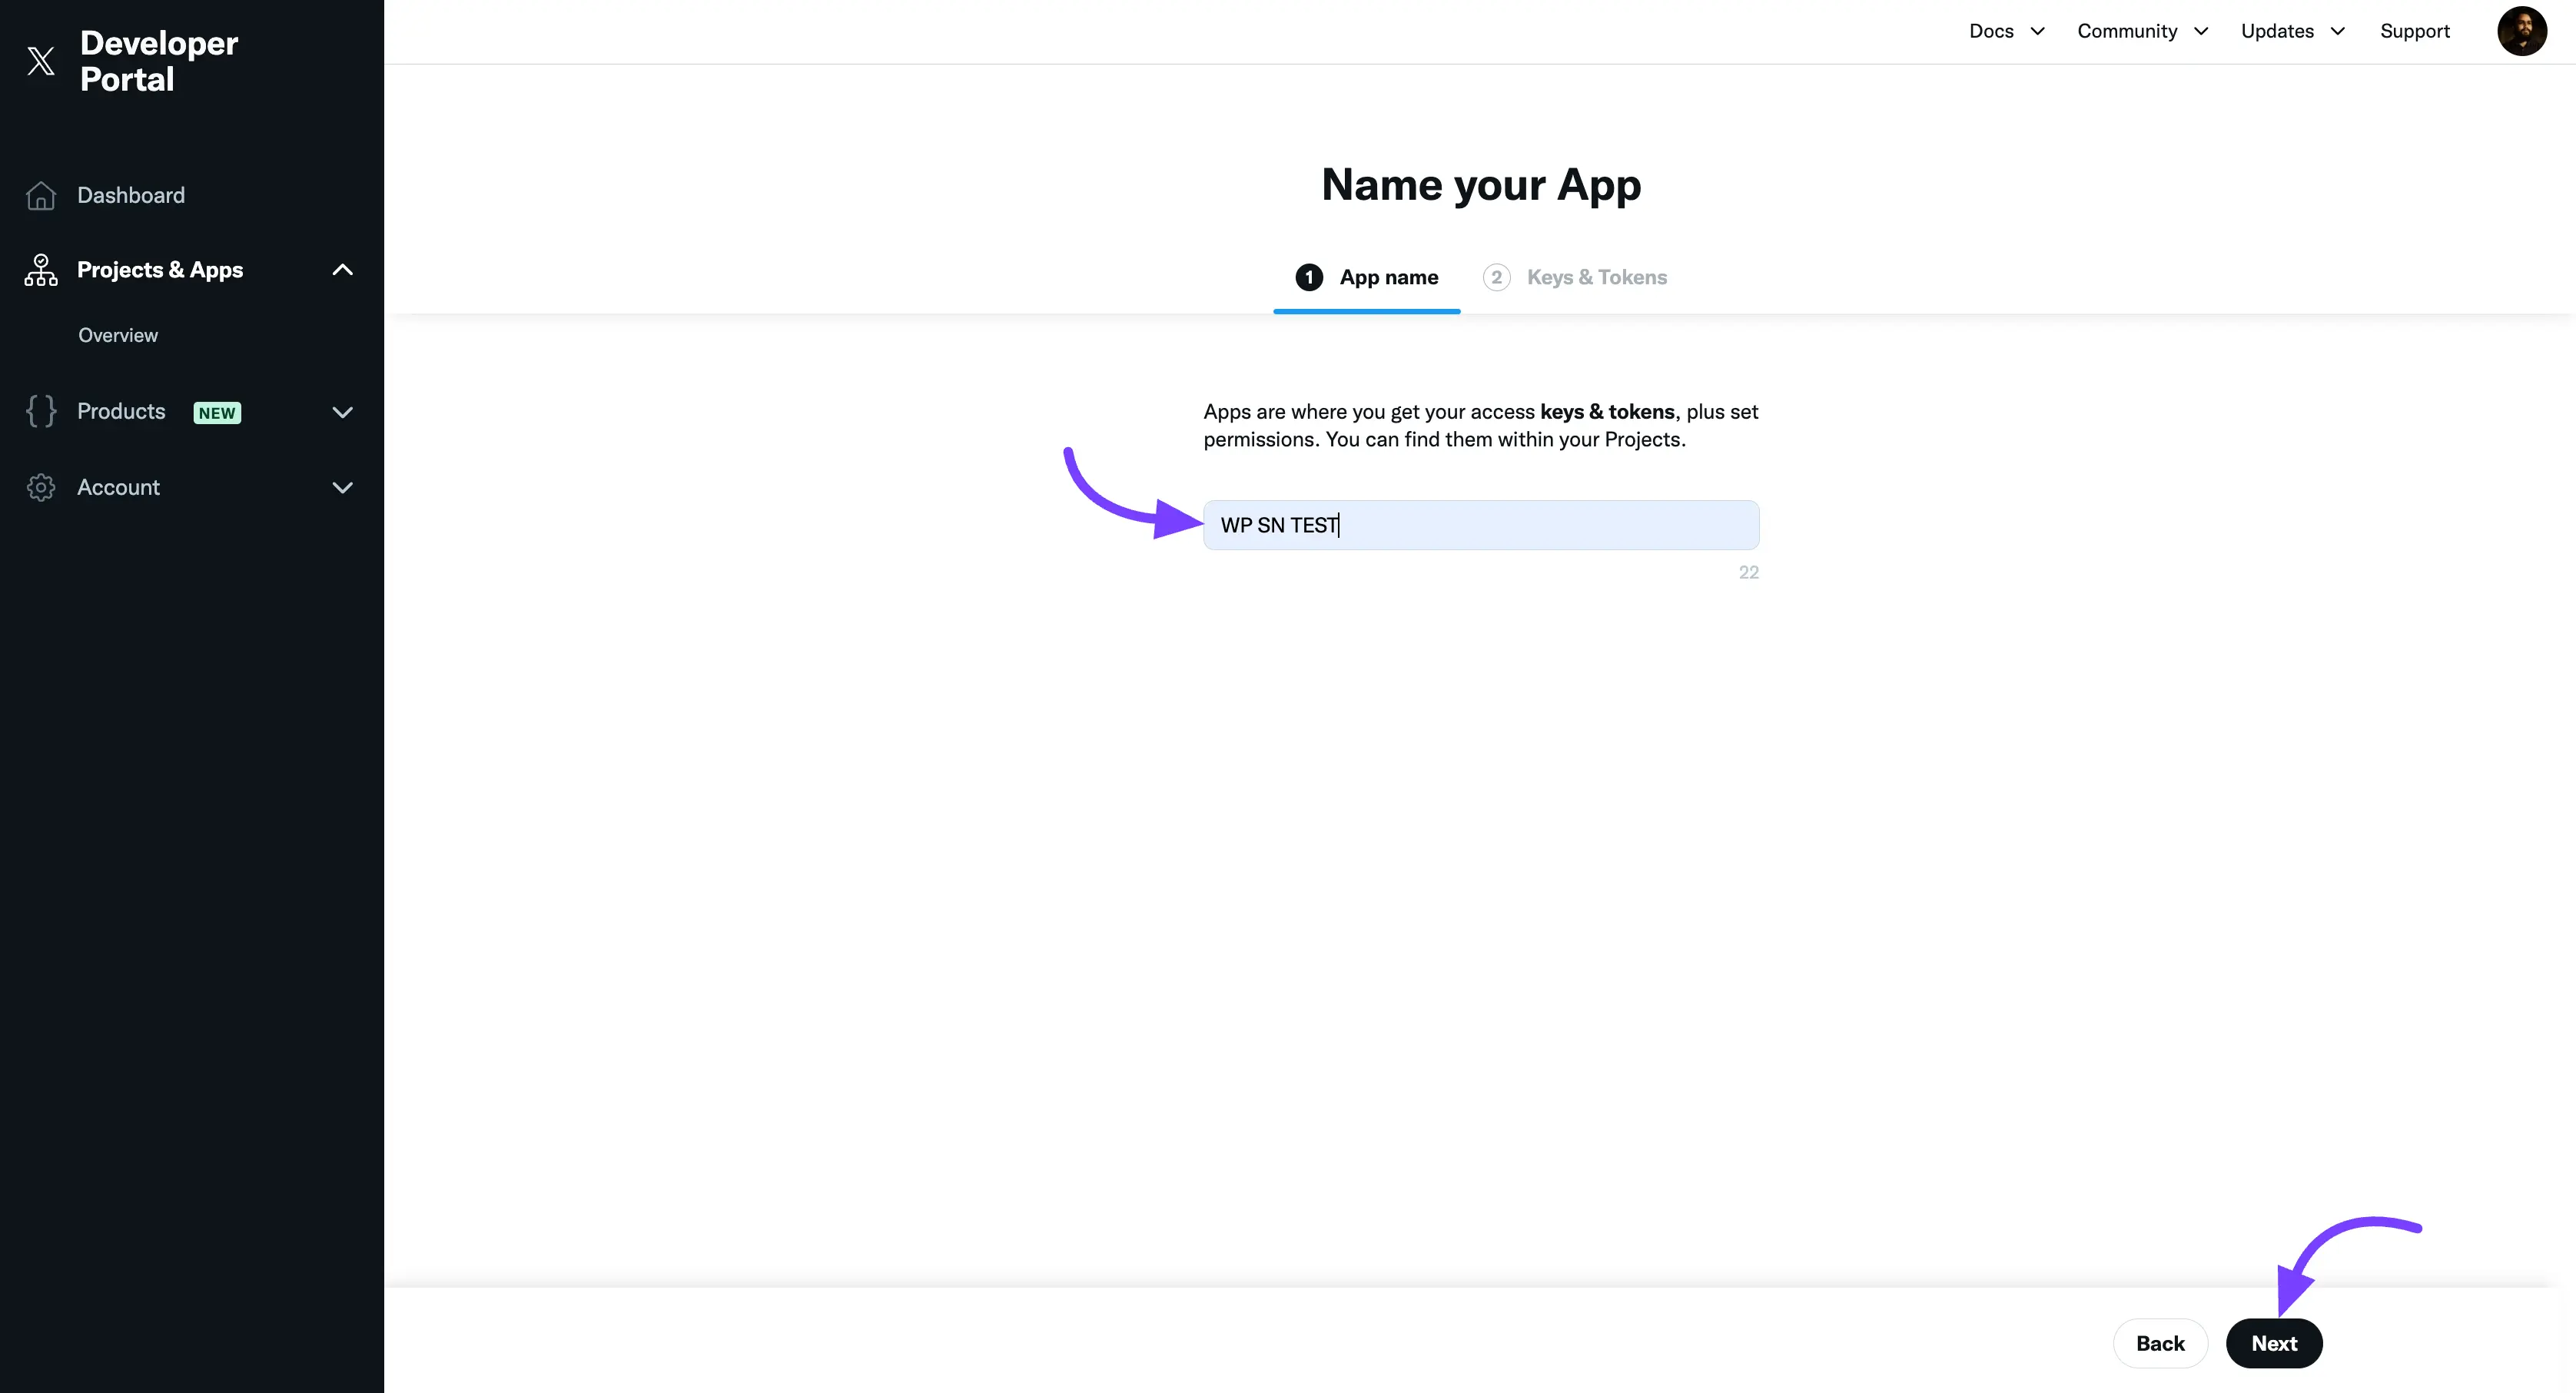
A pop-up will appear asking you to give your app a name. Choose a name you will recognize, for example, "My Website Feed" or "WP Social Ninja Connection."
Click Next.
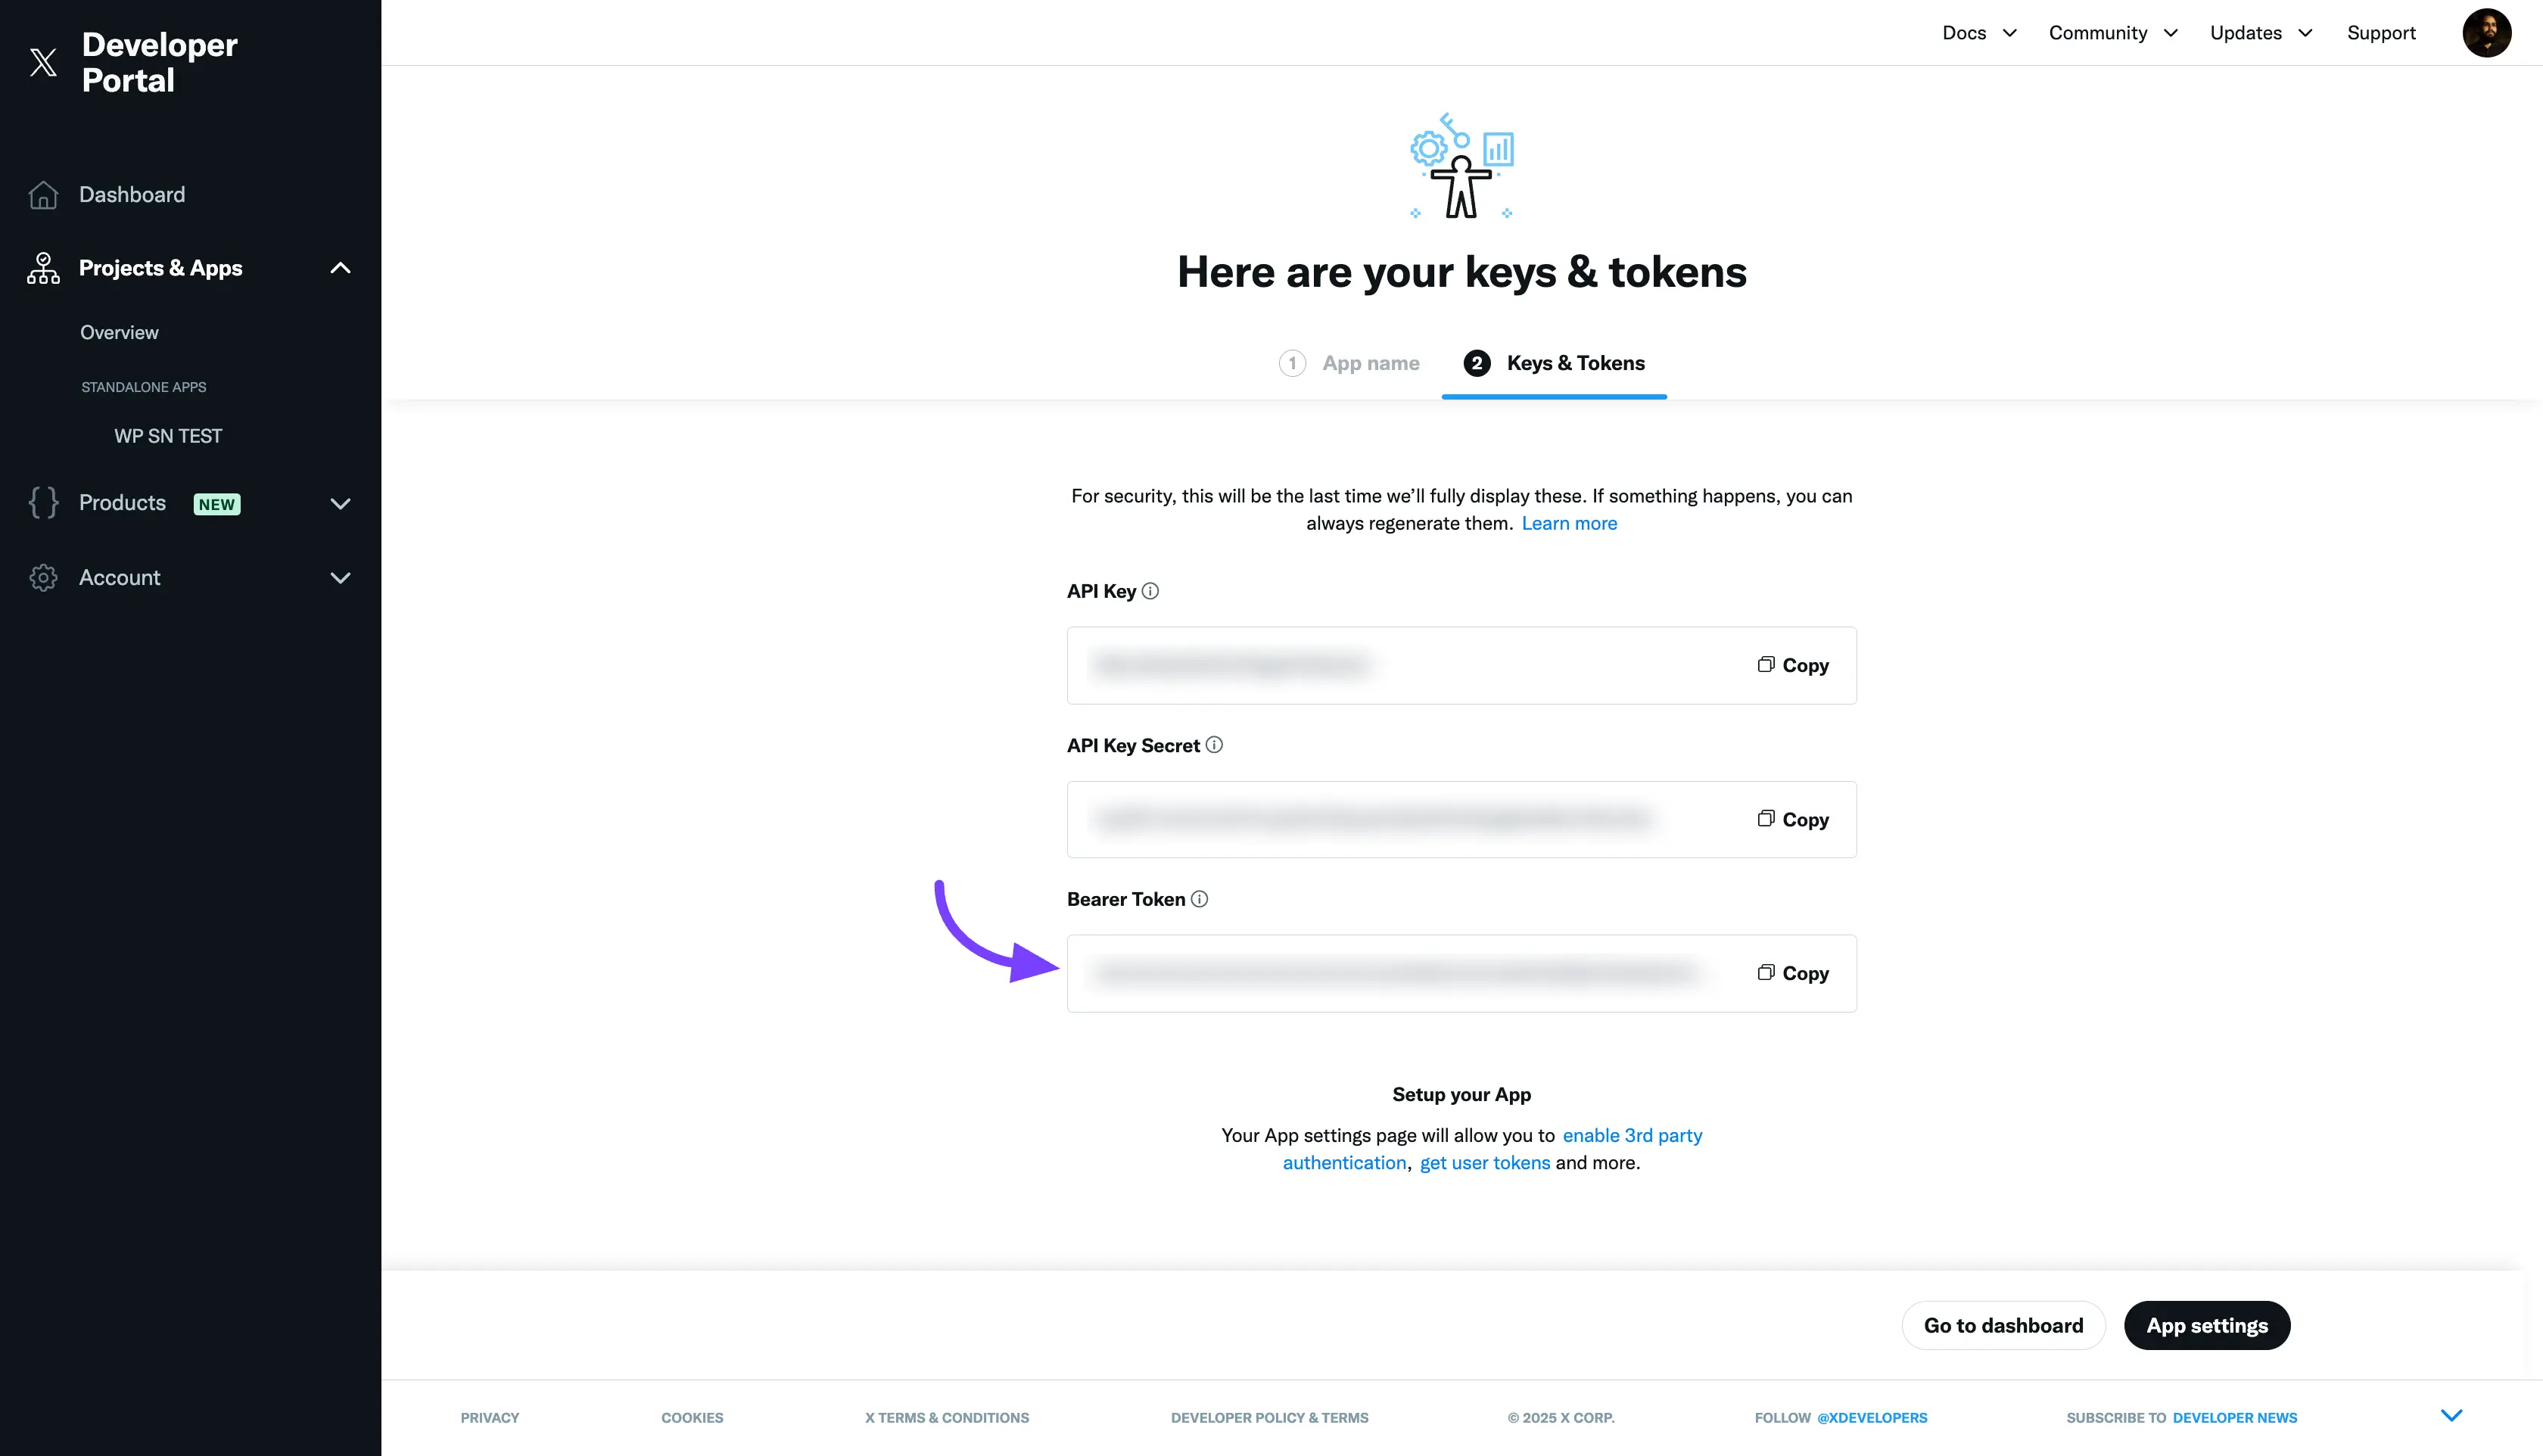
After this step, your app is created! The next page will show you your new keys.
Part 2: Your Credentials
Now we will find the specific keys you need. We'll show you how to get them for both API V2 and API V1.
Method A: Get Credentials for API V2 (Recommended)
This is the fastest and easiest way.
- After you name your app in Part 2, the next screen will immediately show you your credentials.
- Find the Bearer Token field.
- Click to copy the long string of characters and save it in a safe place (like a text file). This is the only key you need for this method.
Method B: Get Credentials for API V1 (Advanced)
Use this method if you need to use the older API V1 connection. This requires four separate keys.
- From your new app's dashboard in the X (Twitter) Developer portal, click on the Keys and Tokens tab.
- In this page you will find the Access Token and Secret section.
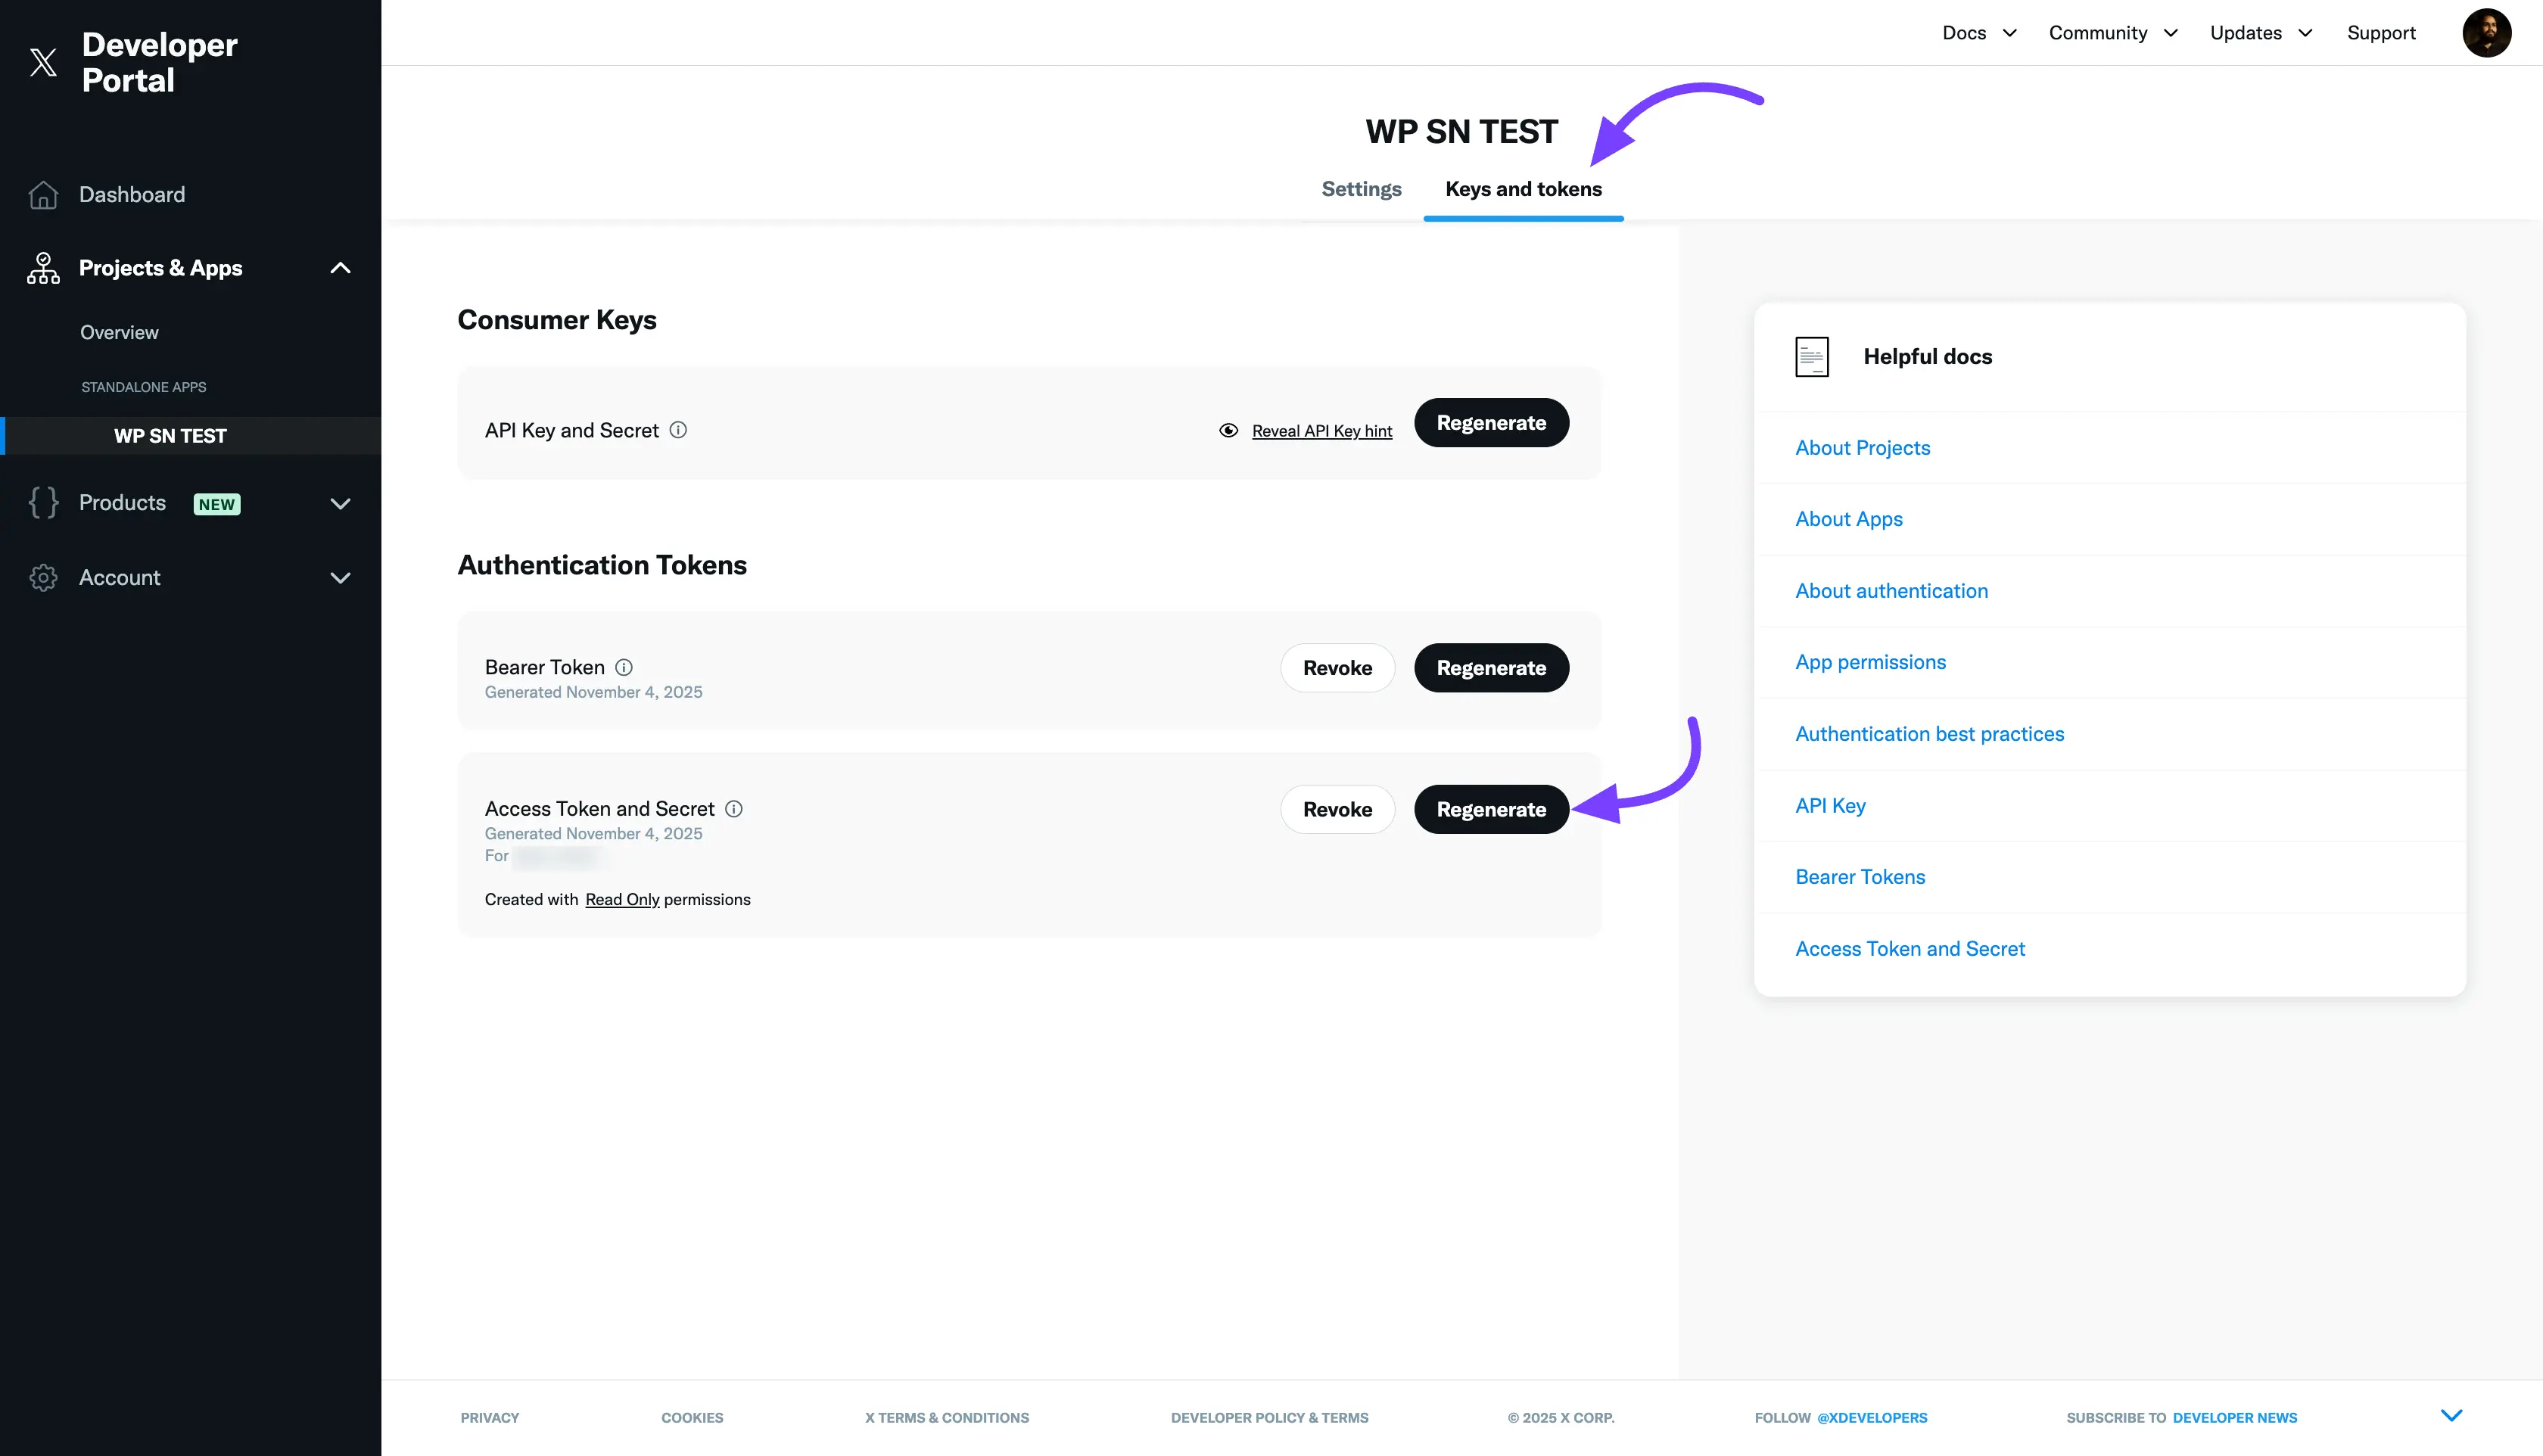
- Click the Regenerate button.
- A pop-up will appear showing your keys, you will see these keys.
- Copy the API Key ( "Consumer Key").
- Copy the API Key Secret (or "Consumer Secret").
- Copy the Access Token.
- Copy the Access Token Secret.
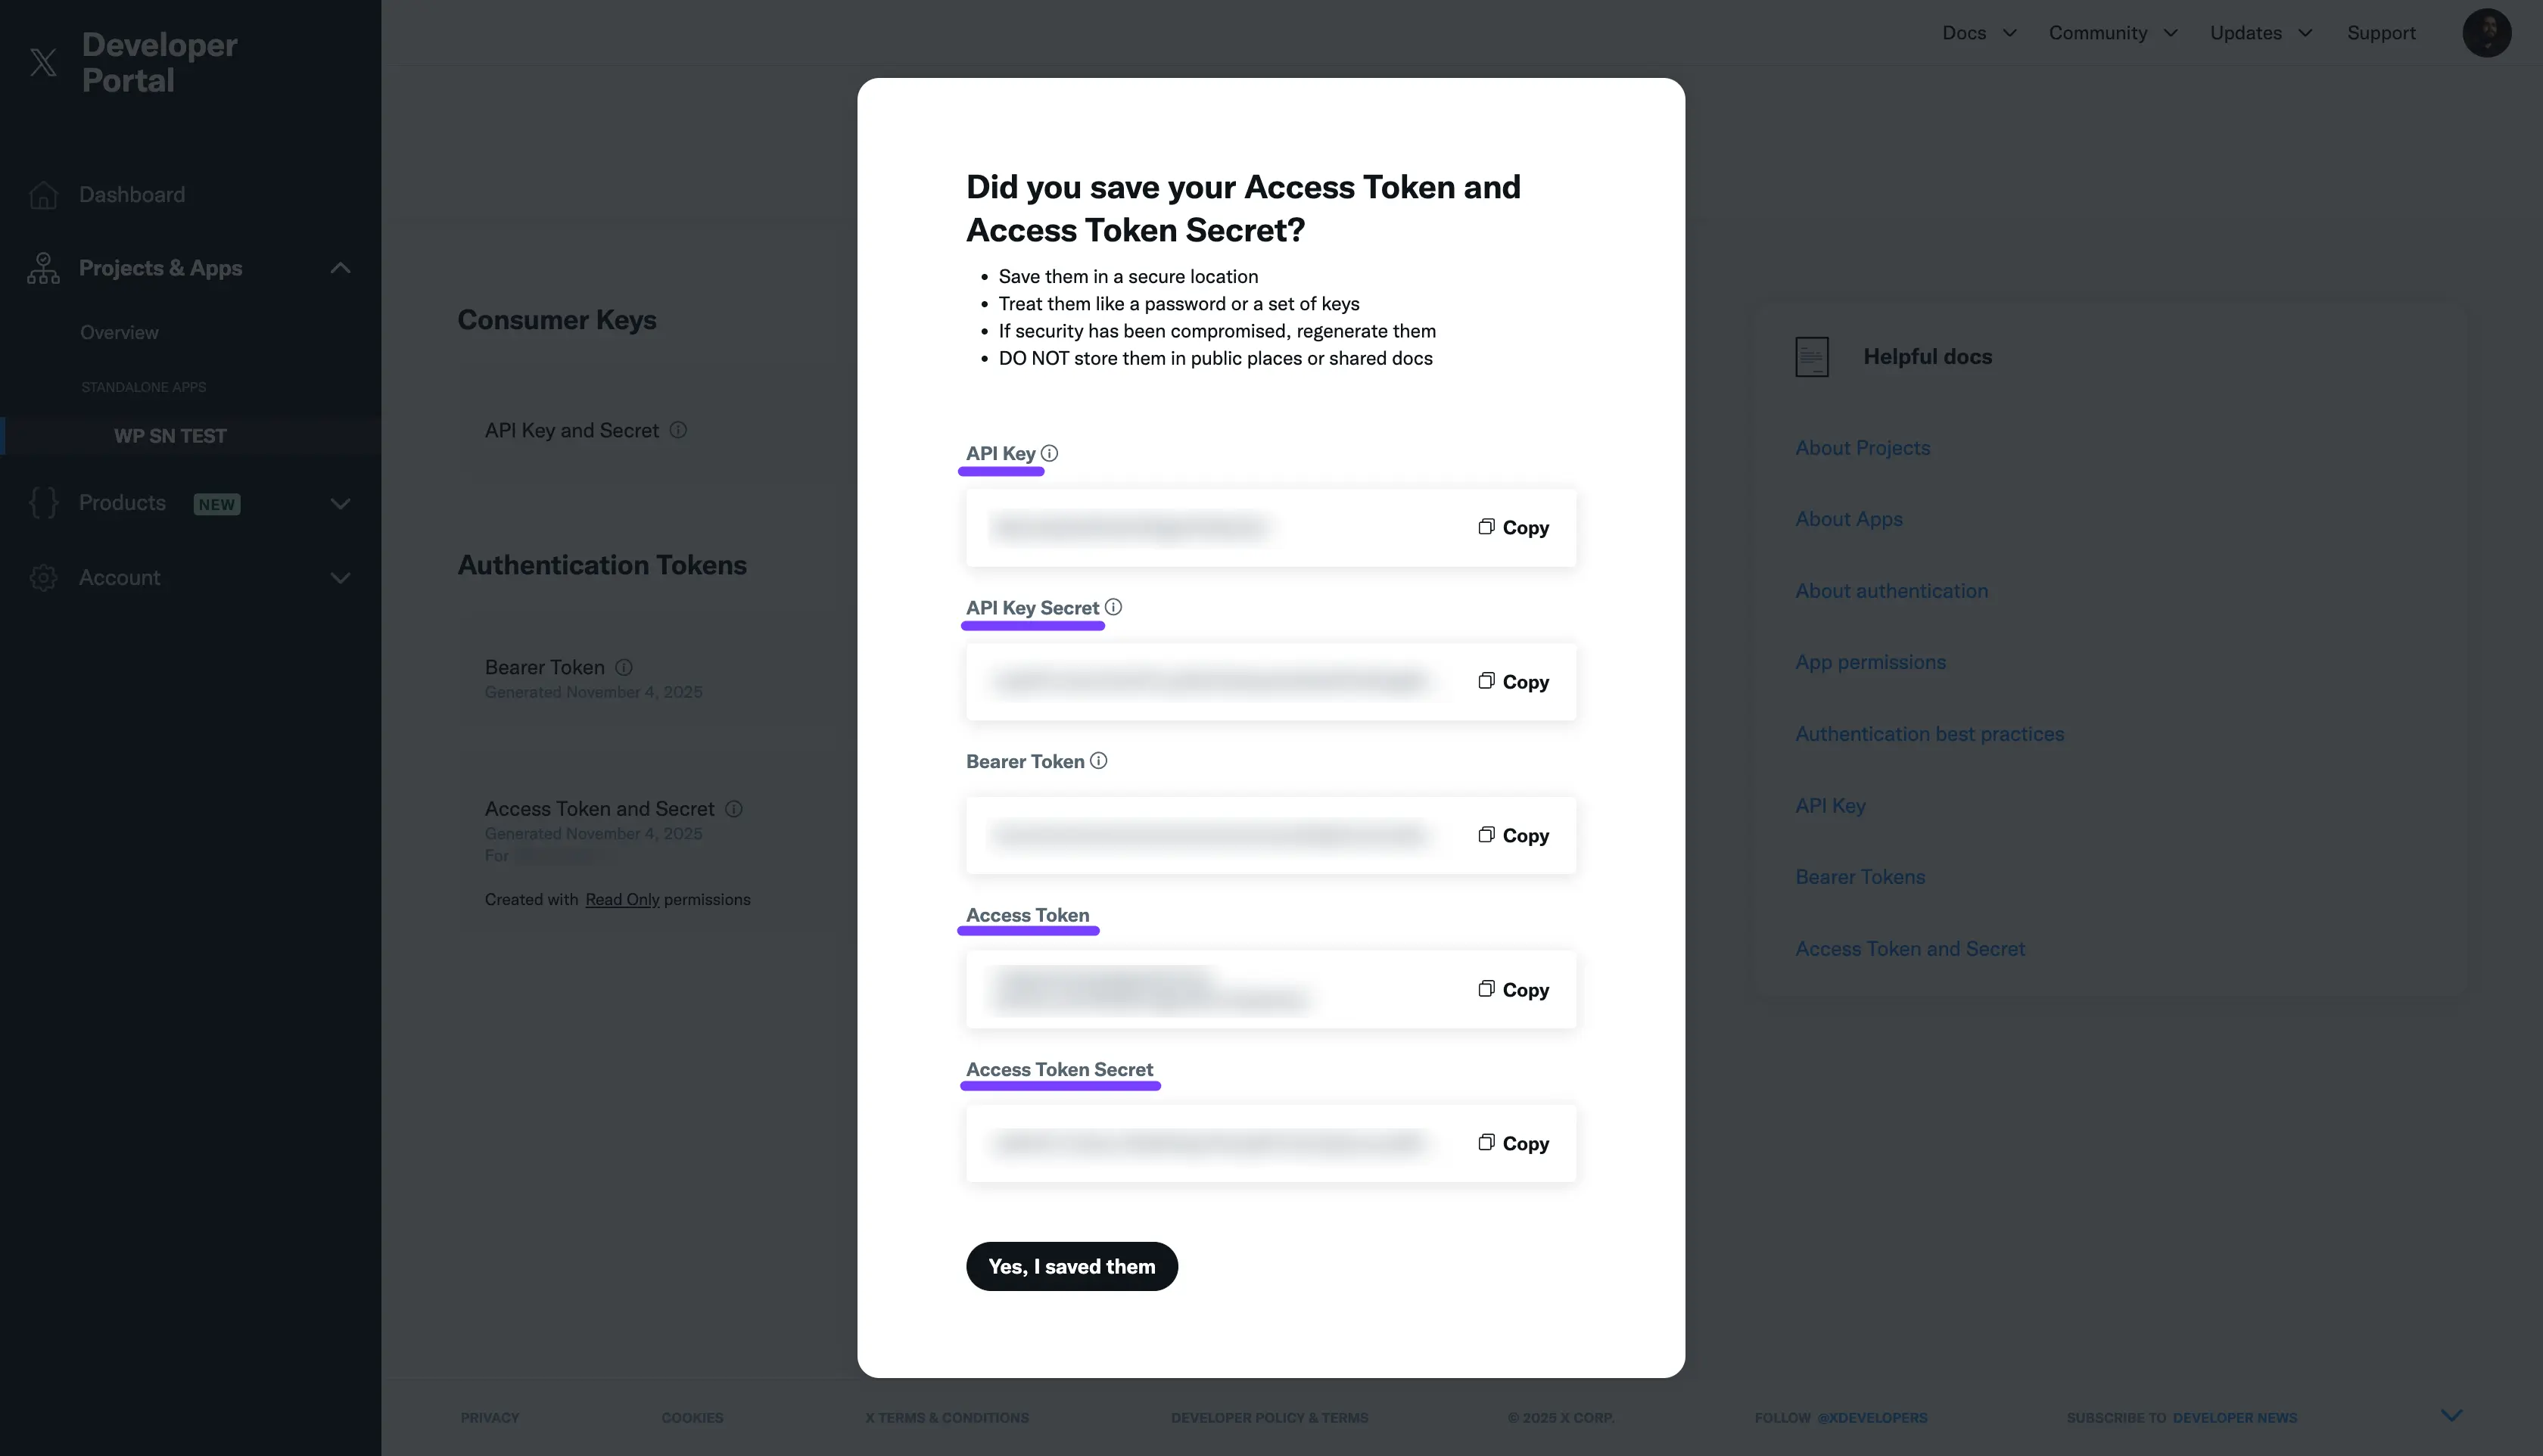
You should now have all four keys for the API V1 method saved in your text file.
Part 4: Connect Your Account in WP Social Ninja
Now for the final, easy step. Go back to your WordPress dashboard.
The pop-up from Part 1 should still be open.
- If you are using API V2: Click the API V2 tab, paste in your Bearer Token and Username, and click Connect.
- If you are using API V1: Click the API V1 tab, carefully paste all four keys (API Key, API Key Secret, Access Token, Access Token Secret) into their matching fields, and click Connect.
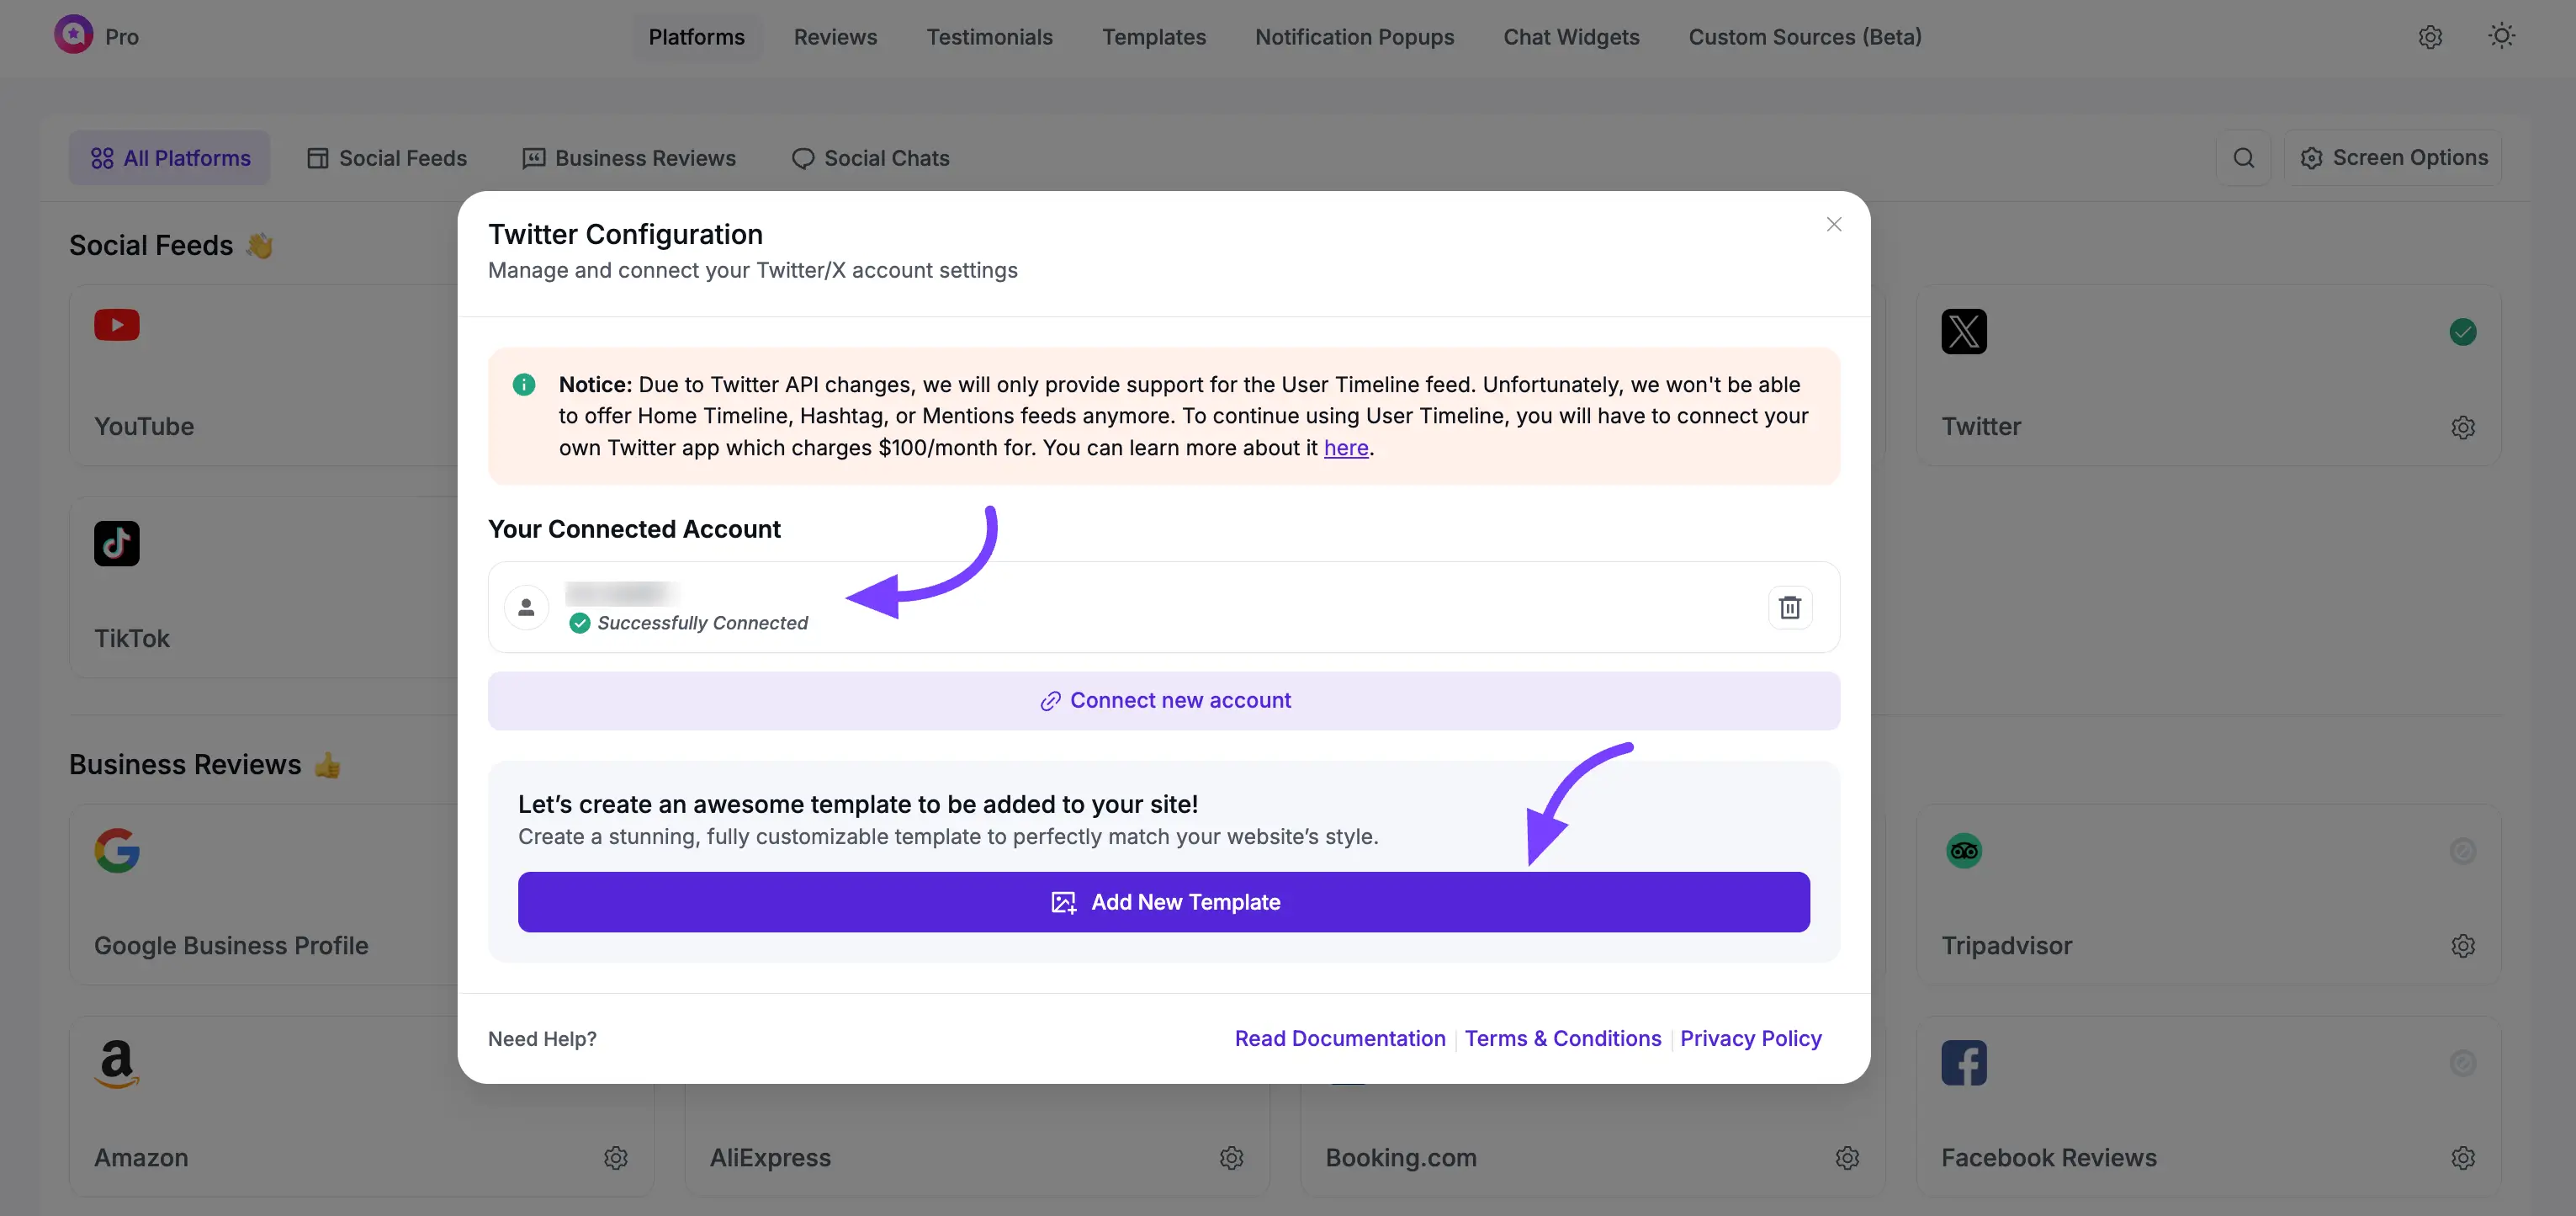
The pop-up will close, and you will be returned to the Platforms page.
You will now see the X (Twitter) row shows a "Connected" status.
Next Steps
Congratulations! Your X (Twitter) account is fully connected.
- Connect New Account: You can click this to add another X (Twitter) account.
- Add New Template: Click this button to go to the template editor and start designing how your X (Twitter) feed will look on your website!